
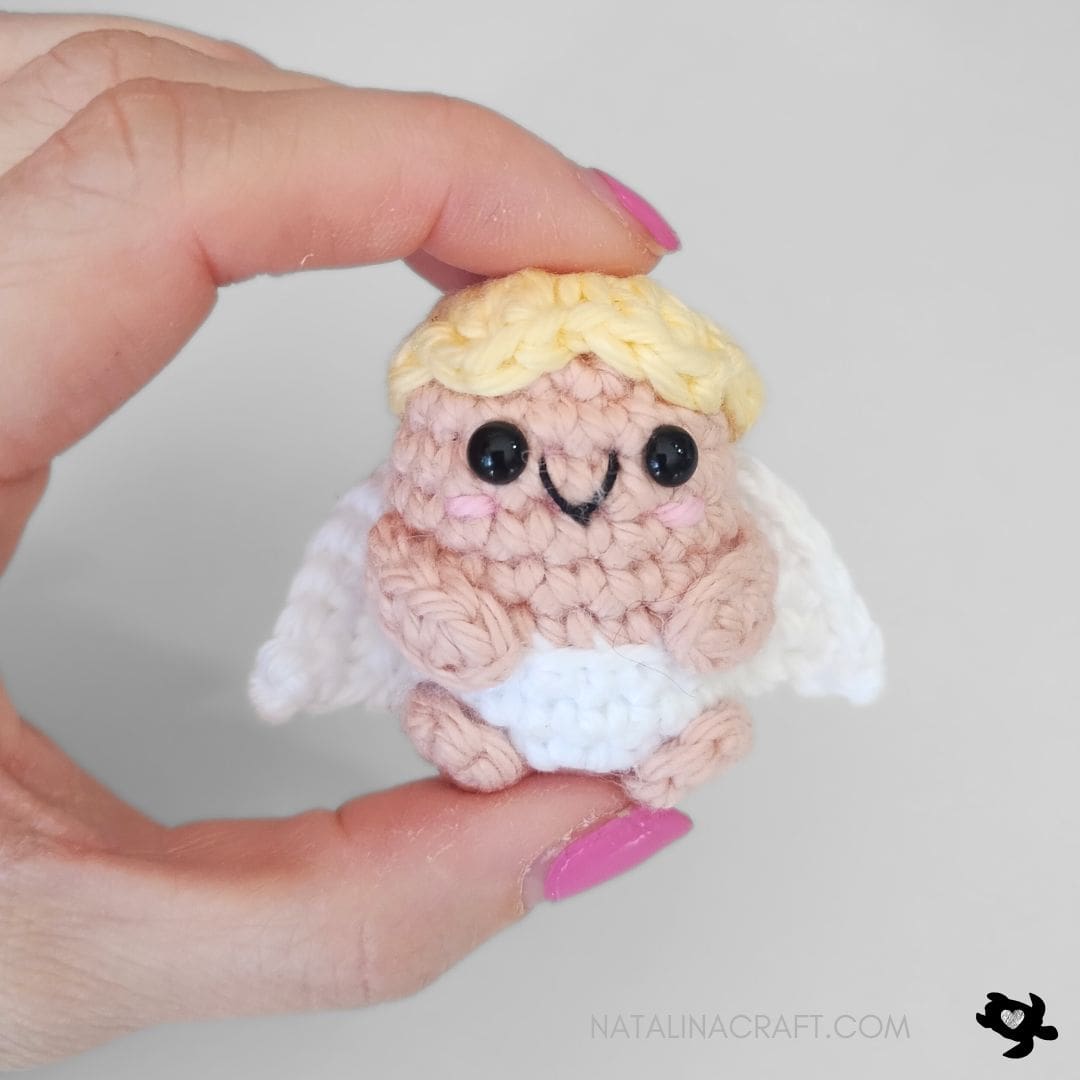
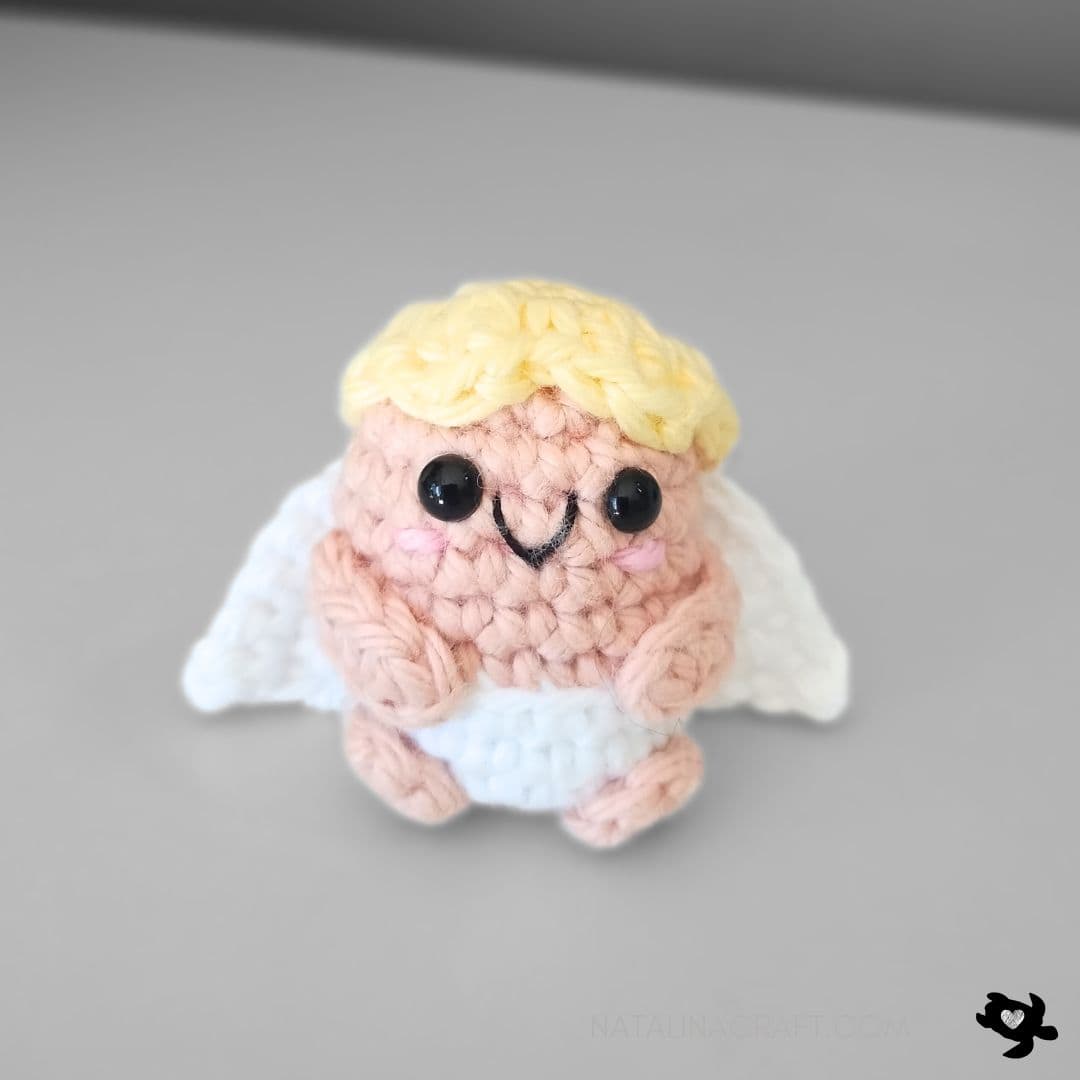
Welcome to this Little Cupid – Free Crochet Pattern 💘
This tiny cupid is quick to make, beginner-friendly, and perfect for adding a touch of handmade love to your projects. Whether you crochet it as a small gift, decoration, or sweet keepsake, this little cupid works up fast and uses only a small amount of yarn.
The pattern includes instructions for both worsted-weight yarn and plush yarn, so you can choose between a miniature version or a soft, cuddly one. Despite its small size, each part is simple and clearly explained.
Join my Facebook group, where you can ask questions, share your finished projects, and help me choose future designs!

Little Cupid – Free Crochet Pattern
Start Here
- Please read the whole pattern before starting.
- The pattern is written using US crochet terms.
This pattern is made of:
- 1 body
- 2 wings
- 2 feet
- 2 arms
Finished Size
- Approx. 1.5 inches (4 cm) using light worsted yarn
Materials
- 2.75 mm (US C-2) for worsted yarn
- Worsted-weight cotton yarn in white, skin color, yellow, and a small amount of pink for the cheeks
- 2 black safety eyes (6 mm)
- Stitch markers (optional)
- Tapestry needle
- Polyfill
- Optional: hot glue
Abbreviations:
- chain (ch)
- magic ring (mr)
- single crochet (sc)
- increase (inc)
- invisible decrease (dec)
- slip stitch (sl st)
- double crochet (DC)
Pattern: How to crochet a little Cupid?
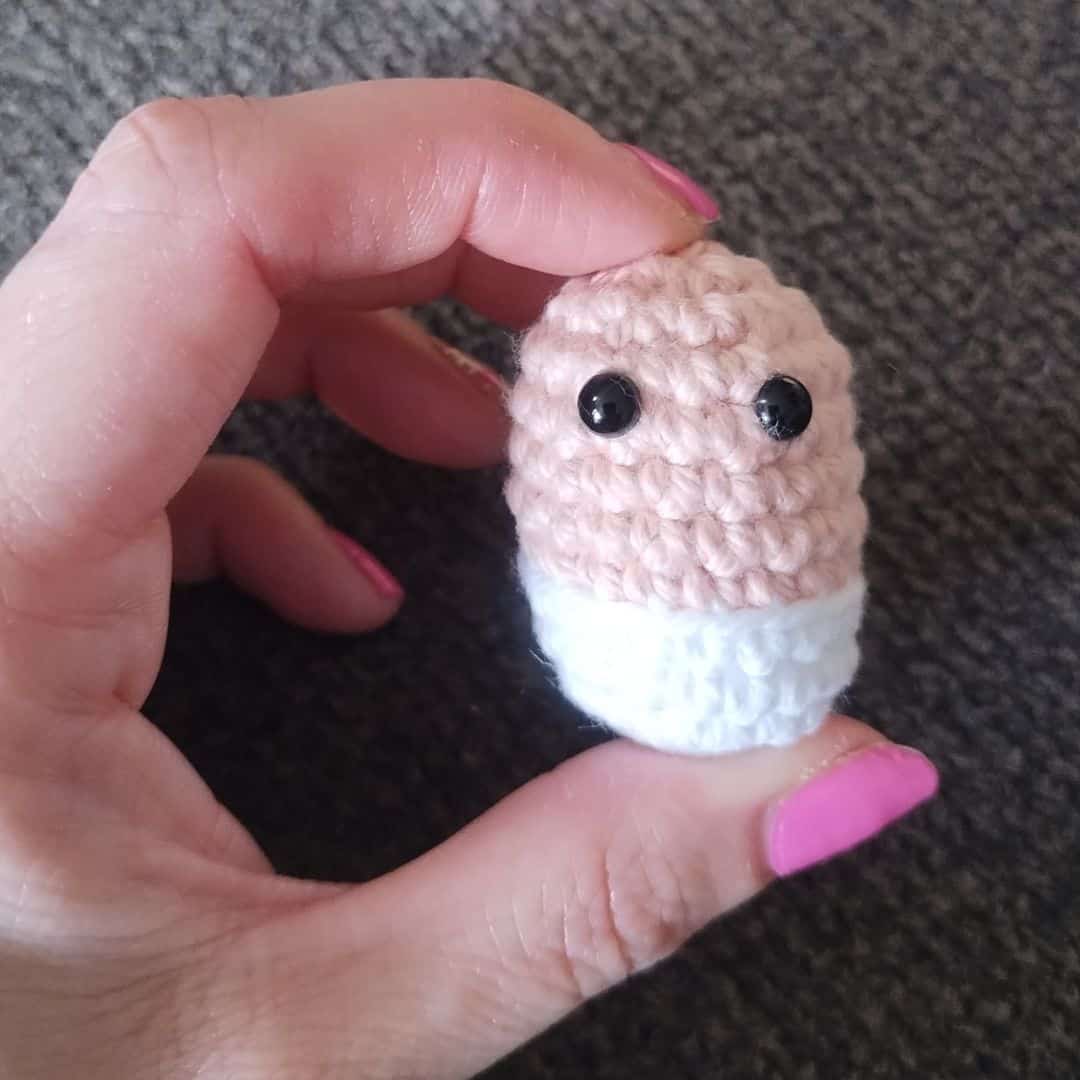
Body
- The body is worked in continuous rounds (as a spiral). Use a stitch marker if needed.
- Remember to stuff as you crochet.
With a 2.75 mm crochet and yarn in white:
-
- Round 1: 6 sc in a magic ring. (6)
- Round 2: [6 inc]. (12)
- Round 3: [1 inc, 1 sc]x6. (18)
- Rounds 4-5: [1 sc in all st]. (18)
Change to skin color:
-
- Round 6: working in the back loops only (BLO): [1 sc in all st]. (18)
- Rounds 7-10: [1 sc in all st]. (18)
- Round 11: [1 dec, 1 sc] x6. (12)
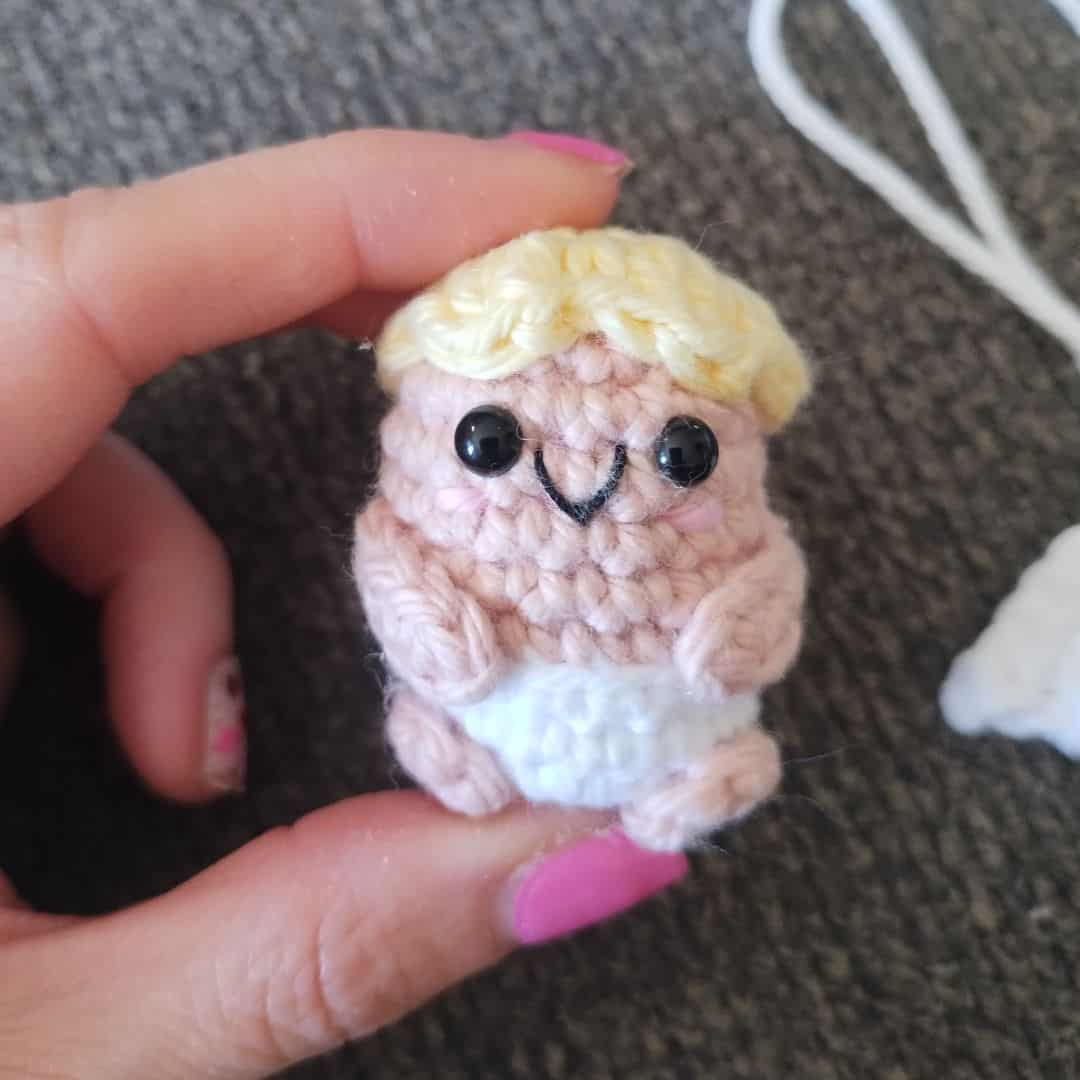
Place the eyes between Rounds 9 and 10, spaced by 2 stitches.
Using a tapestry needle and black cotton thread, embroider a small mouth over Round 9.
With pink yarn, add two small cheeks between Rounds 8 and 9, just below the eyes.
Stuff firmly.
- Round 12: [6 dec]. (6)
Fasten off and close the opening.
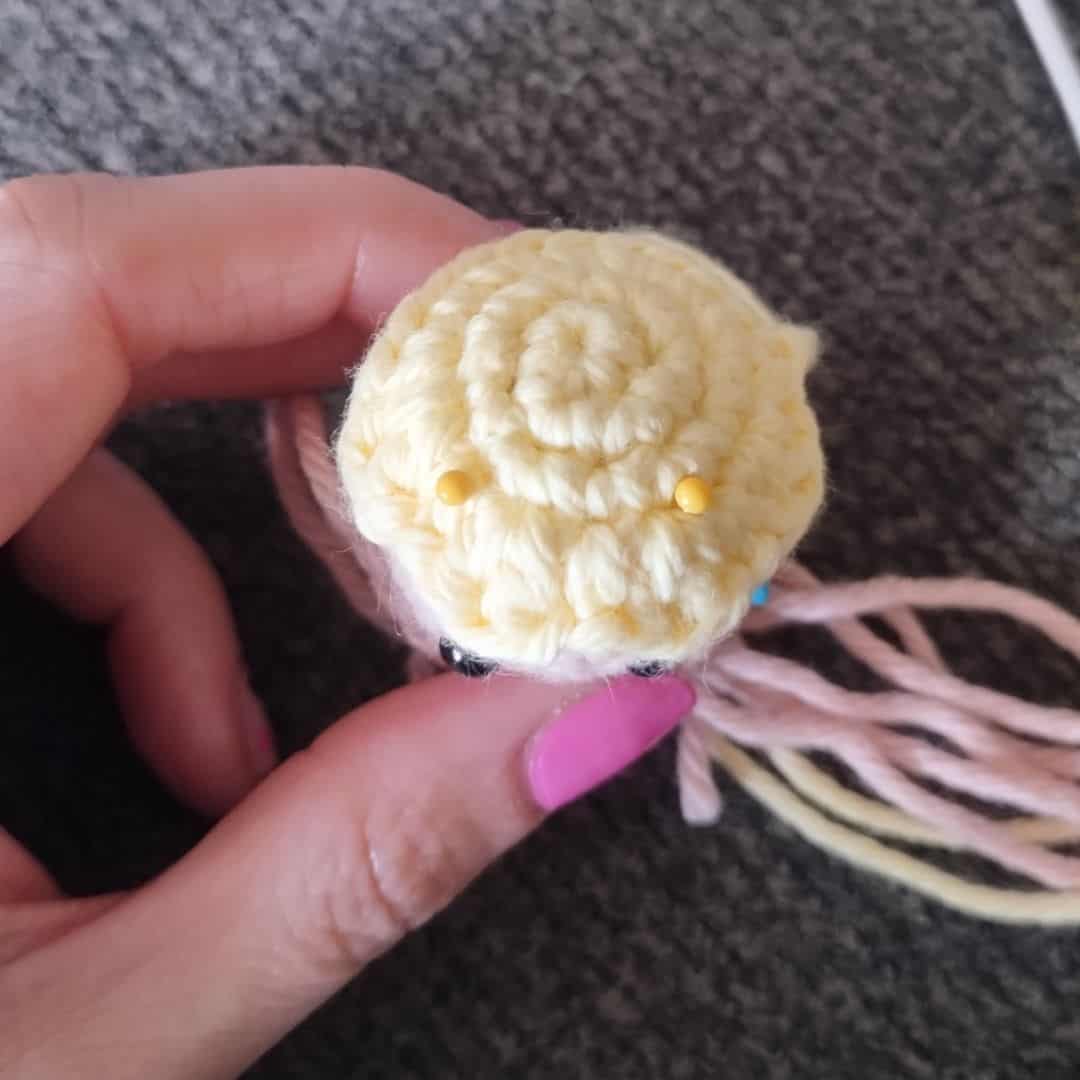
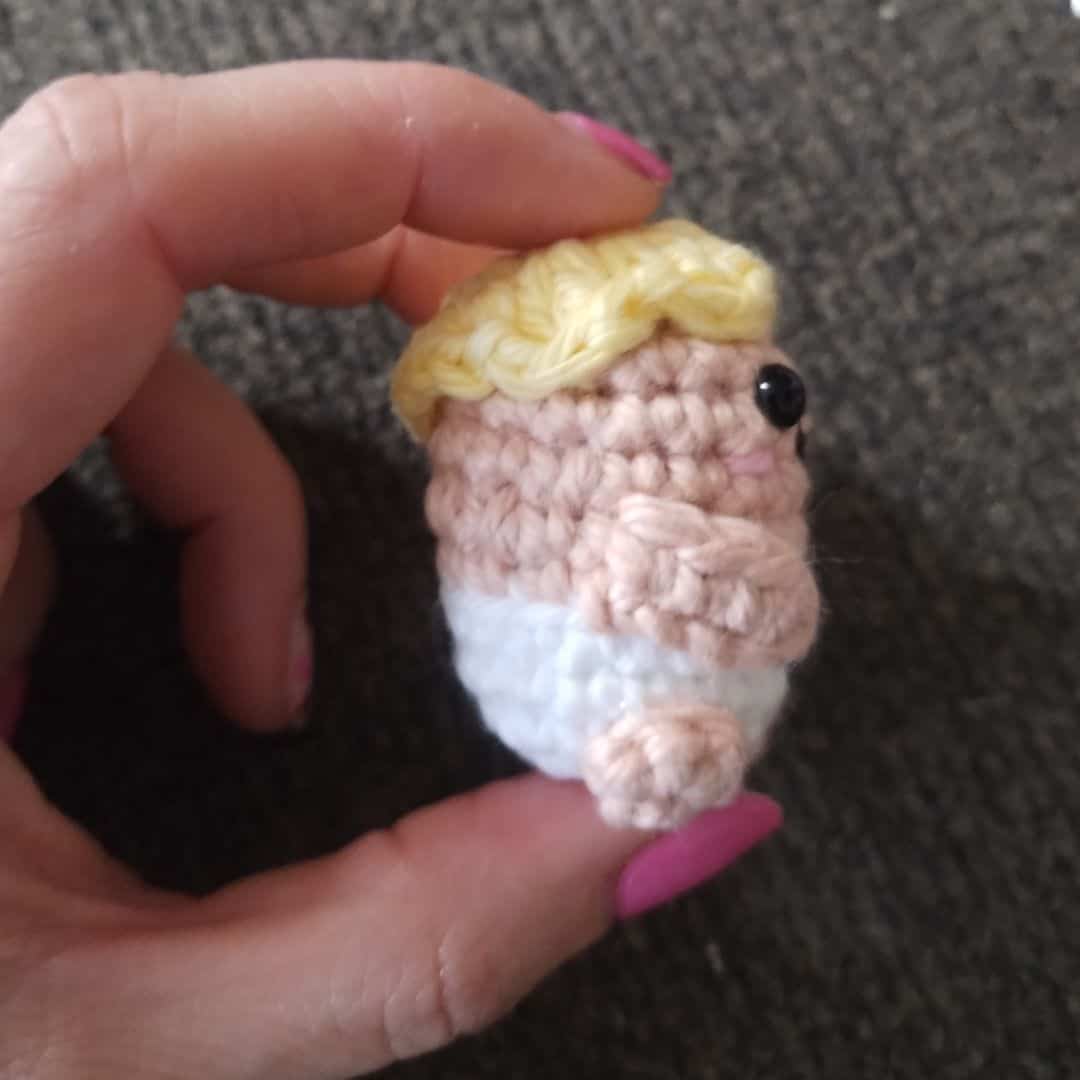
Hair
- The hair is worked in continuous rounds (as a spiral). Use a stitch marker if needed.
With a 2.75 mm crochet and yarn in yellow:
-
- Round 1: 6 sc in a magic ring. (6)
- Round 2: [6 inc]. (12)
- Round 3: [1 inc, 1 sc]x6. (18)
- Round 4: [2 DC in next st, ch 1, sc in next st] x4, 1 sl st in next st.
Do not work the remaining stitches.
Sew the hair on top of the head, with Round 4 facing the front.
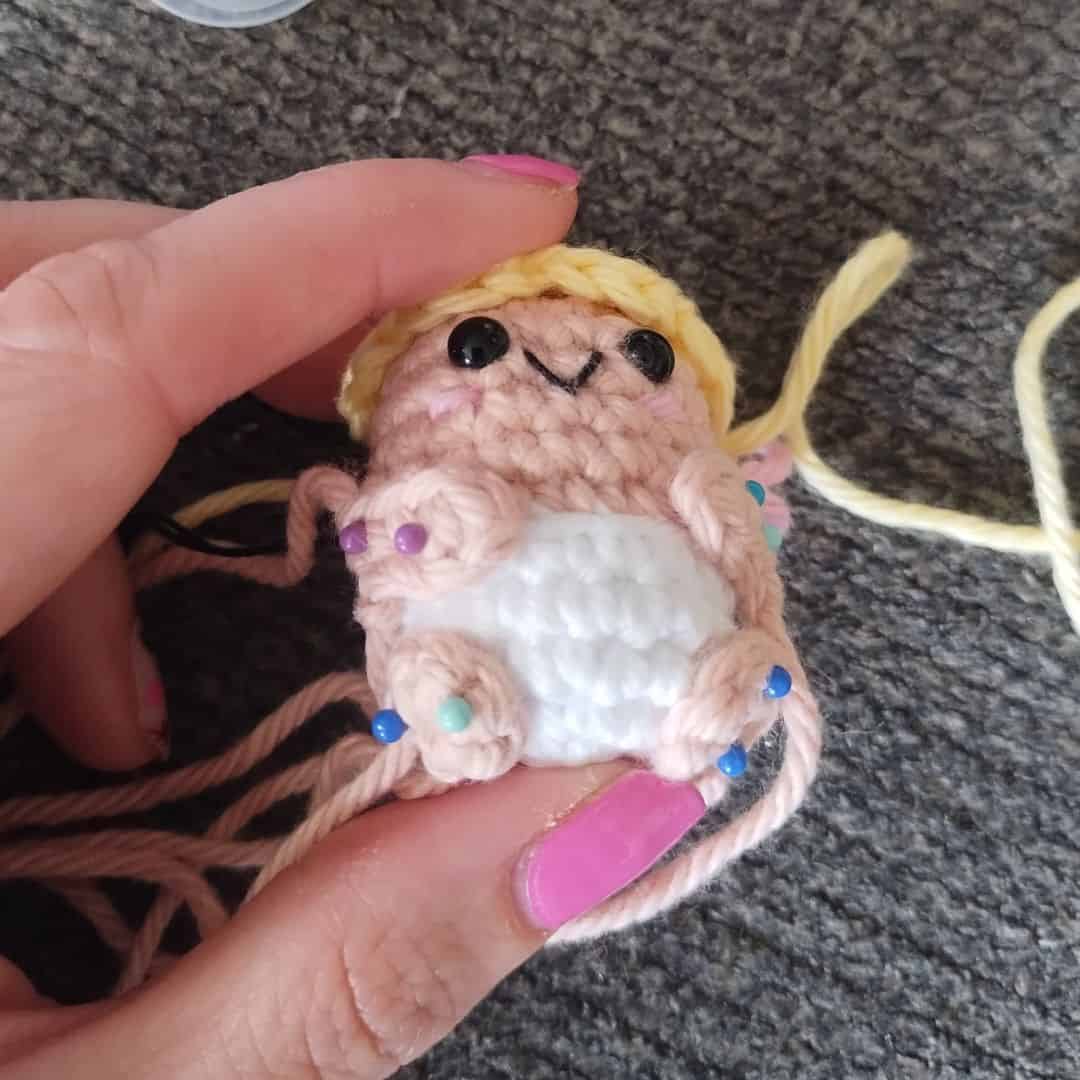
Feet (make 2)
- The feet are worked in continuous rounds.
With a 2.75 mm crochet and skin color:
- Round 1: 5 sc in a magic ring. (5)
Fasten off, leaving a long tail. Thread the yarn through the first stitch to close.
Sew the feet between Rounds 2 and 3 at the front of the body, spaced by about 2 stitches.
(The right side of each foot should face the body.)
Tip: Fabric glue can help secure such small pieces.

Arms (make 2)
- The arms are worked in rows.
With a 2.75 mm crochet and the yarn in skin color:
- Row 1: ch 5.
- Row 2: starting in the 2nd ch from the hook: 1 sc in each chain. (4)
Cut the yarn but leave a long tail for sewing. Sew the arms to the body over Rounds 5 and 6, spaced by 3 stitches.
Tip: For very small pieces, you can sew only the outer “shoulder” edge and secure the rest with a small amount of fabric glue.
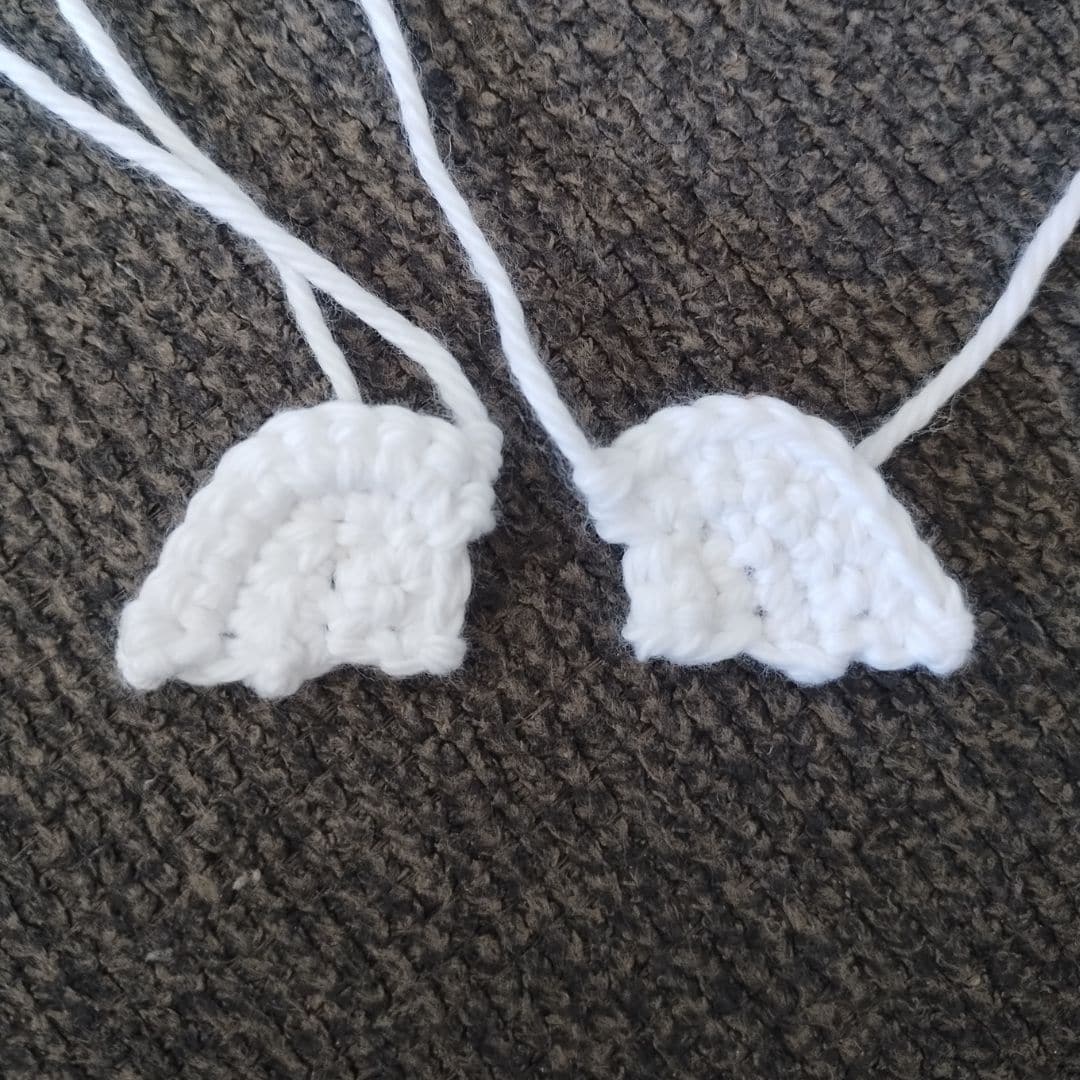
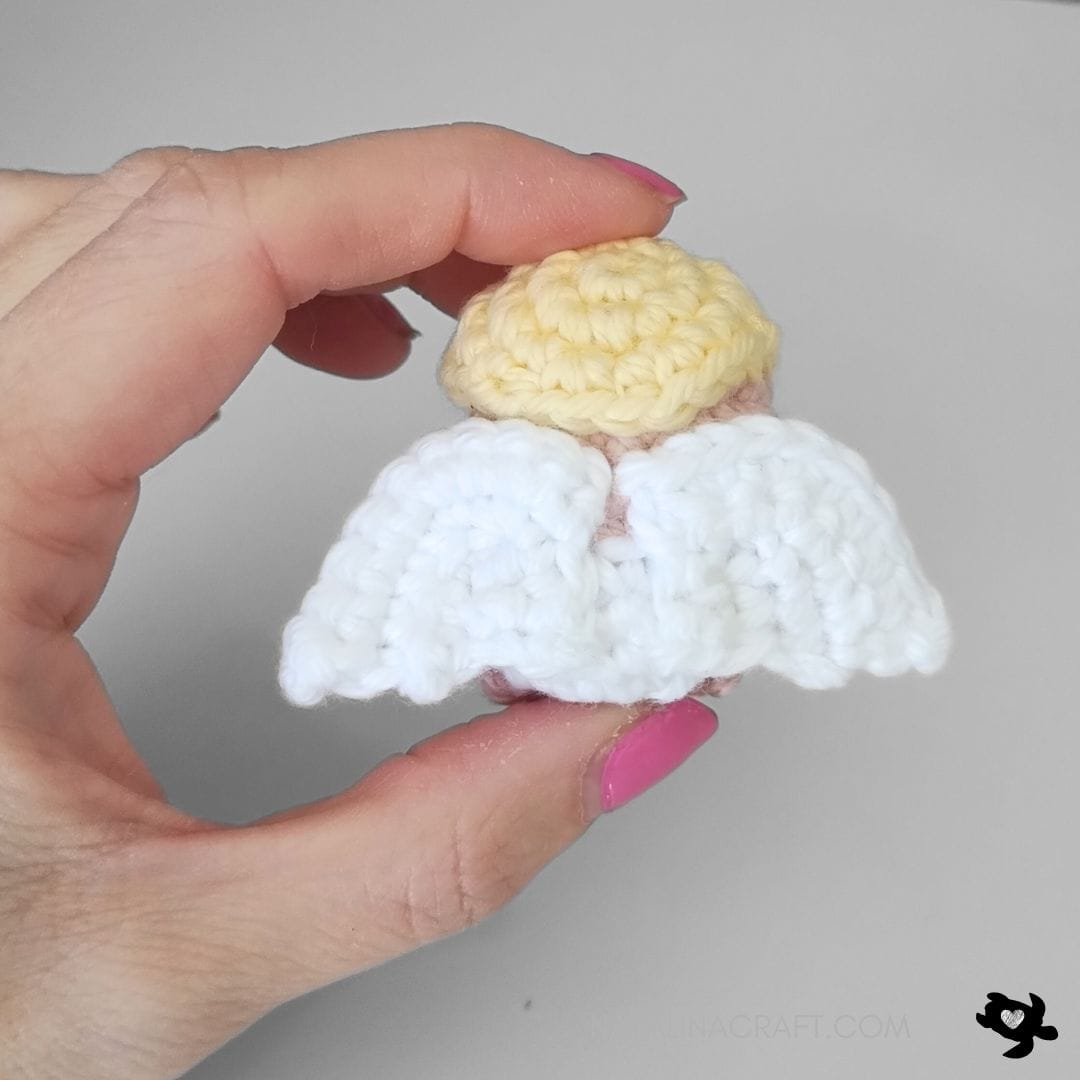
Wings (make 2)
- The wings are worked in rows.
With a 2.75 mm crochet and the yarn in white:
- Row 1: ch 5
- Row 2: Starting in the 2nd ch from the hook:
- 1 sc in next 3 ch
- 2 sc in last ch
- Working on the opposite side of the foundation chain: sc in next 2 ch
Leave remaining chain unworked.
- Row 3: ch 1, turn:
- 1 sc in next 2 st
- 1 inc in next 2 st
- 1 sc in next 3 st
- ch 2; 1 sc in 2nd ch from hook
- 1 sc in next 4 st
- 1 inc in next 2 st
- sc in next st
Leave remaining stitches unworked.
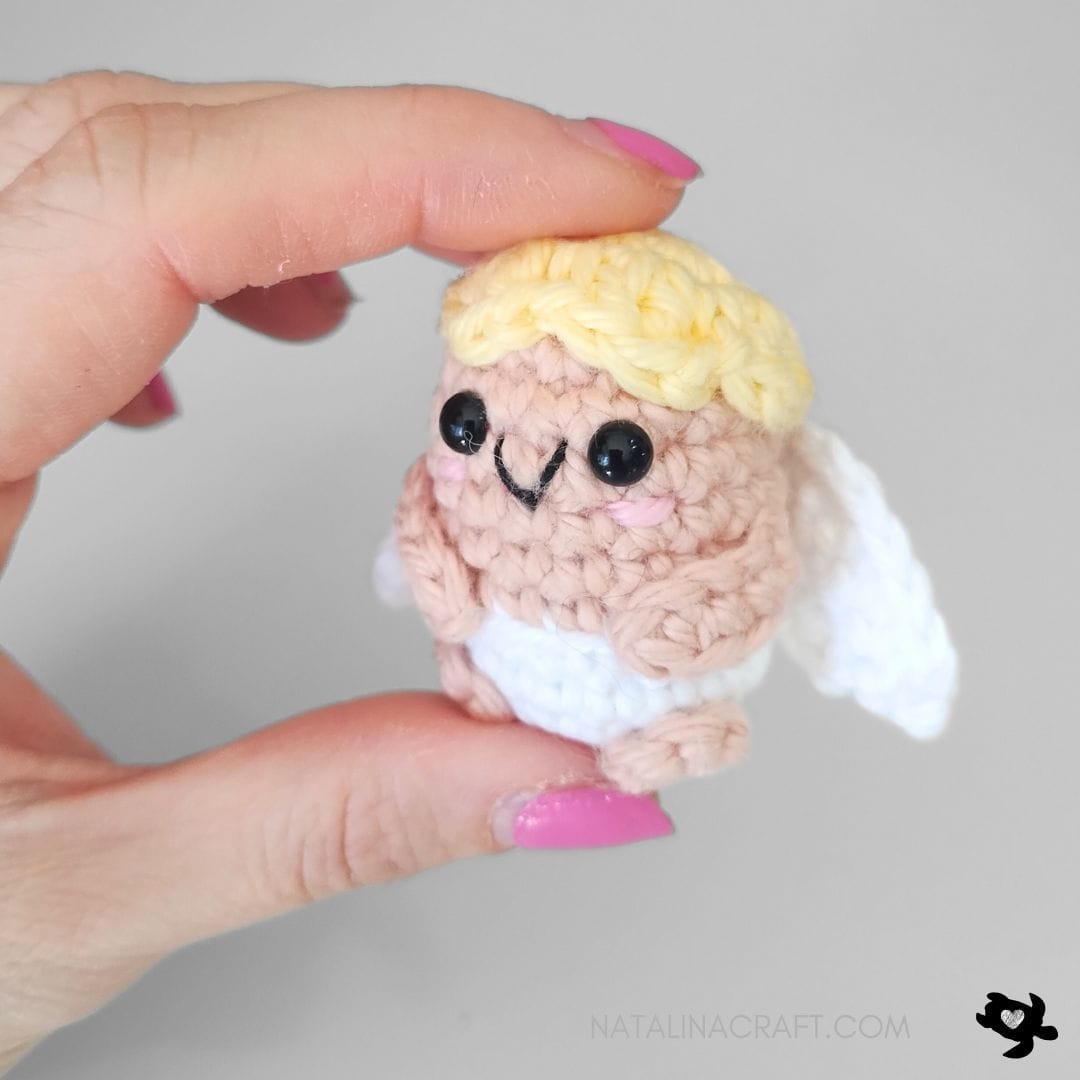
Fasten off, leave a long tail for sewing. Sew the wings to the back of the body. Attach one wing with the right side facing outward and the other with the right side facing the body.


Conclusion & Congratulations
Congratulations, you’ve finished your Little Cupid! 🎉💘
I hope you enjoyed making this tiny project and found the pattern easy and fun to follow. If you have any questions, feel free to reach out. I’ll always do my best to help.
I would absolutely love to see your finished Cupid! Please share your creations on social media using #natalinacraft, or post them in my Facebook group to inspire other crocheters.
Thank you so much for crocheting with me!
Copyright Notice
All rights reserved. This pattern and all accompanying photographs are the property of Natalina Craft and are protected by copyright law. This pattern is for personal use only. Any unauthorized reproduction, redistribution, or publication of this pattern, in whole or in part, is strictly prohibited.
You are welcome to sell finished items made from this pattern in small quantities. While crediting Natalina Craft as the designer is not required, it is always greatly appreciated—especially when selling online—so others can find the original pattern. Thank you for respecting these guidelines.
Little Cupid – Free Crochet Pattern
Little Cupid - Free Crochet Pattern
Instructions
- Please read the whole pattern before starting.
The pattern is written using US crochet terms.- 1 body
- 2 wings
- 2 feet
- 2 arms
Approx. 1.5 inches (4 cm) using light worsted yarn- 2.75 mm (US C-2) for worsted yarn
- Worsted-weight cotton yarn in white, skin color, yellow, and a small amount of pink for the cheeks
- 2 black safety eyes (6 mm)
- Stitch markers (optional)
- Tapestry needle
- Polyfill
- Optional: hot glue
- chain (ch)
- magic ring (mr)
- single crochet (sc)
- increase (inc)
- invisible decrease (dec)
- slip stitch (sl st)
- double crochet (DC)
- The body is worked in continuous rounds (as a spiral). Use a stitch marker if needed.
- Remember to stuff as you crochet.
- Round 1: 6 sc in a magic ring. (6)
- Round 2: [6 inc]. (12)
- Round 3: [1 inc, 1 sc]x6. (18)
- Rounds 4-5: [1 sc in all st]. (18)
- Round 6: working in the back loops only (BLO): [1 sc in all st]. (18)
- Rounds 7-10: [1 sc in all st]. (18)
- Round 11: [1 dec, 1 sc] x6. (12)
- Round 12: [6 dec]. (6)
- The hair is worked in continuous rounds (as a spiral). Use a stitch marker if needed.
- Remember to stuff as you crochet.
- Round 1: 6 sc in a magic ring. (6)
- Round 2: [6 inc]. (12)
- Round 3: [1 inc, 1 sc]x6. (18)
- Round 4: [2 DC in next st, ch 1, sc in next st] x4, 1 sl st in next st.Do not work the remaining stitches.
- The feet are worked in continuous rounds.
- Round 1: 5 sc in a magic ring. (5)
- The arms are worked in rows.
- Row 1: ch 5.
- Row 2: starting in the 2nd ch from the hook: 1 sc in each chain. (4)
- The wings are worked in rows.
- Row 1: ch 5
- Row 2: Starting in the 2nd ch from the hook:
- 1 sc in next 3 ch
- 2 sc in last ch
- Working on the opposite side of the foundation chain: sc in next 2 ch. Leave remaining chain unworked.
- Row 3: ch 1, turn:
- 1 sc in next 2 st
- 1 inc in next 2 st
- 1 sc in next 3 st
- ch 2; 1 sc in 2nd ch from hook
- 1 sc in next 4 st
- 1 inc in next 2 st
- sc in next st. Leave remaining stitches unworked.
Little Cupid - Free Crochet Pattern
Start Here
This pattern is made of:
Finished Size
Materials
Abbreviations:
Pattern: How to crochet a little Cupid?
Body
With a 2.75 mm crochet and yarn in white:
Change to skin color:
Place the eyes between Rounds 9 and 10, spaced by 2 stiches.
Using a tapestry needle and black cotton thread, embroider a small mouth over Round 9.
With pink yarn, add two small cheeks between Rounds 8 and 9, just below the eyes.
Stuff firmly.
Fasten off and close the opening.
Hair
With a 2.75 mm crochet and yarn in yellow:
Sew the hair on top of the head, with Round 4 facing the front.
Feet (make 2)
With a 2.75 mm crochet and skin color:
Fasten off, leaving a long tail. Thread the yarn through the first stitch to close.
Sew the feet between Rounds 2 and 3 at the front of the body, spaced by about 2 stitches.(The right side of each foot should face the body.)
Tip: Fabric glue can help secure such small pieces.
Arms (make 2)
With a 2.75 mm crochet and the yarn in skin color:
Cut the yarn but leave a long tail for sewing. Sew the arms to the body over Rounds 5 and 6, spaced by 3 stitches. Tip: For very small pieces, you can sew only the outer “shoulder” edge and secure the rest with a small amount of fabric glue.
Wings (make 2)
With a 2.75 mm crochet and the yarn in white:
Fasten off, leave a long tail for sewing. Sew the wings to the back of the body. Attach one wing with the right side facing outward and the other with the right side facing the body.
Conclusion & Congratulations
Congratulations, you’ve finished your Little Cupid! 🎉💘I hope you enjoyed making this tiny project and found the pattern easy and fun to follow. If you have any questions, feel free to reach out. I’ll always do my best to help.
I would absolutely love to see your finished Cupid! Please share your creations on social media using #natalinacraft, or post them in my Facebook group to inspire other crocheters.
Thank you so much for crocheting with me!
Copyright NoticeAll rights reserved. This pattern and all accompanying photographs are the property of Natalina Craft and are protected by copyright law. This pattern is for personal use only. Any unauthorized reproduction, redistribution, or publication of this pattern, in whole or in part, is strictly prohibited.You are welcome to sell finished items made from this pattern in small quantities. While crediting Natalina Craft as the designer is not required, it is always greatly appreciated—especially when selling online—so others can find the original pattern.Thank you for respecting these guidelines.