
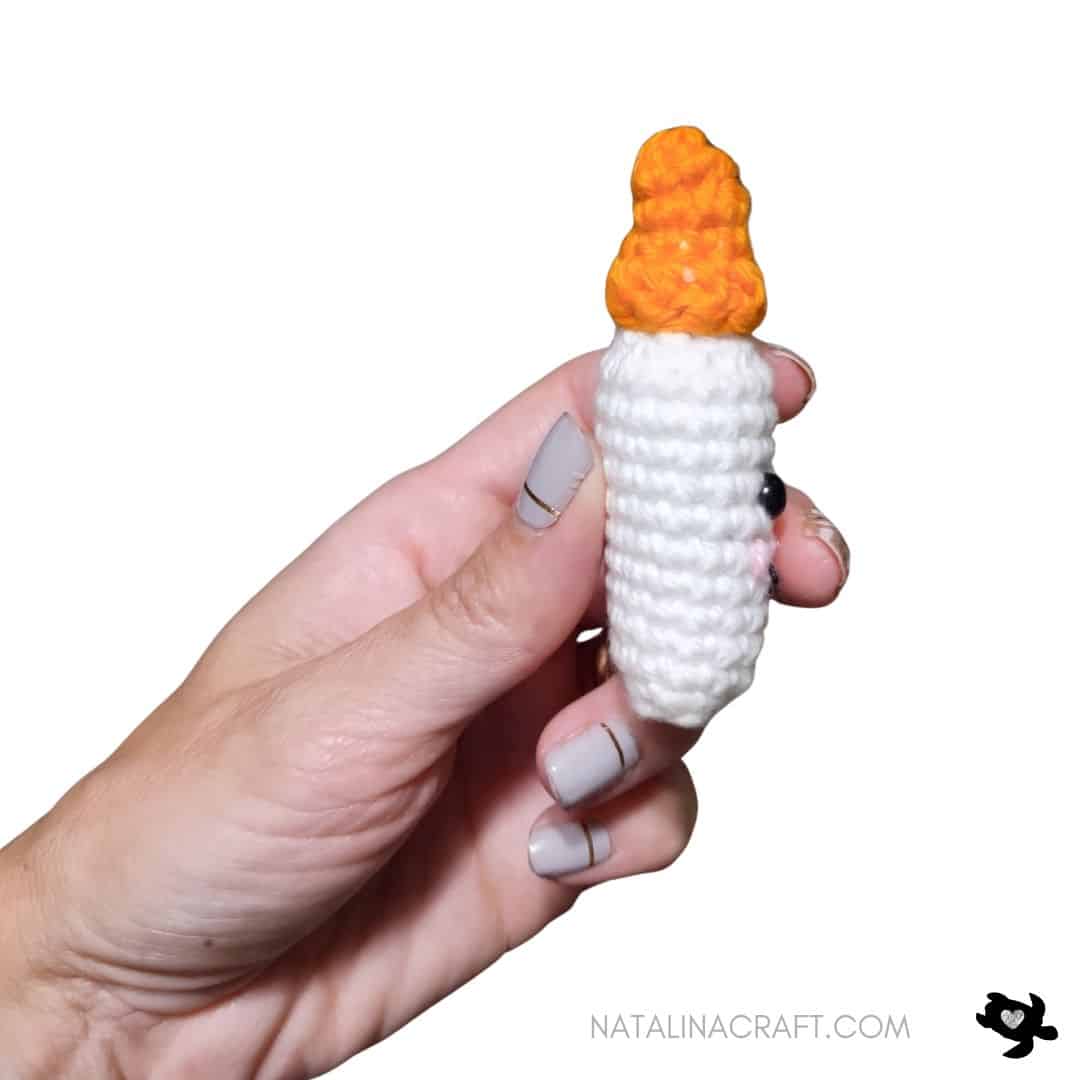
Free Crochet Pattern – Glue Bottle Amigurumi (Back to School Series #2)
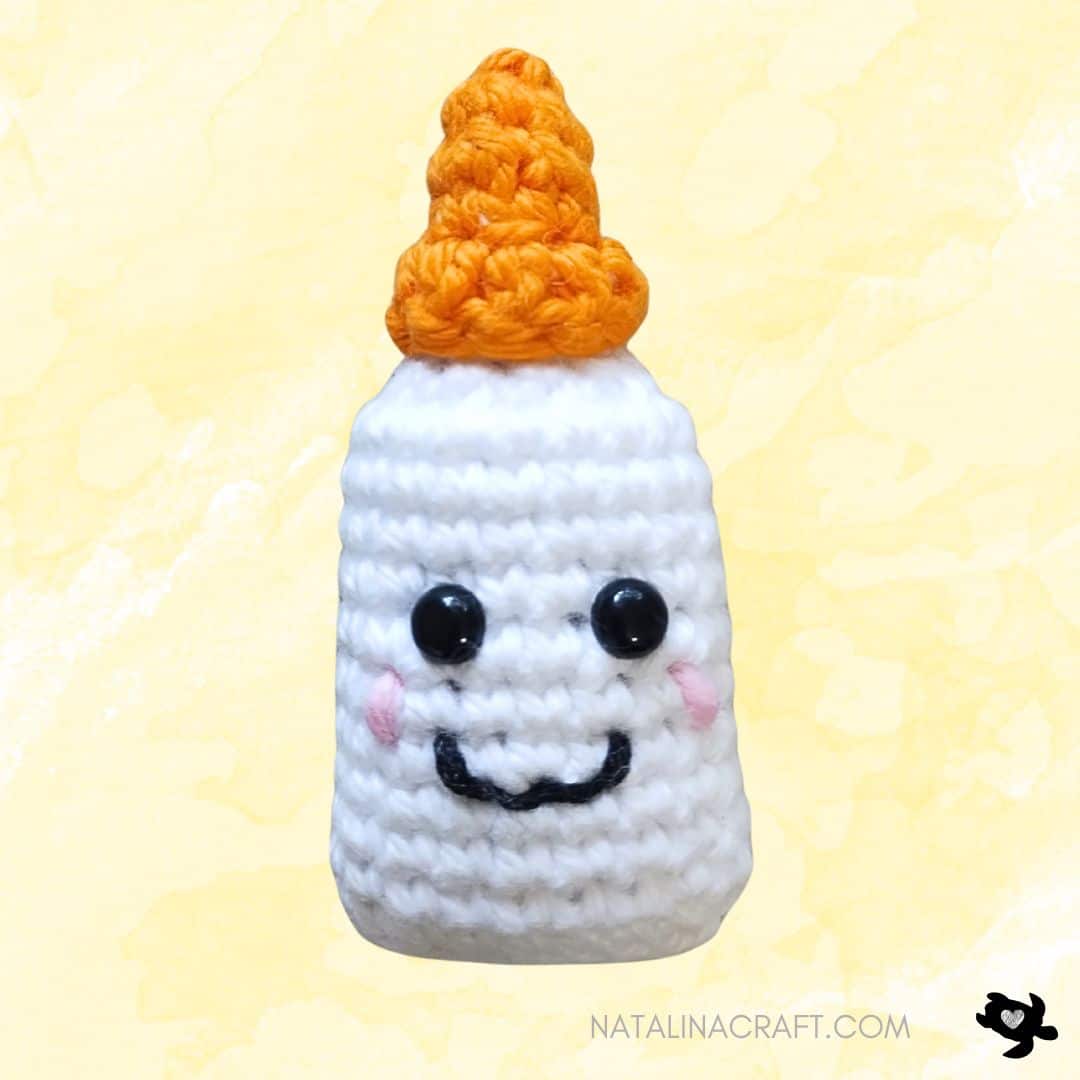
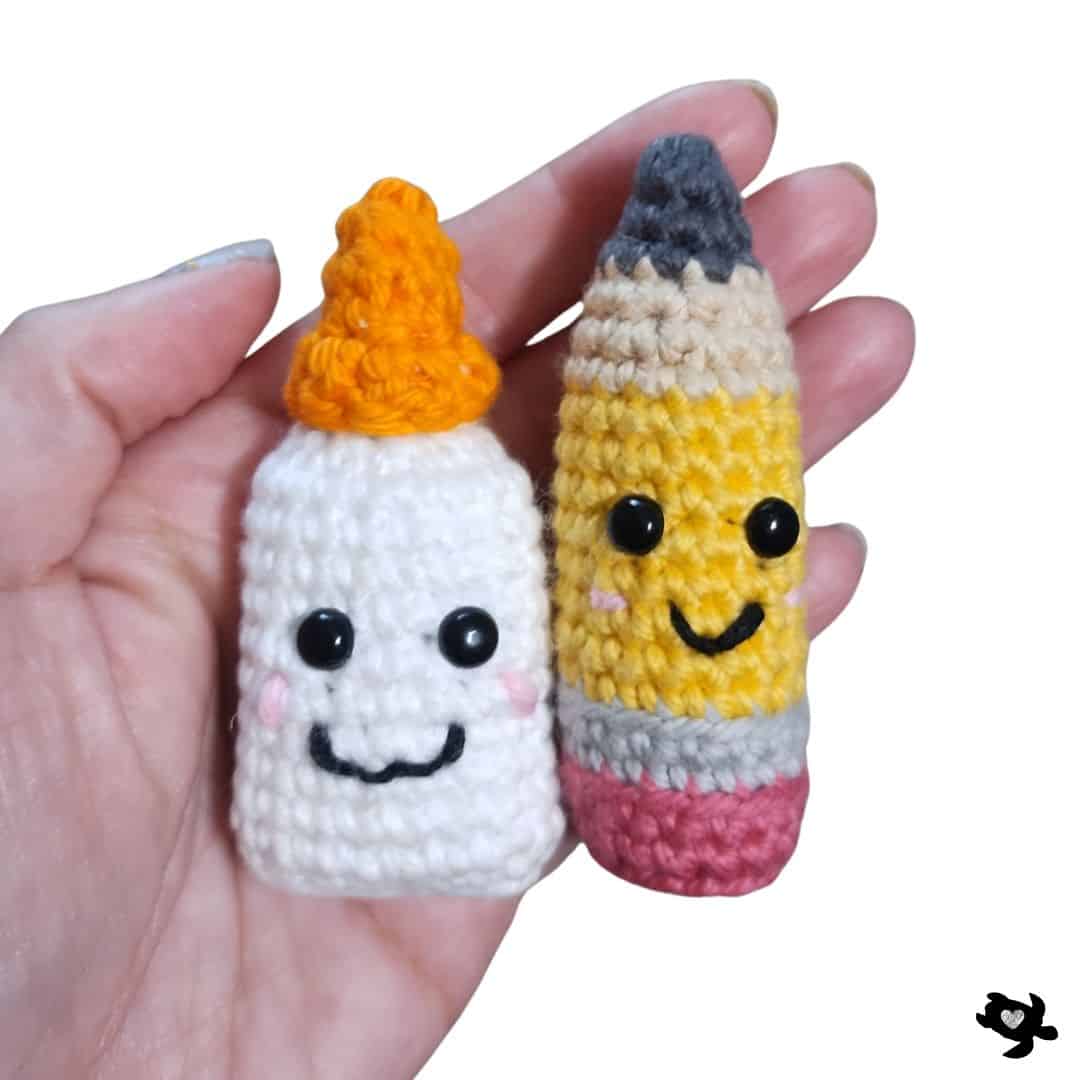
It’s time for another Back to School crochet project! After the little pencil, here comes the second piece in the series — a cute Glue Bottle Amigurumi. 🧴
This pattern is small, fast, and beginner-friendly, making it the perfect project for anyone looking for a quick and fun make. The glue bottle is worked in a simple squishy style, with minimal sewing, and it’s great as a teacher gift, classroom decoration, or even a fun market stall item.
Like the pencil, this glue bottle is designed with easy stitches and clear instructions, so even new crocheters can join in. And the best part? You only need a small amount of yarn in basic colors — perfect for using up scraps!
Stay tuned as more Back to School crochet patterns will be added to this series — soon you’ll have a whole set of adorable school supplies to display or gift.
Remember to become a part of my VIP Facebook group HERE. This is where you can ask any questions you might have and showcase your completed projects. I’ll frequently inquire about the patterns you’d like to work on next. Of course, feel free to propose ideas even if I haven’t asked for suggestions!
I hope you will enjoy and understand the pattern. If you have any questions, please don’t hesitate to write to me. I’ll do my best to help you. And I would love to see your work! Don’t forget to share your finished projects using the hashtag #natalinacraft. I love seeing your incredible work!
Follow me on Instagram and Facebook for exclusive sneak peeks, behind-the-scenes, and updates on upcoming patterns and collections. Let’s build a vibrant crochet community together!


Crochet Pattern – Free Crochet Pattern – Glue
Start Here:
Please read the entire pattern carefully before beginning.
The pattern is written using US terms. The design can be created with yarn in various sizes. I made it with worsted yarn.
Size:
- 3 inches (7 cm) tall with light worsted yarn
Material:
- Yarn calling for a 5.5 mm hook in white, orange and a small amount of pink for the cheeks.
- Embroidery thread in black for the mouth
- Size 2.75 mm crochet hook (B/2).
- 2 black safety eyes (6 mm)
- Stitch markers (if needed)
- Tapestry needle
- poly-fill
Abbreviations:
- chain (ch)
- magic ring (mr)
- single crochet (sc)
- increase (inc)
- invisible decrease (dec)
- slip stitch (sl st)
- half double crochet (hdc)
- double crochet (dc)
- back loop only (blo)
Pattern: How to crochet a glue bottle?
Let’s start – Free Crochet Pattern – Glue
- The glue bottle is worked in continuous rounds (as a spiral). Use a stitch marker if needed.
- Don’t forget to stuff as you crochet.
With a 2.75 mm crochet and white yarn
- Round 1: ch 10. Starting in the 2nd ch from the hook: 1 sc in the next 8 ch, 2 sc in the last ch. Now working on the other side of the chain: 1 sc in the next 8 ch. (18)
- Round 2: working in the blo (back lop only): [1 sc in all st]. (18)
- Rounds 3 to 12: [1 sc in all st]. (18)
Place the eyes between Rounds 8 and 9, spaced by 2 stitches.
With your tapestry needle and the light pink, make 2 little cheeks over Round 7, over 1 stitch. With the black embroidery thread, make a mouth over round 6.
Fill the glue bottle.
- Round 13: [9 dec]. (9)
- Rounds 14 to 15: [1 sc in all st]. (9)

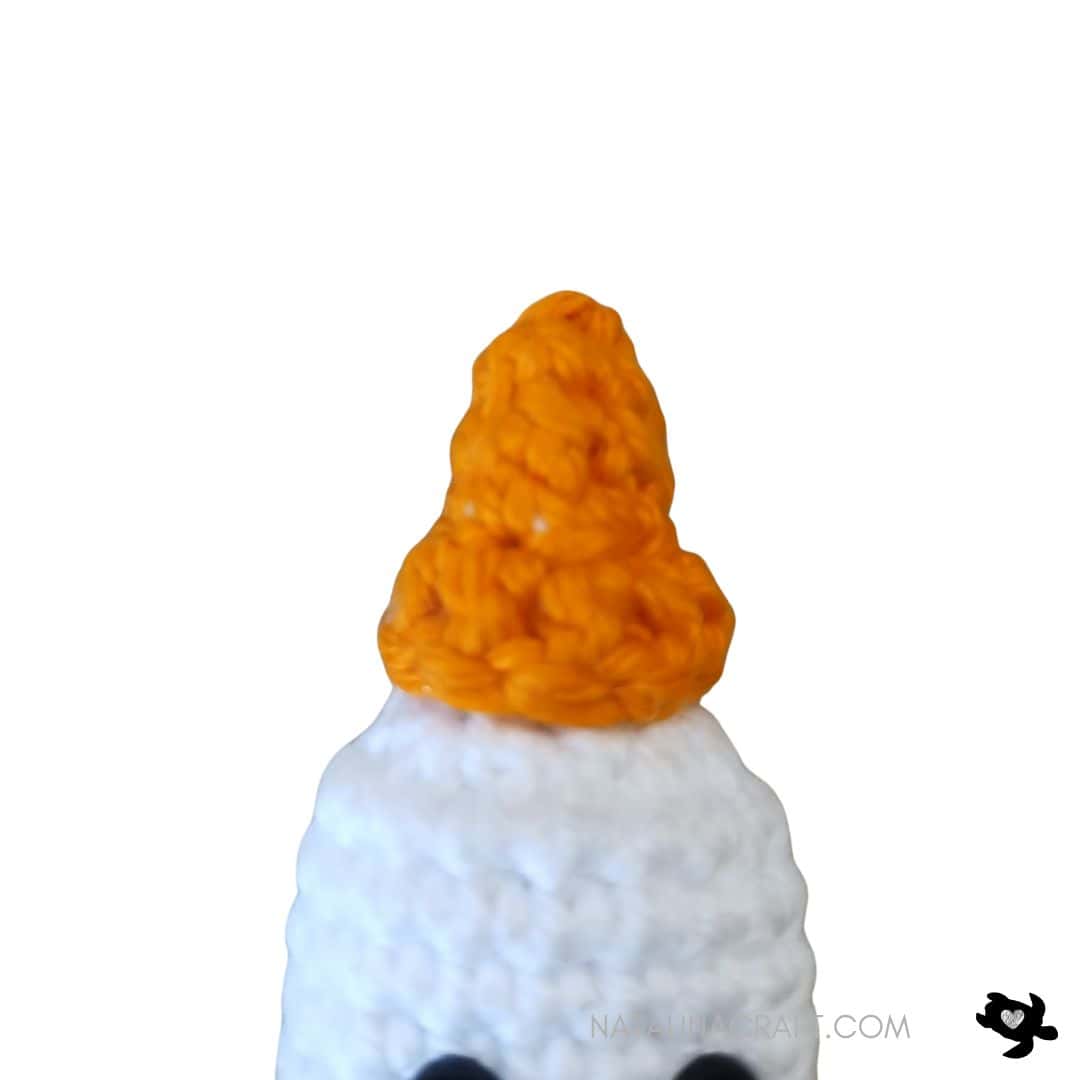
Change to the orange yarn:
- Round 16: working in the blo (back lop only): [1 sc in all st]. (9)
- Round 17: [1 dec, 1 sc in the next 7 st]. (8)
Fill the glue bottle.
- Round 18: [1 dec, 1 sc in the next 2] x2. (6)
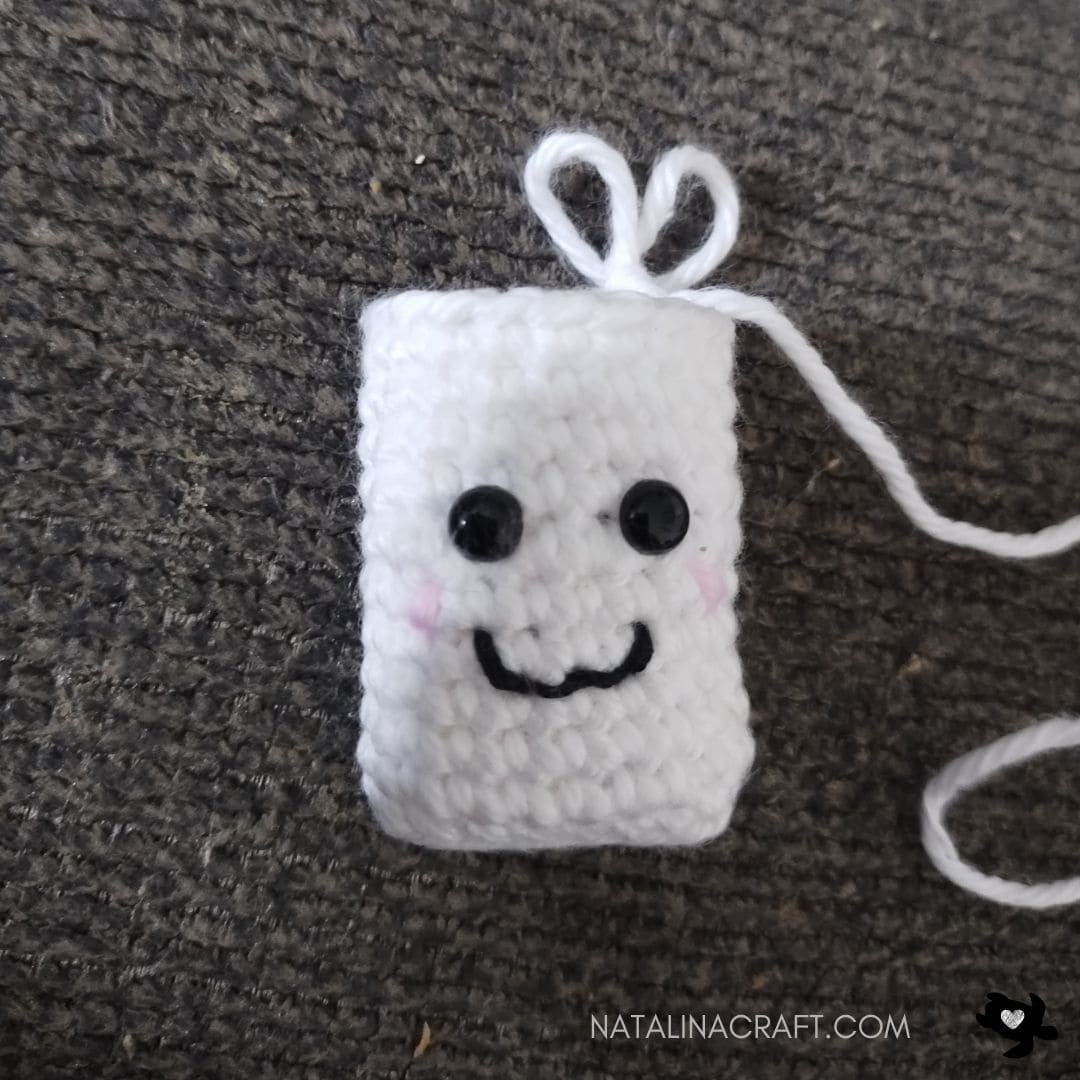
- Close the glue bottle with your tapestry needle.
Join the orange yarn in the front loop only of any stitch from Round 16 (I recommend choosing one at the back so the join is less visible). Work 1 DC in the next 9 stitches, including the stitch where you joined. Finish with 1 sl st in the first DC you made. Cut the yarn and weave in the end. Finally, fold the round of DC downward so it sits at the bottom edge of the lid.


Congratulations, your glue bottle is ready!


Copyright Notice:
All rights reserved. The pattern and photographs presented in this document are the sole property of Natalina Craft and are protected under copyright law. This pattern is provided for personal use only. Any unauthorized reproduction, in whole or in part, or distribution of this pattern or its contents is strictly prohibited.
You are permitted to sell finished items created from this pattern in limited quantities. If you choose to sell your finished products online, it would be greatly appreciated if you include a statement attributing the pattern to Natalina Craft and provide a link back to the original post. Thank you for your understanding and adherence to these guidelines.
Glue – Free Crochet Pattern
Free crochet pattern - Glue
Instructions
Crochet Pattern - Free Crochet Pattern - Glue
Start Here:
Please read the entire pattern carefully before beginning.
The pattern is written using US terms. The design can be created with yarn in various sizes. I made it with worsted yarn.
Size:
- 3 inches (7 cm) tall with light worsted yarn
Material:
- Yarn calling for a 5.5 mm hook in white, orange and a small anount of pink for the cheeks.
- Embroidery thread in black for the mouth
- Size 2.75 mm crochet hook (B/2).
- 2 black safety eyes (6 mm)
- Stitch markers (if needed)
- Tapestry needle
- poly-fill
Abbreviations:
- chain (ch)
- magic ring (mr)
- single crochet (sc)
- increase (inc)
- invisible decrease (dec)
- slip stitch (sl st)
- half double crochet (hdc)
- double crochet (dc)
- back loop only (blo)
Pattern: How to crochet a glue bottle?
Let's start - Free Crochet Pattern - Glue
- The glue bottle is worked in continuous rounds (as a spiral). Use a stitch marker if needed.
- Don't forget to stuff as you crochet.
With a 2.75 mm crochet and white yarn
- Round 1: ch 10. Starting in the 2nd ch from the hook: 1 sc in the next 8 ch, 2 sc in the last ch. Now working on the other side of the chain: 1 sc in the next 8 ch. (18)
- Round 2: working in the blo (back lop only): [1 sc in all st]. (18)
- Rounds 3 to 12: [1 sc in all st]. (18)
Place the eyes between Rounds 8 and 9, spaced by 2 stitches.
Without your tapestry needle and the light pink, make 2 little cheeks over Round 7, over 1 stitch. With the black embroidery thread, make a mouth over round 6.
Fill the glue bottle.
- Round 13: [9 dec]. (9)
- Rounds 14 to 15: [1 sc in all st]. (9)
Change to the orange yarn:
- Round 16: working in the blo (back lop only): [1 sc in all st]. (9)
- Round 17: [1 dec, 1 sc in the next 7 st]. (8)
Fill the glue bottle.
- Round 18: [1 dec, 1 sc in the next 2] x2. (6)
- Close the glue bottle with your tapestry needle.
Join the orange yarn in the front loop only of any stitch from Round 16 (I recommend choosing one at the back so the join is less visible). Work 1 DC in the next 9 stitches, including the stitch where you joined. Finish with 1 sl st in the first DC you made. Cut the yarn and weave in the end. Finally, fold the round of DC downward so it sits at the bottom edge of the lid.
Congratulations, your glue bottle is ready!
Copyright Notice:
All rights reserved. The pattern and photographs presented in this document are the sole property of Natalina Craft and are protected under copyright law. This pattern is provided for personal use only. Any unauthorized reproduction, in whole or in part, or distribution of this pattern or its contents is strictly prohibited.
You are permitted to sell finished items created from this pattern in limited quantities. If you choose to sell your finished products online, it would be greatly appreciated if you include a statement attributing the pattern to Natalina Craft and provide a link back to the original post. Thank you for your understanding and adherence to these guidelines.