
Looking for a fun and easy crochet project? This little raccoon is the perfect quick make! Whether you need a cute gift, a fun addition to your amigurumi collection, or just love woodland animals, this pattern is for you. 🧶💛
Designed to be fast and beginner-friendly, this raccoon works up in no time with minimal sewing. Grab your yarn and hook, and let’s get started!
Don’t forget to join my Facebook group HERE, you can ask your questions, and share your finished projects. I will regularly ask you what pattern you would like to see next (or you can even suggest something even if I am not asking!).
I hope you will enjoy and understand the pattern. If you have any questions, please write to me, I will try my best to help you. And I would love to see your work! Don’t forget to share your finished projects using the hashtag #natalinacraft. I love seeing your beautiful work!


Raccoon – Free Crochet Pattern
Start Here:
Please read the whole pattern properly before starting.
The pattern is written using US terms.
This pattern is made of the following parts:
- 1 Body
- 2 ears
- 1 nose
- 1 tail
- Facultative: 2 feet
Size:
- 1.5 inches (4 cm) with light worsted yarn (I used I love this cotton from Hobby Lobby)
- 2.5 inches (7 cm) with plush yarn (I used Premier Parfait chunky)
Material:
- Yarn calling for a US I-9 / 5.5 mm hook in light grey, dark grey, white and black. OR Yarn calling for a US L-11 / 8 mm hook in light grey, dark grey, white and black..
- Size US C-2 / 2.75 mm crochet hook (a larger hook can be used, your raccoon will only be slightly bigger) if you use worsted yarn OR Size US 7 / 4.5 mm if you use plush yarn.
- 2 black safety eyes (6 mm) if you use worsted yarn OR 2 black safety eyes (10 mm) if you use plush yarn
- Stitch markers (if needed)
- Tapestry needle
- Polyfill
- Facultative: fabric glue for the feet
Abbreviations:
- chain (ch)
- magic ring (mr)
- single crochet (sc)
- increase (inc)
- invisible decrease (dec)
- slip stitch (sl st)
- double crochet (DC)
- Half double crochet (HDC)
Pattern: How to crochet a Raccoon?
Let’s start – Raccoon – Free Crochet Pattern
The mouth – Raccoon – Free Crochet Pattern
- The mouth is worked in continuous rounds (as a spiral). Use a stitch marker if needed.
- Remember to stuff as you crochet.
With a 2.75 mm crochet and white yarn OR with a 4.5 mm and yarn in white.
-
- Round 1: start 4 sc in a magic ring. (6) – NB: if you work with plush yarn: ch2; make 4 sc in the 2nd ch from the hook. (6)
- make 1 sl st in the next sc
Using your tapestry needle and 3 strands of black yarn, make a nose between 2 sc. See pictures below.


The body – Raccoon – Free Crochet Pattern
- The body is worked in continuous rounds (as a spiral). Use a stitch marker if needed.
- Remember to stuff as you crochet.
With a 2.75 mm crochet and yarn in light grey OR with a 4.5 mm and yarn in light grey.
-
- Round 1: start 6 sc in a magic ring. (6) – NB: if you work with plush yarn: ch2; make 6 sc in the 2nd ch from the hook. (6)
- Round 2: [6 inc]. (12)
- Round 3: [1 inc in the next st, 1 sc]x6. (18)
- Rounds 4-7: [1 sc in all st]. (18)
- Rounds 8-9: keep working with the light grey as follows: 1 sc in the next 5 st. Change for the dark grey yarn and work as follows: 1 sc in the next 7 st. Change back for the light grey and work as follows: 1 sc in the next 6 st. (18)
- Round 10: keep working with the light grey as follows: 1 sc in the next 5 st. Change for the white yarn and work as follows: 1 sc in the next 7 st. Change back for the light grey and work as follows: 1 sc in the next 6 st. (18)
Place the eyes between Rounds 9 and 10, spaced by 2 st.


Using your tapestry needle, sew the mouth centered below the eyes, over Rounds 7 and 9.
-
- Round 11: keep working with the light grey: [1 dec, 1 sc] x6. (12)
Fill the body with polyfill.
- Round 12: [6 dec]. (6)
Cut the yarn, close the body and fasten it off.

The ears (make 2) – Raccoon – Free Crochet Pattern
With a 2.75 mm crochet and yarn in light grey OR with a 4.5 mm and light grey yarn.
- Row 1: ch 3. (3)
- Row 2: starting in the 2nd ch from the hook: 1 sc, 1 HDC. (2)
Cut the yarn but leave a long tail for sewing.
Sew the ears to the body over Round 11, spaced by 7 st.


The tail – Raccoon – Free Crochet Pattern
- The tail is worked in continuous rounds (as a spiral). Use a stitch marker if needed.
- Remember to stuff as you crochet.
With a 2.75 mm crochet and yarn in black OR with a 4.5 mm and yarn in black.
-
- Round 1: start 4 sc in a magic ring. (4) – NB: if you work with plush yarn: ch2; make 4 sc in the 2nd ch from the hook. (4)
- Round 2: [1 sc, 1 inc] x2. (6)
Change for the light grey yarn.
-
- Round 3: [2 sc, 1 inc] x2. (8)
- Round 4: [1 sc in all st]. (8)
Change for the black yarn.
-
- Round 5: [2 sc, 1 dec] x2. (6)
- Round 6: [1 sc in all st]. (6)
Cut the yarn but leave a long tail for sewing.
Sew the tail to the body over Rounds 3 and 4.


Facultative: The feet (make 2) – Raccoon – Free Crochet Pattern
With a 2.75 mm crochet and black yarn OR with a 4.5 mm and black yarn :
- Round 1: start 5 sc in a magic ring. (5) – NB: if you work with plush yarn: ch2; make 5 sc in the 2nd ch from the hook. (5)
Cut the yarn but leave a long tail for sewing. Insert the yarn in the first sc to close the feet.
Sew the feet to the body over Rounds 2 and 3, spaced by 2 stitches. I placed the right side of the feet against the raccons’s body. It is sometimes hard to sew such small pieces, so I used some glue.
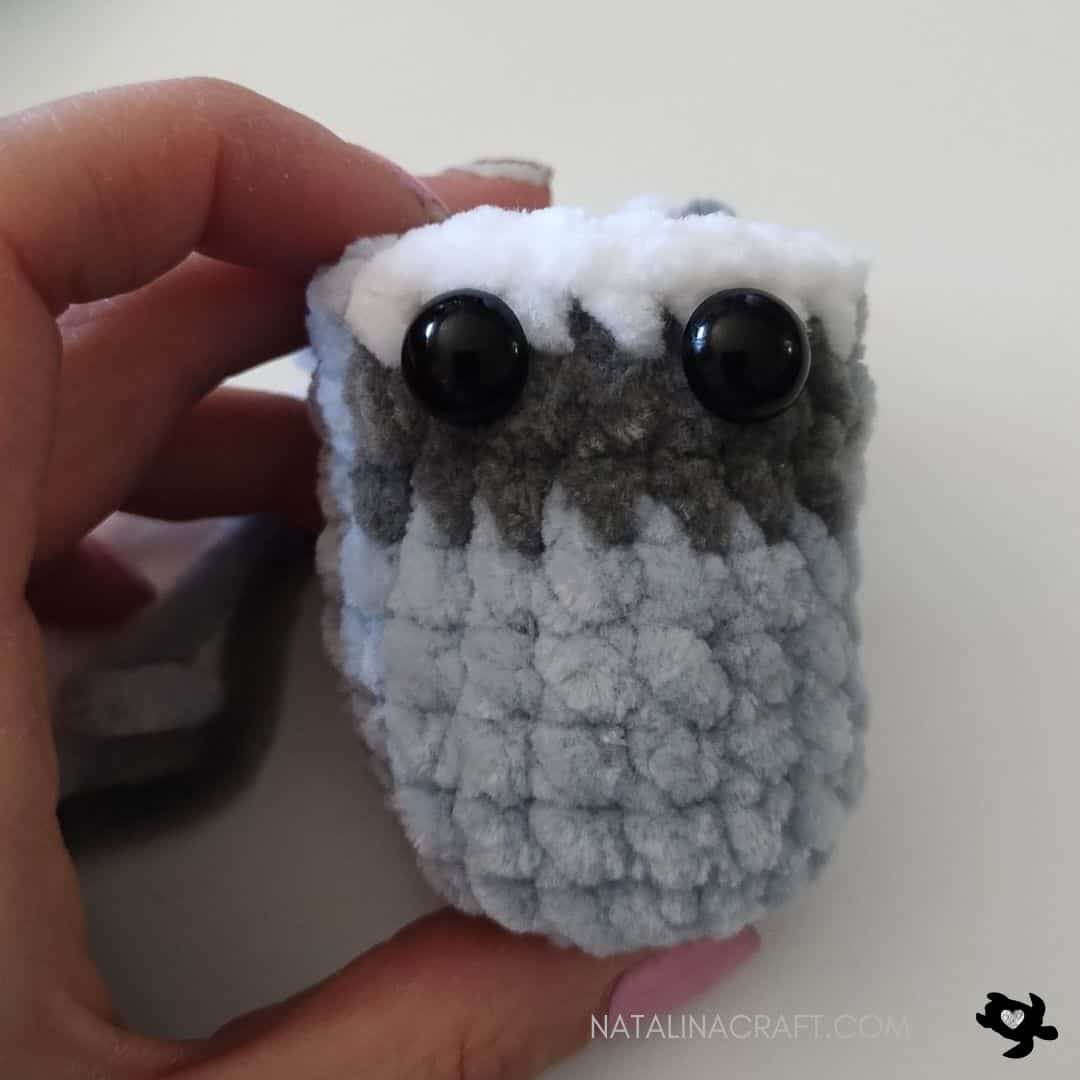
See the pictures for the owl as I decided not to make feet for the raccoon.


Congratulations on crafting the cutest crochet raccoon!


Copyright Notice:
All rights reserved. The pattern and photographs presented in this document are the sole property of Natalina Craft and are protected under copyright law. This pattern is provided for personal use only. Any unauthorized reproduction, in whole or in part, or distribution of this pattern or its contents is strictly prohibited.
You are permitted to sell finished items created from this pattern in limited quantities. If you choose to sell your finished products online, it would be greatly appreciated if you include a statement attributing the pattern to Natalina Craft and provide a link back to the original post. Thank you for your understanding and adherence to these guidelines.
Raccoon – Free Crochet Pattern
Raccoon - Free Crochet Pattern
Instructions
Start Here:
Please read the whole pattern properly before starting.
The pattern is written using US terms.
This pattern is made of the following parts:
- 1 Body
- 2 ears
- 1 tail
- Facultative: 2 feet
Size:
- 1.5 inches (4 cm) with light worsted yarn (I used I love this cotton from Hobby Lobby)
- 2.5 inches (7 cm) with plush yarn (I used Premier Parfait chunky)
Material:
- Male cardinal: Yarn calling for a US I-9 / 5.5 mm hook in light grey, dark grey, white and black. OR Yarn calling for a US L-11 / 8 mm hook in light grey, dark grey, white and black..
- Size US C-2 / 2.75 mm crochet hook (a larger hook can be used, your raccoon will only be slightly bigger) if you use worsted yarn OR Size US 7 / 4.5 mm if you use plush yarn.
- 2 black safety eyes (6 mm) if you use worsted yarn OR 2 black safety eyes (10 mm) if you use plush yarn
- Stitch markers (if needed)
- Tapestry needle
- Polyfill
- Facultative: fabric glue for the feet
Abbreviations:
- chain (ch)
- magic ring (mr)
- single crochet (sc)
- increase (inc)
- invisible decrease (dec)
- slip stitch (sl st)
- double crochet (DC)
- Half double crochet (HDC)
Pattern: How to crochet a Raccoon?
Let's start - Raccoon - Free Crochet Pattern
The mouth - Raccoon - Free Crochet Pattern
- The mouth is worked in continuous rounds (as a spiral). Use a stitch marker if needed.
- Remember to stuff as you crochet.
With a 2.75 mm crochet and yarn white OR with a 4.5 mm and yarn in white.
- Round 1: start 4 sc in a magic ring. (6) - NB: if you work with plush yarn: ch2; make 4 sc in the 2nd ch from the hook. (6)
- make 1 sl st in the next sc
Using your tapestry needle and 3 strands of black yarn, make a nose between 2 sc. See pictures below.
The body - Raccoon - Free Crochet Pattern
- The body is worked in continuous rounds (as a spiral). Use a stitch marker if needed.
- Remember to stuff as you crochet.
With a 2.75 mm crochet and yarn in light grey OR with a 4.5 mm and yarn in light grey.
- Round 1: start 6 sc in a magic ring. (6) - NB: if you work with plush yarn: ch2; make 6 sc in the 2nd ch from the hook. (6)
- Round 2: [6 inc]. (12)
- Round 3: [1 inc in the next st, 1 sc]x6. (18)
- Rounds 4-7: [1 sc in all st]. (18)
- Rounds 8-9: keep working with the light grey as follows: 1 sc in the next 5 st. Change for the dark grey yarn and work as follows: 1 sc in the next 7 st. Change back for the light grey and work as follows: 1 sc in the next 6 st. (18)
- Round 10: keep working with the light grey as follows: 1 sc in the next 5 st. Change for the white yarn and work as follows: 1 sc in the next 7 st. Change back for the light grey and work as follows: 1 sc in the next 6 st. (18)
Place the eyes between Rounds 9 and 10, spaced by 2 st.
Using your tapestry needle, sew the mouth centered below the eyes, over Rounds 7 and 9.
- Round 11: keep working with the light grey: [1 dec, 1 sc] x6. (12)
Fill the body with polyfill.
- Round 12: [6 dec]. (6)
Cut the yarn, close the body and fasten it off.
The ears (make 2) - Raccoon - Free Crochet Pattern
With a 2.75 mm crochet and yarn in light grey OR with a 4.5 mm and light grey yarn.
- Row 1: ch 3. (3)
- Row 2: starting in the 2nd ch from the hook: 1 sc, 1 HDC. (2)
Cut the yarn but leave a long tail for sewing.
Sew the ears to the body over Round 11, spaced by 7 st.
The tail - Raccoon - Free Crochet Pattern
- The tail is worked in continuous rounds (as a spiral). Use a stitch marker if needed.
- Remember to stuff as you crochet.
With a 2.75 mm crochet and yarn in black OR with a 4.5 mm and yarn in black.
- Round 1: start 4 sc in a magic ring. (4) - NB: if you work with plush yarn: ch2; make 4 sc in the 2nd ch from the hook. (4)
- Round 2: [1 sc, 1 inc]. (6)
Change for the light grey yarn.
- Round 3: [2 sc, 1 inc]x2. (8)
- Round 4: [1 sc in all st]. (8)
Change for the black yarn.
- Round 5: [2 sc, 1 dec]x2. (6)
- Round 6: [1 sc in all st]. (6)
Cut the yarn but leave a long tail for sewing.
Sew the tail to the body over Rounds 3 and 4.
Facultative: The feet (make 2) - Raccoon - Free Crochet Pattern
With a 2.75 mm crochet and black yarn OR with a 4.5 mm and black yarn :
- Round 1: start 5 sc in a magic ring. (5) - NB: if you work with plush yarn: ch2; make 5 sc in the 2nd ch from the hook. (5)
Cut the yarn but leave a long tail for sewing. Insert the yarn in the first sc to close the feet.
Sew the feet to the body over Rounds 2 and 3, spaced by 2 stitches. I placed the right side of the feet against the owl's body. It is sometimes hard to sew such small pieces, so I used some glue.
Copyright Notice:
All rights reserved. The pattern and photographs presented in this document are the sole property of Natalina Craft and are protected under copyright law. This pattern is provided for personal use only. Any unauthorized reproduction, in whole or in part, or distribution of this pattern or its contents is strictly prohibited.
You are permitted to sell finished items created from this pattern in limited quantities. If you choose to sell your finished products online, it would be greatly appreciated if you include a statement attributing the pattern to Natalina Craft and provide a link back to the original post. Thank you for your understanding and adherence to these guidelines.
On the pattern for the raccoon feet it says to:
Sew the feet to the body over Rounds 2 and 3, spaced by 2 stitches. I placed the right side of the feet against
the owl’s body. It is sometimes hard to sew such small pieces, so l used some glue.
Is there a change for the raccoons feet since it is talking about placing the feet against the owl’s body?
Thank you,
Debbie Sundhausen
dsundhausen@hotmail.com
Thank you for the message. My mistake! You can do the feet, the exact same way. Sorry!