
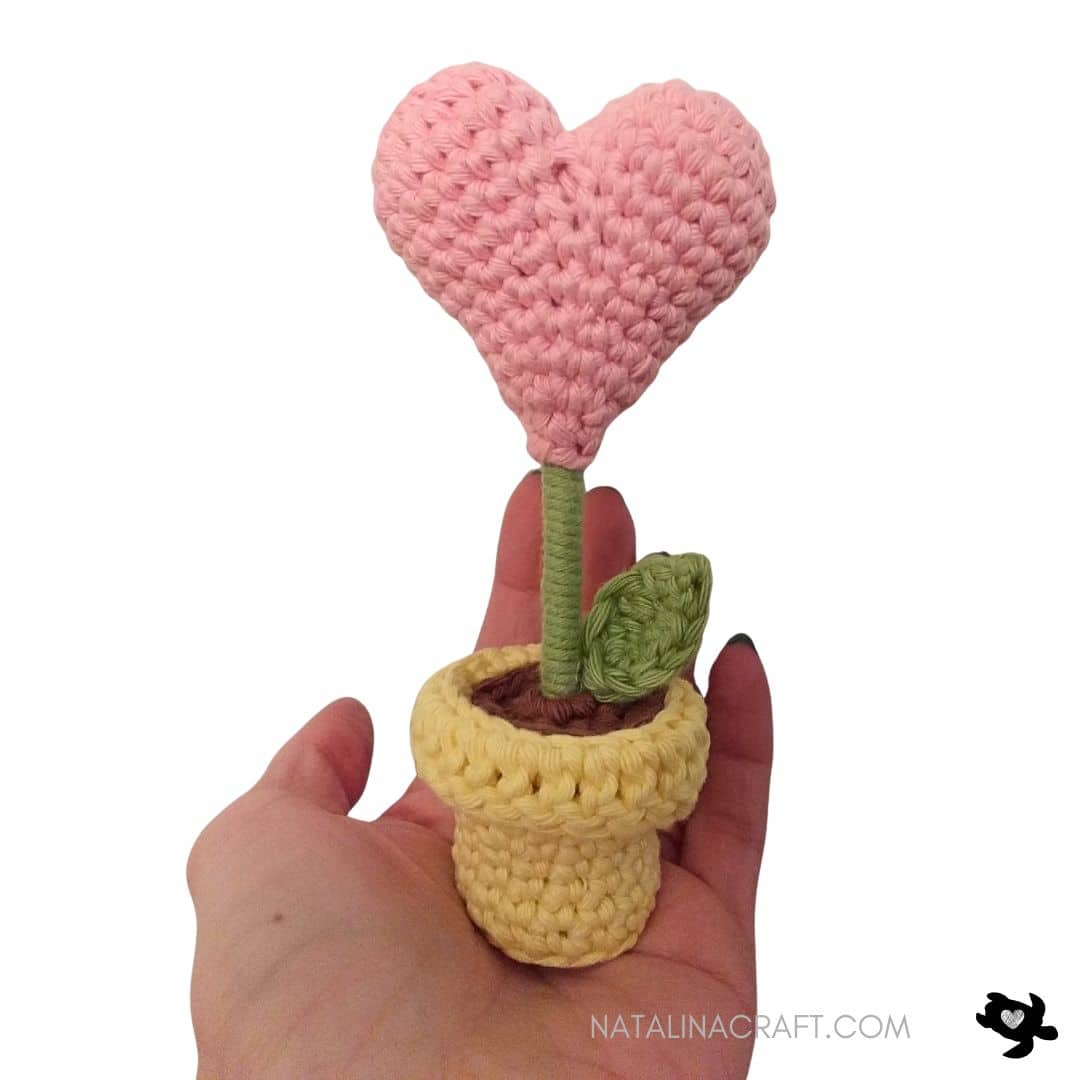
Crochet flowers are always a wonderful gift for any occasion—but how about a heart-shaped flower in a cute little crochet pot? This adorable project is sure to bring joy and makes a truly original handmade gift. Best of all, it works up quickly, so you’ll soon be able to create a whole bunch of crochet flowers!
Don’t forget to join my facebook group, you can ask your questions, and share your finished projects. I will regularly ask you what pattern you would like to see next (or you can even suggest something even if I am not asking!).
I hope you enjoy this pattern and find it easy to follow. If you have any questions, feel free to write to me—I’ll do my best to help. And I would absolutely love to see your creations!

Crochet Pattern – Free Crochet Pattern Heart Flower
Start Here
- Please read the entire pattern before starting.
- This pattern is written using US crochet terms.
Size
Approx. 5.5” (14.5 cm) tall when made with the indicated yarn.
Material
- Worsted in 3 different colors.
- Size D-3 (3.5 mm) crochet hook
- Poly-Fil fiberfill stuffing
- Tapestry needle
- 1 lollipop stick
- Hot glue gun
- A small amount of plastic pellets
- 1 ceramic magnet
What Did I Use?
Light worsted-weight yarn in pink, green, yellow, and brown.
I used Rico Creative Cotton from Wool Warehouse in:
- Pink (Color 0)
- Pistachio (Color 41)
- Vanilla (Color 62)
- Cinnamon (Color 57)
Abbreviations (US terms)
- chain (ch)
- magic ring (mr)
- single crochet (sc)
- double crochet (DC)
- half double crochet (HDC)
- increase (inc)
- invisible decrease (dec)
- back loop only (blo)
PART 1: The Heart
We start by making a crochet heart.
- Work in rounds. Do not turn unless specified.
- Use a stitch marker if needed to mark the first stitch of each round.
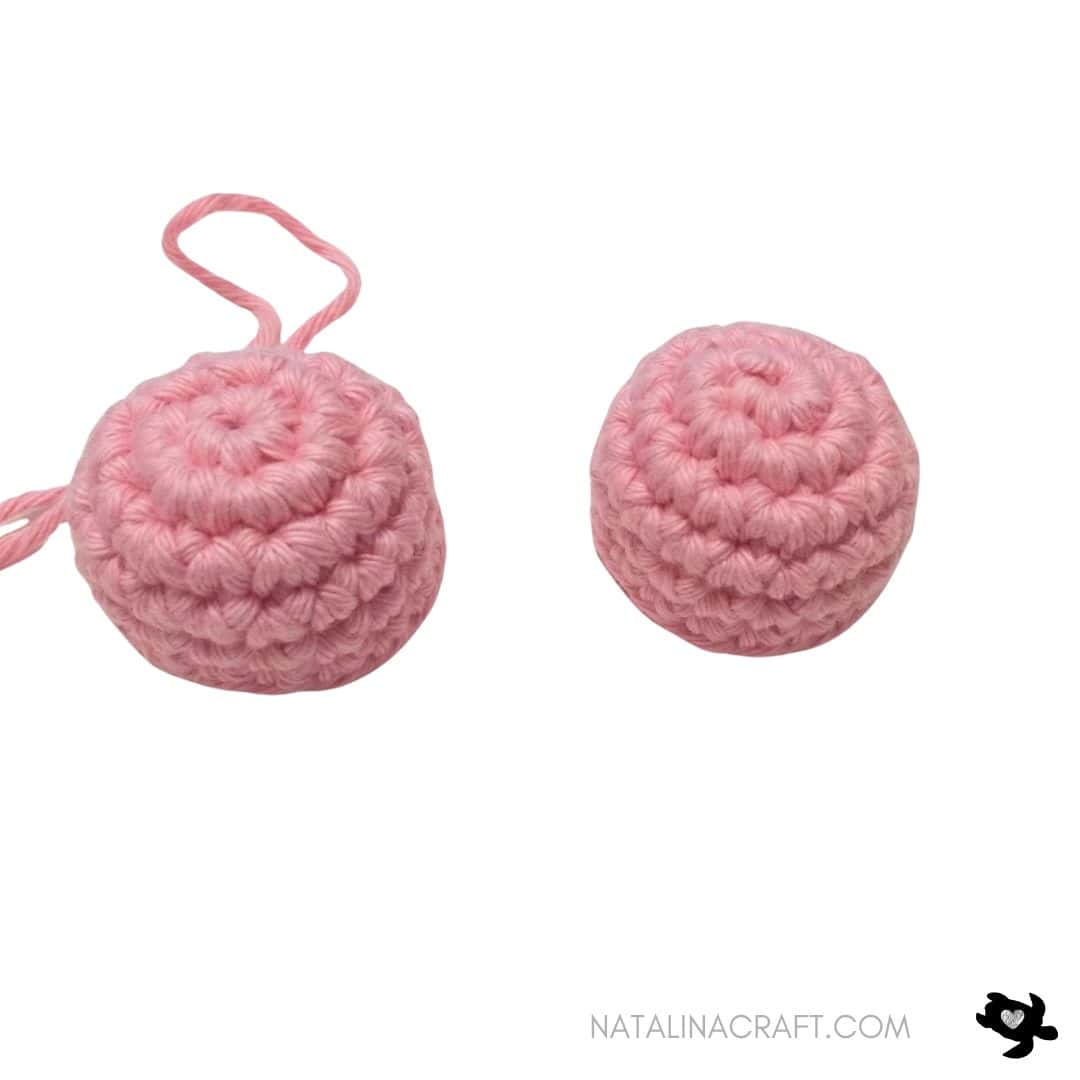
- Round 1: 6 sc in a magic ring. (6)
- Round 2: inc 6 times. (12 sc)
- Round 3: [1 sc in next st, 1 inc in next st] x6. (18)
- Rounds 4 to 6: 1 sc in all st (18)
Fasten off and weave in the ends.
This piece is called Part A.
Repeat Rounds 1–6 to make the second half of the heart.
Do not fasten off after Round 6. This piece is called Part B.
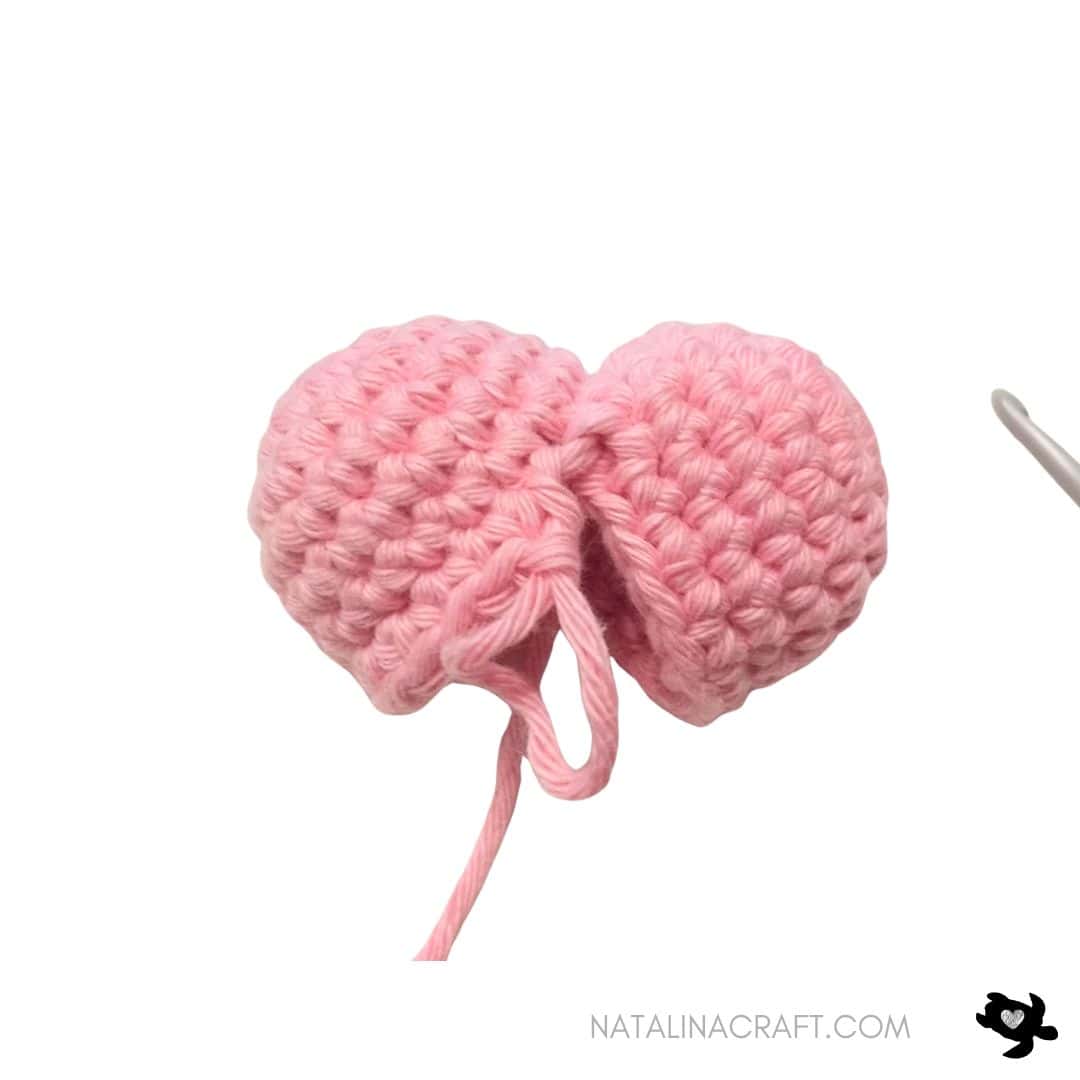
Joining the Heart
- Round 7:
Join Part A and Part B. With Part B still on the hook, hold Part A next to it, aligning the stitches.
Insert your hook through one stitch of Part A and the next stitch of Part B, yarn over, and make 1 sc.
Repeat this for the next 5 stitches (6 joining sc total).
Continue working 1 sc around the remaining stitches of both parts. (24)


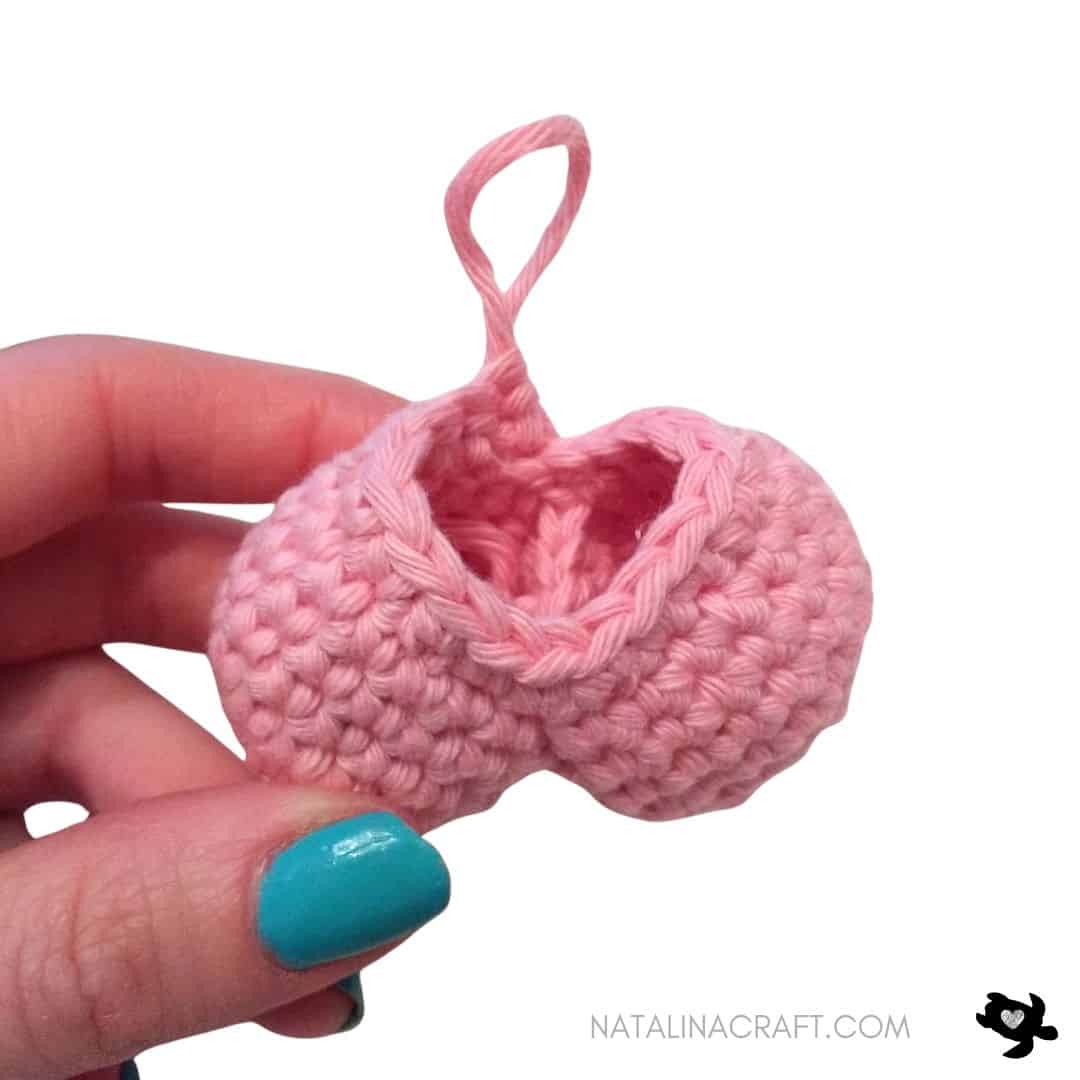
- Round 8: [1 sc in next 2 st, 1 dec in next st] x6 (18)
- Round 9: sc in all st (18)
Start stuffing firmly, shaping the heart as you go.
- Round 10: [sc in next 4 st, dec in next st] x3 (15)
- Round 11: sc in all st (15)
- Round 12: [sc in next st, dec in next st] x5 (10)
Continue stuffing firmly.
Do not cut the yarn.

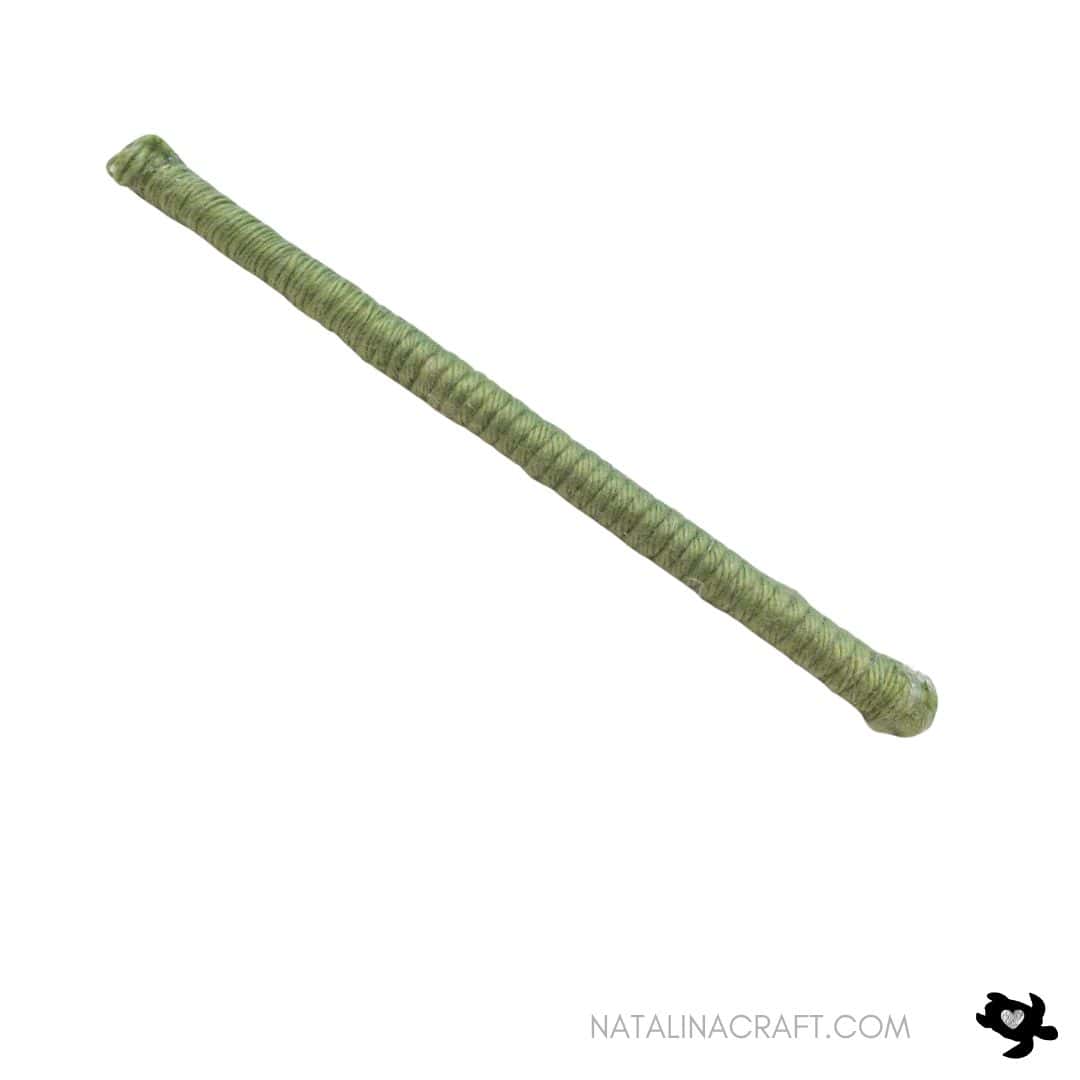
PART 2: The Stem
For the stem, you will need a small amount of green yarn, a lollipop stick, and hot glue.
Wrap the lollipop stick tightly with green yarn.
Secure the yarn with a small amount of hot glue at the top and bottom of the stick.
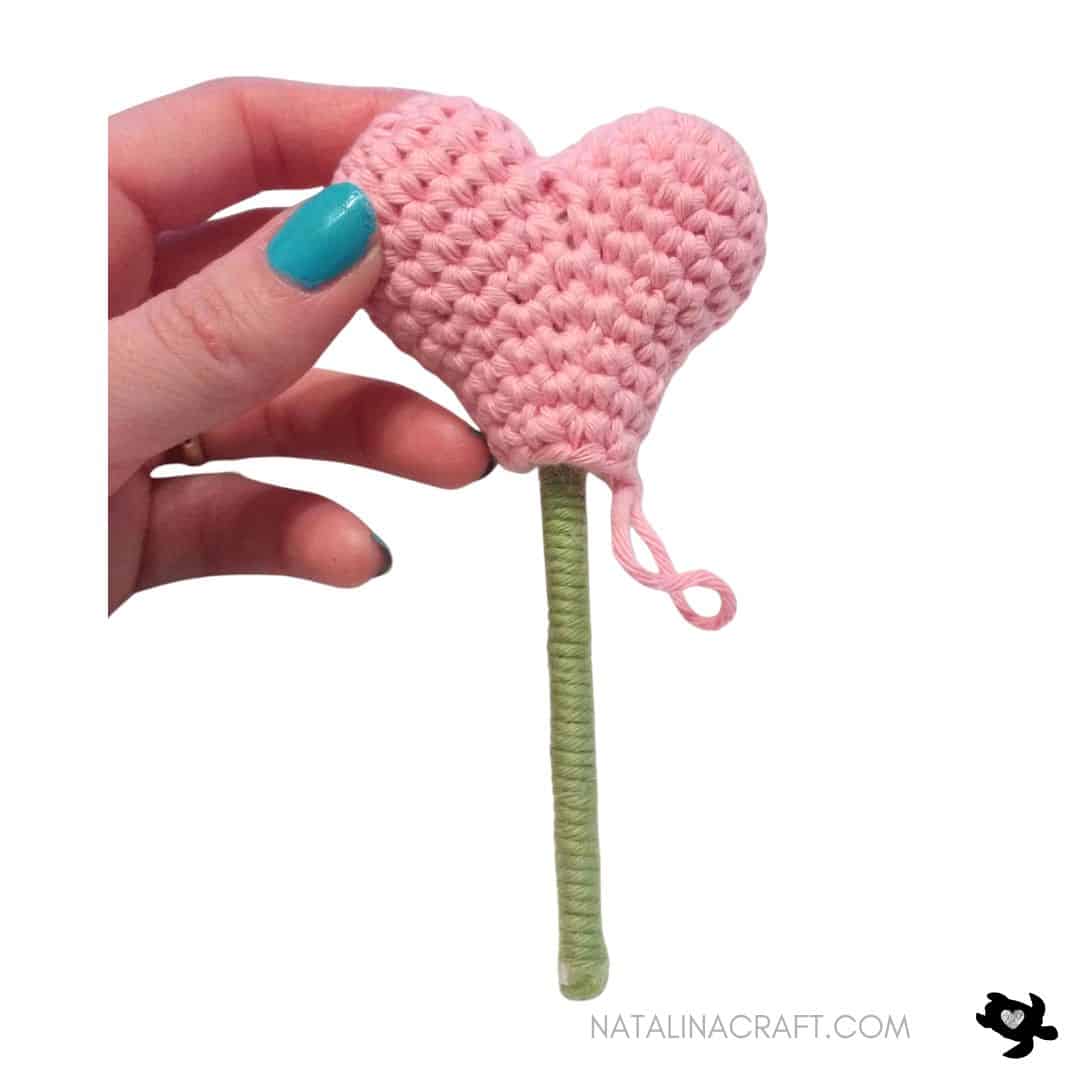
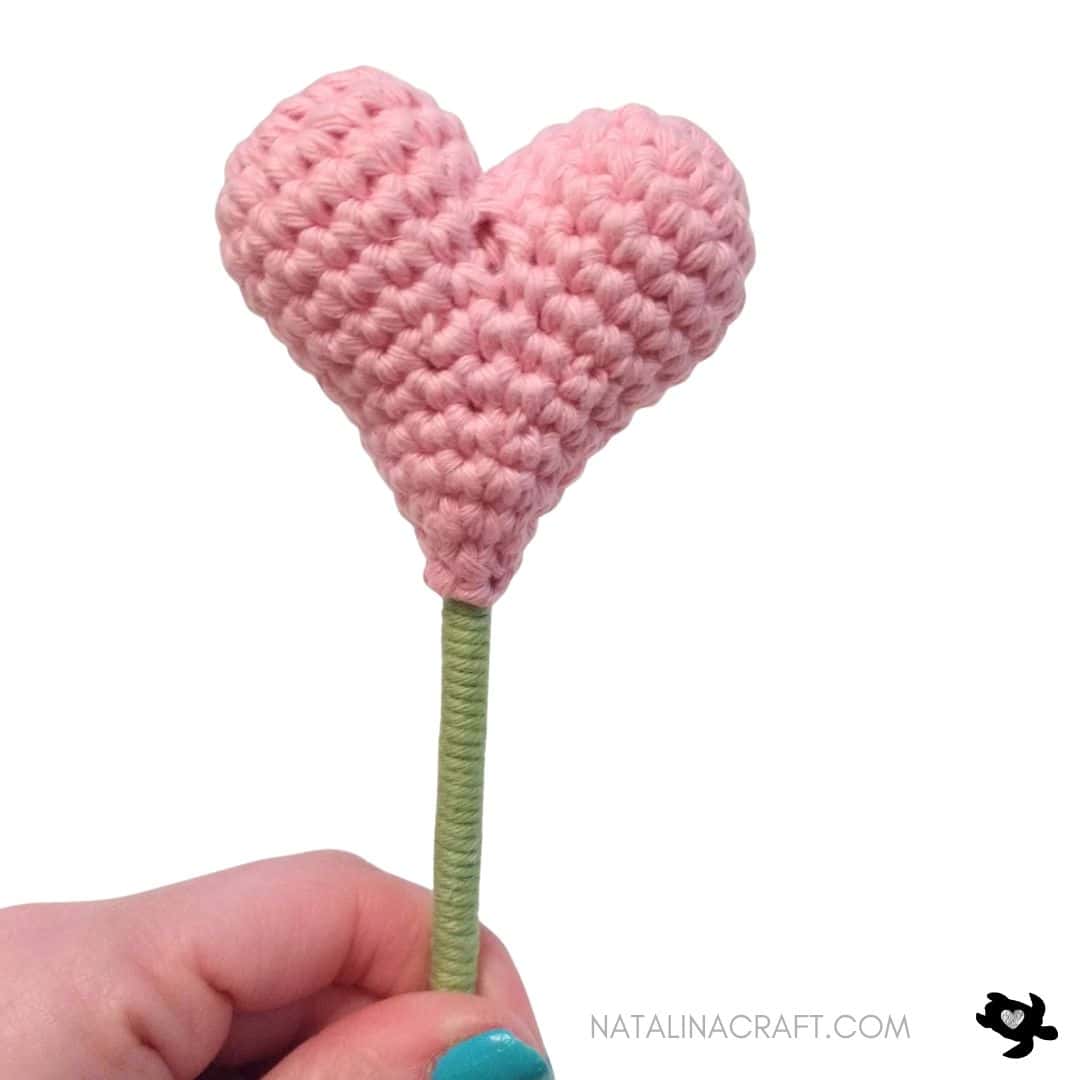
Insert the wrapped stick into the heart and close the heart tightly.
You now have a crochet heart lollipop—perfect as a gift on its own!


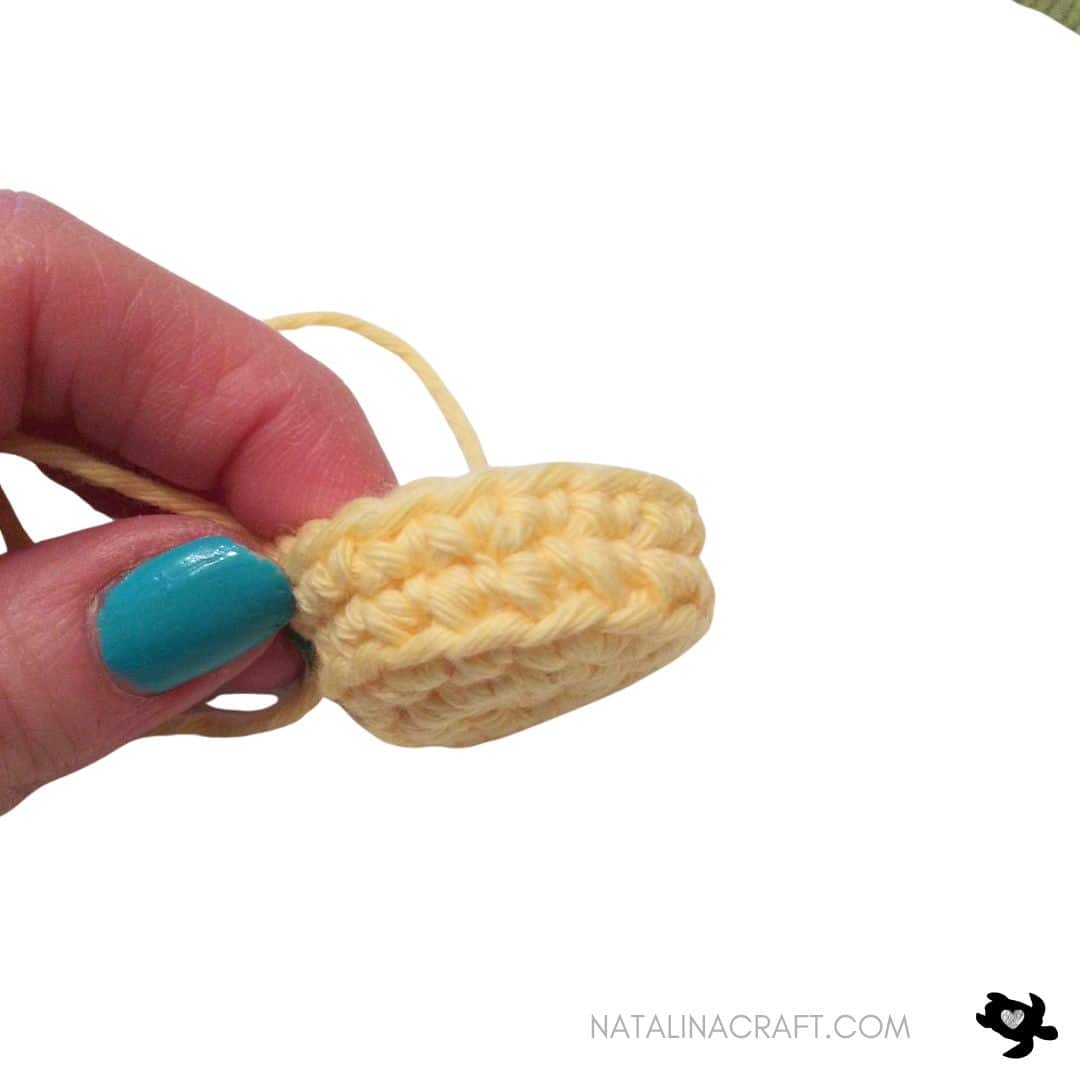
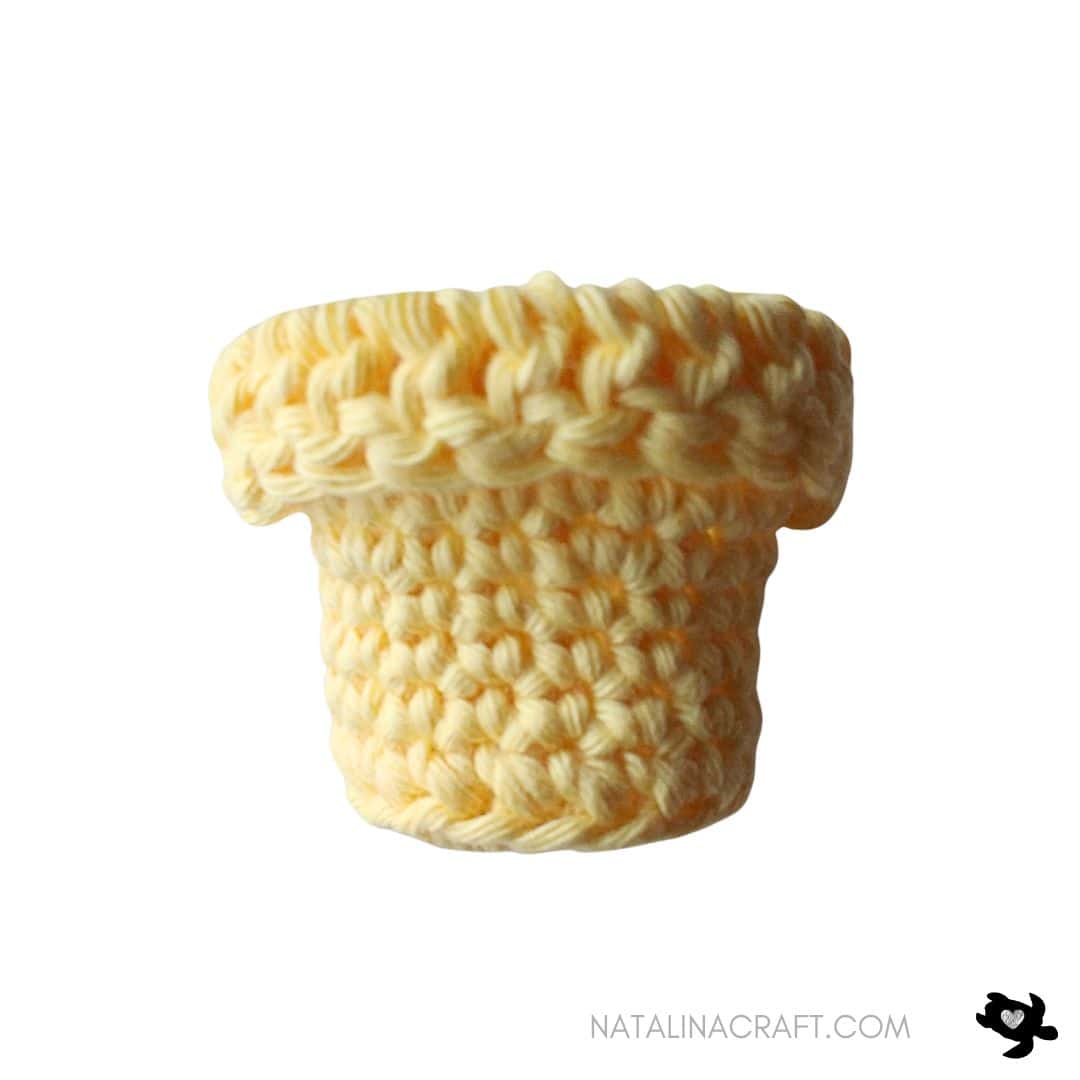
PART 3: The Pot
You will need yellow yarn (or any color you like), a D-3 (3.5 mm) hook, and a small amount of plastic pellets.
- Round 1: 6 sc in a magic ring. (6)
- Round 2: inc 6 times. (12 sc)
- Round 3: [1 sc in next st, 1 inc in next st] x6. (18)
- Round 4: working in back loops only (blo): 1 sc in all st. (18)
- Round 5: 1 sc in all st. (18)
- Round 6: 1 sc in all st. (18)
- Round 7: [1 sc in next 2 st, 1 inc in next st] x6. (24)
- Round 8: 1 sc in all st. (24)
- Round 9: 1 sc in all st. (24)
- Round 10: 1 sc in all st. (24)
- Round 11: 1 sc in all st. (24)
- Round 12: 1 DC in all st. (24)
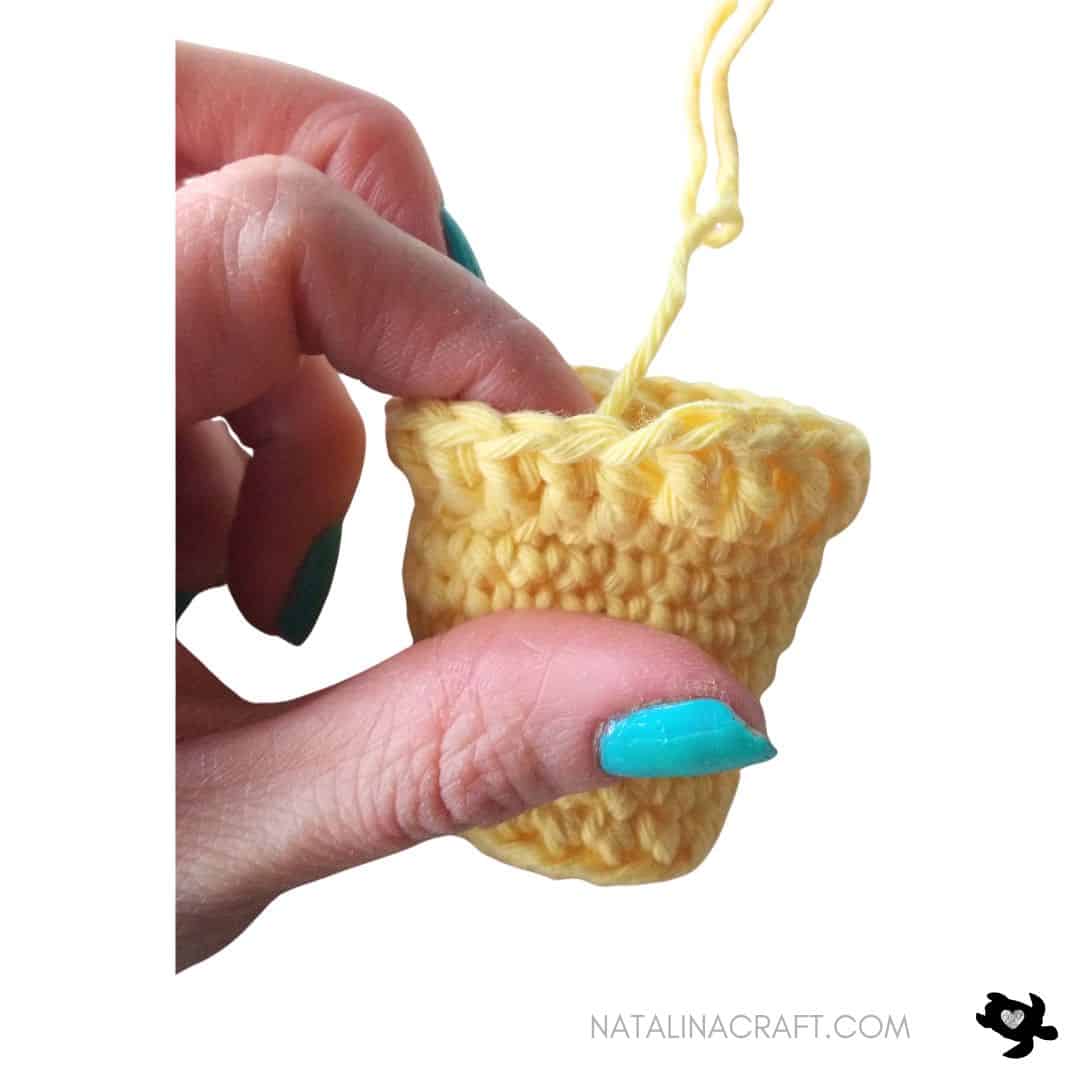
Yarn over and cut the yarn.

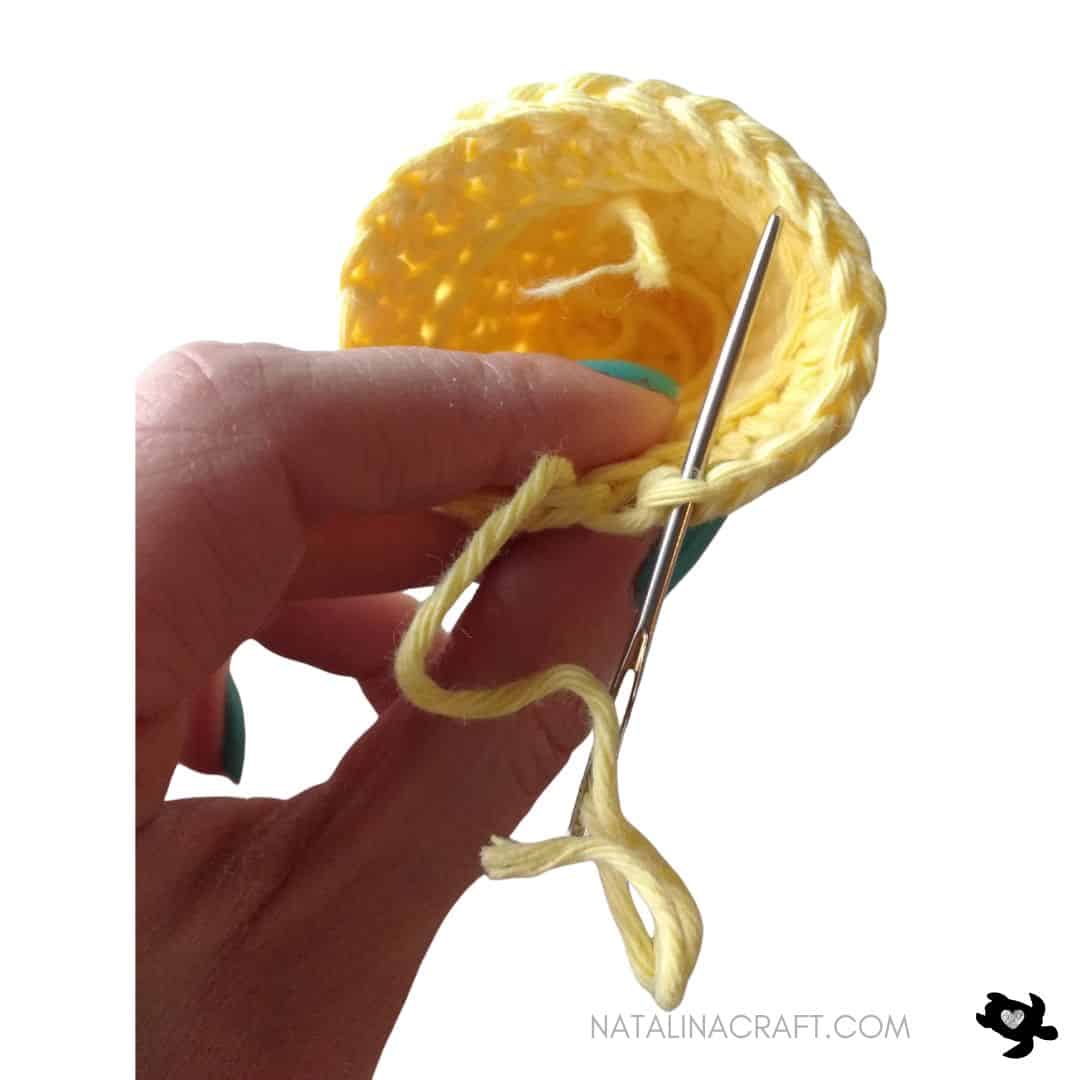
To finish the pot edge:
Skip the next stitch and insert your tapestry needle into the following stitch to create a new front loop. Insert the needle under the back loop of the previous stitch to create a new back loop. This technique creates a clean, seamless edge.
Turn the last round of double crochet outward to form the rim of the pot.


PART 4: The Soil
With brown yarn and a D-3 (3.5 mm) hook:
- Round 1: 6 sc in a magic ring. (6)
⚠️ Do not close the magic ring too tightly! - Round 2: inc 6 times. (12 sc)
- Round 3: [1 sc in next st, i1 nc in next st] x6. (18)
Slip stitch, fasten off, and leave a long tail to sew the soil securely into the pot.

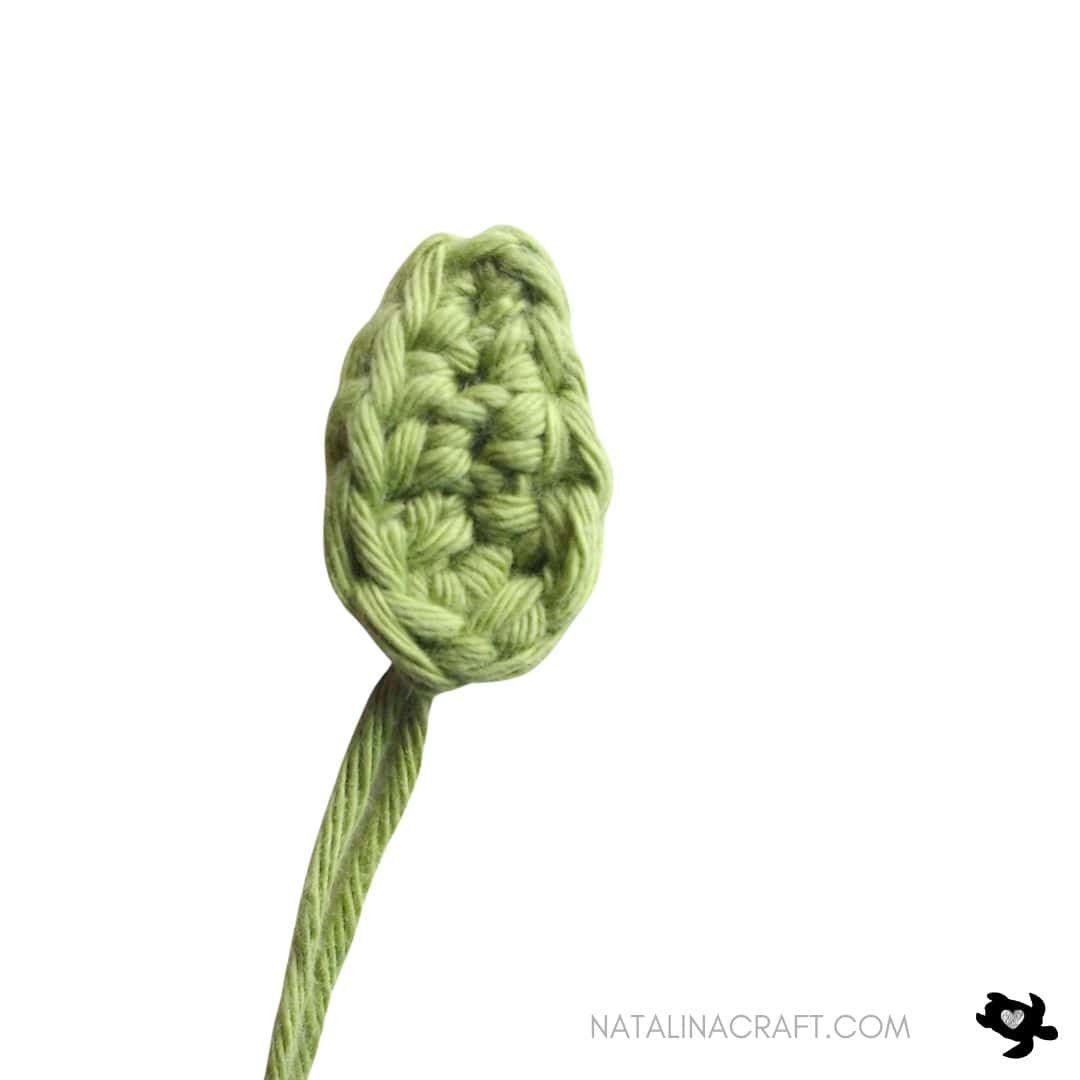
PART 5: The Leaf
With green yarn and a D-3 (3.5 mm) hook:
ch 7
1 sc in 2nd ch from hook, 1 sc in next 2 ch, 1 HDC in next 2 ch, 1 DC in next ch, 3 DC in next ch.
Working on the opposite side of the chain: 1 DC in next ch, 1 HDC in next 2 ch, 1 sc in next 2 ch. (13 stitches)
Join with a slip stitch to the first single crochet.
Fasten off, leaving a long tail to attach to the stem.
PART 6: Assembling the Flower
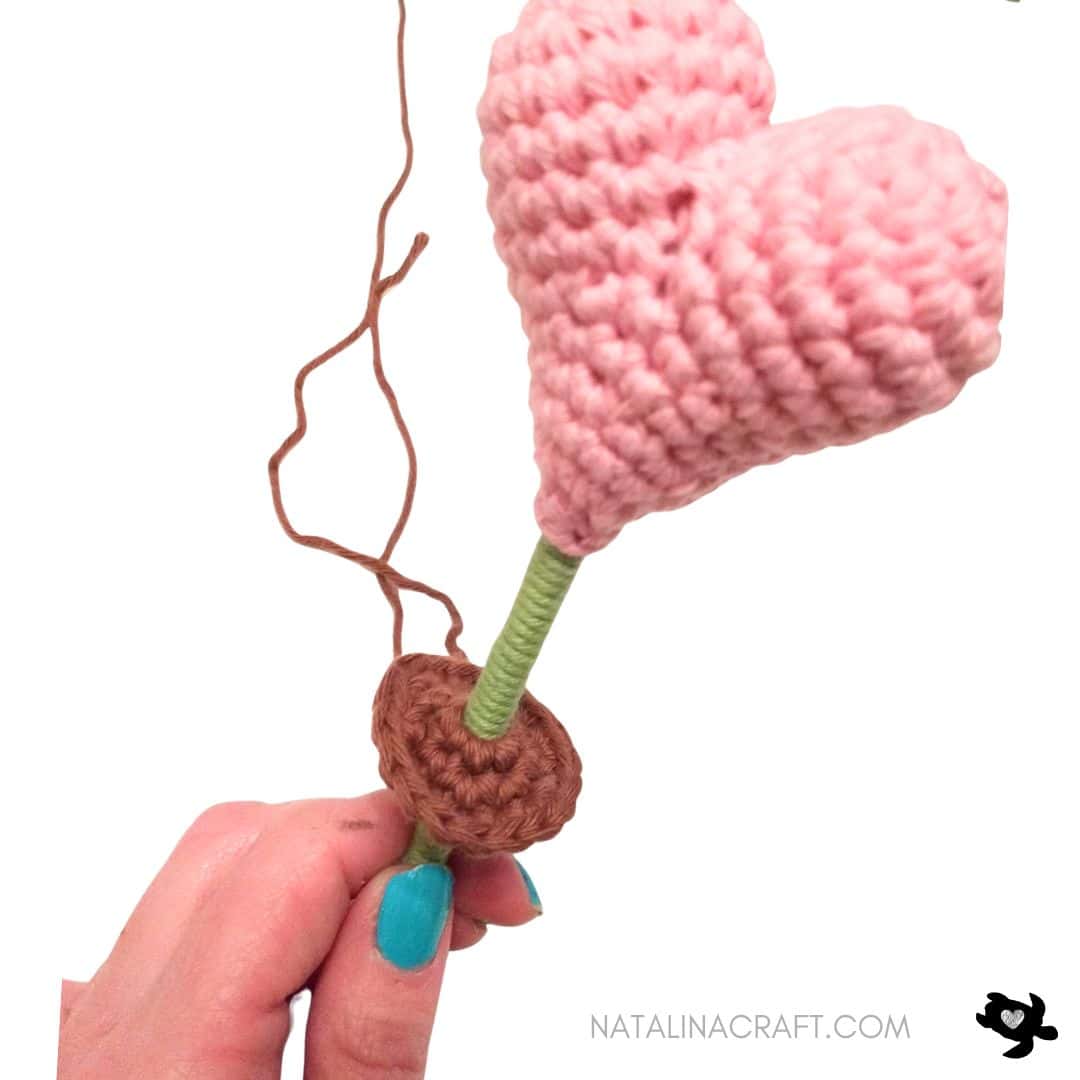
Insert the lollipop stick into the magic ring of the soil piece. Decide how tall you want your flower to be. I left about 1.5” (4 cm) between the base of the heart and the soil. Once satisfied, close the magic ring tightly around the stick.
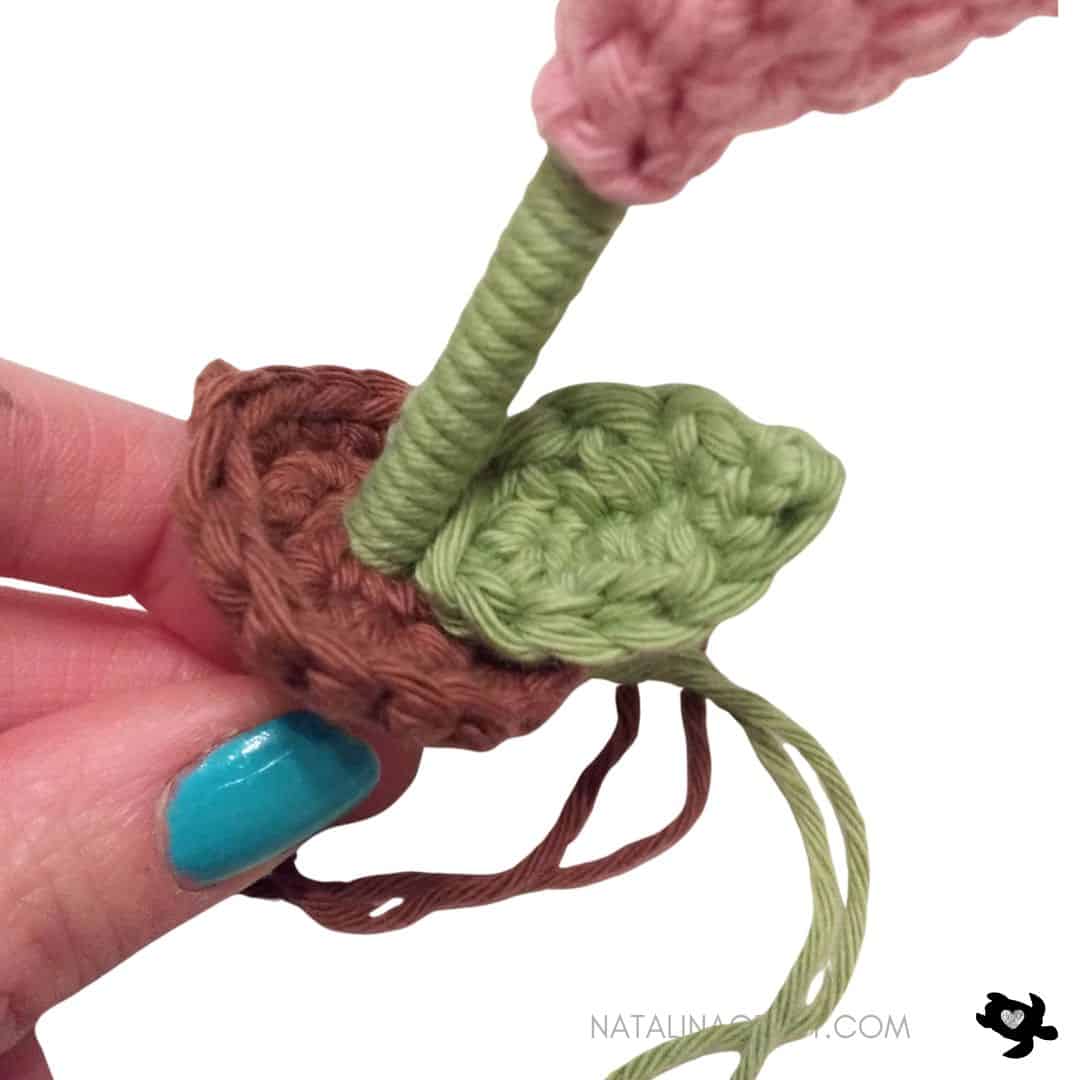
Attach the leaf at the base of the stem, just above the soil. For extra security, you can tie the yarn ends together underneath the soil.
Sew the soil into the pot. I added a ceramic magnet at the bottom of the pot for extra weight, then filled it with plastic pellets.
Finally, sew the soil piece to the pot just under the last round of double crochet so the seam remains invisible.


🎉 Congratulations!
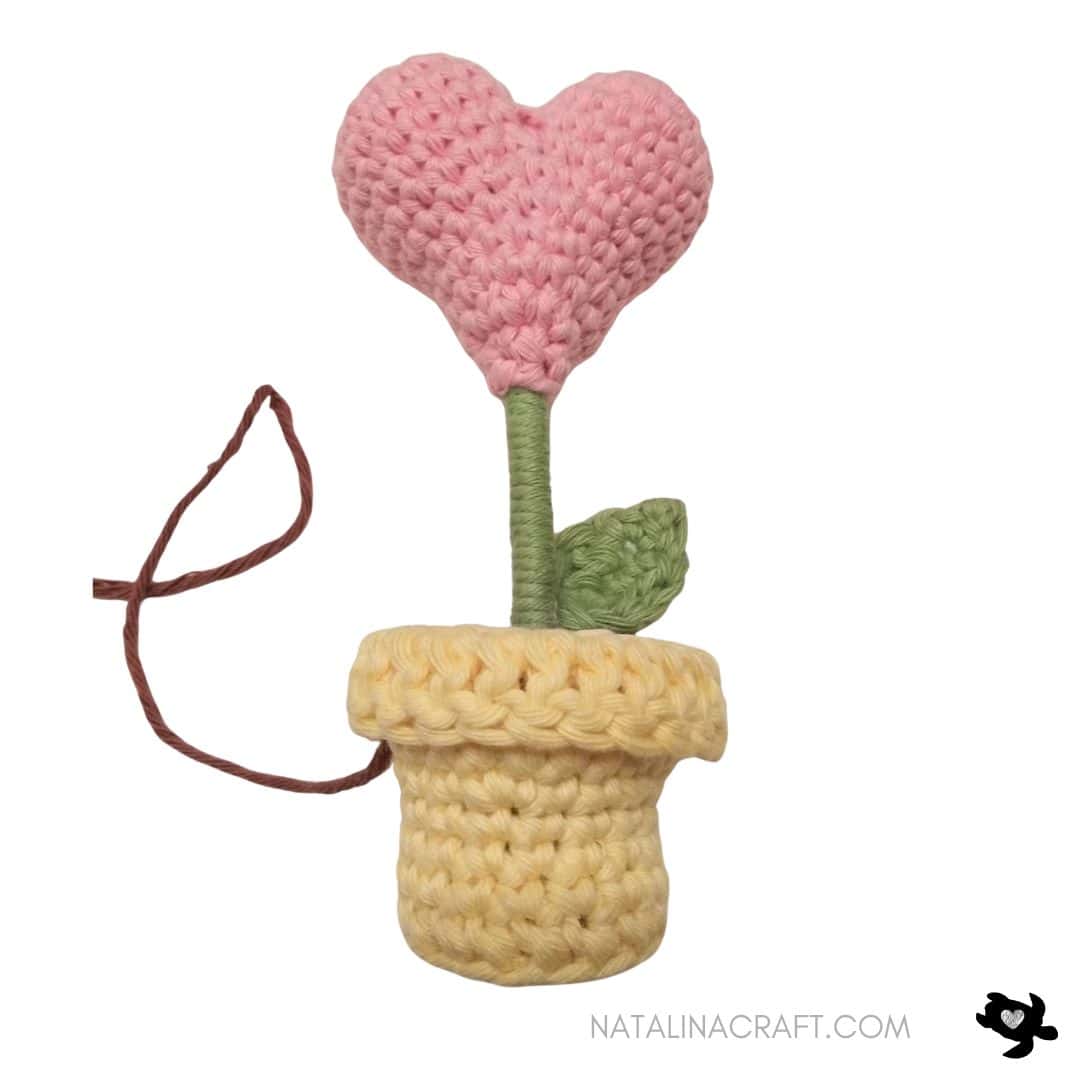
Congratulations—you’ve finished your Valentine’s Day Crochet Flower! 🌸💖
I hope you enjoyed making this heart-shaped flower as much as I enjoyed designing it. Whether you created it as a gift or kept it for yourself, you now have a sweet handmade piece that’s sure to bring smiles.
I would love to see your finished project! Please share your creations on social media using #natalinacraft, or post them in my Facebook group so we can all admire your beautiful work.
Thank you so much for crocheting with me!

Copyright Notice
All rights reserved. This pattern and all accompanying photographs are the property of Natalina Craft and are protected by copyright law. This pattern is for personal use only. Any unauthorized reproduction, redistribution, or publication of this pattern, in whole or in part, is strictly prohibited.
You are welcome to sell finished items made from this pattern in small quantities. While crediting Natalina Craft as the designer is not required, it is always greatly appreciated—especially when selling online—so others can find the original pattern.
Thank you for respecting these guidelines.
Heart Flower Crochet Pattern
Crochet flower: Heart shaped flower
Instructions
Crochet Pattern - Free Crochet Pattern Heart Flower
Start Here
- Please read the entire pattern before starting.
- This pattern is written using US crochet terms.
Size
Approx. 5.5” (14.5 cm) tall when made with the indicated yarn.
Material
- Worsted in 3 different colors. I used pink, green and yellow.
- Size D-3 (3.5 mm) crochet hook
- Poly-Fil fiberfill stuffing
- Tapestry needle
- 1 lollipop stick
- Hot glue gun
- A small amount of plastic pellets
- 1 ceramic magnet
What Did I Use?
Light worsted-weight yarn in pink, green, yellow, and brown.I used Rico Creative Cotton from Wool Warehouse in:
- Pink (Color 0)
- Pistachio (Color 41)
- Vanilla (Color 62)
- Cinnamon (Color 57)
Abbreviations (US terms)
- chain (ch)
- magic ring (mr)
- single crochet (sc)
- double crochet (DC)
- half double crochet (HDC)
- increase (inc)
- invisible decrease (dec)
- back loop only (blo)
PART 1: The Heart
We start by making a crochet heart.
- Work in rounds. Do not turn unless specified.
- Use a stitch marker if needed to mark the first stitch of each round.
- Round 1: 6 sc in a magic ring. (6)
- Round 2: inc 6 times. (12 sc)
- Round 3: [1 sc in next st, 1 inc in next st] x6. (18)
- Rounds 4 to 6: 1 sc in all st (18)
Fasten off and weave in the ends. This piece is called Part A.
Repeat Rounds 1–6 to make the second half of the heart .Do not fasten off after Round 6. This piece is called Part B.
Joining the Heart
- Round 7:
Join Part A and Part B. With Part B still on the hook, hold Part A next to it, aligning the stitches.
Insert your hook through one stitch of Part A and the next stitch of Part B, yarn over, and make 1 sc. Repeat this for the next 5 stitches (6 joining sc total).
Continue working 1 sc around the remaining stitches of both parts. (24)
- Round 8: [1 sc in next 2 st, 1 dec in next st] x6 (18)
- Round 9: sc in all st (18)
Start stuffing firmly, shaping the heart as you go.
- Round 10: [sc in next 4 st, dec in next st] x3 (15)
- Round 11: sc in all st (15)
- Round 12: [sc in next st, dec in next st] x5 (10)
Continue stuffing firmly.Do not cut the yarn.
PART 2: The Stem
For the stem, you will need a small amount of green yarn, a lollipop stick, and hot glue.
Wrap the lollipop stick tightly with green yarn.Secure the yarn with a small amount of hot glue at the top and bottom of the stick.
Insert the wrapped stick into the heart and close the heart tightly.
You now have a crochet heart lollipop—perfect as a gift on its own!
PART 3: The Pot
You will need yellow yarn (or any color you like), a D-3 (3.5 mm) hook, and a small amount of plastic pellets.
- Round 1: 6 sc in a magic ring. (6)
- Round 2: inc 6 times. (12 sc)
- Round 3: [1 sc in next st, 1 inc in next st] x6. (18)
- Round 4: working in back loops only (blo): 1 sc in all st. (18)
- Round 5: 1 sc in all st. (18)
- Round 6: 1 sc in all st. (18)
- Round 7: [1 sc in next 2 st, 1 inc in next st] x6. (24)
- Round 8: 1 sc in all st. (24)
- Round 9: 1 sc in all st. (24)
- Round 10: 1 sc in all st. (24)
- Round 11: 1 sc in all st. (24)
- Round 12: 1 DC in all st. (24)
Yarn over and cut the yarn.
To finish the pot edge:Skip the next stitch and insert your tapestry needle into the following stitch to create a new front loop. Insert the needle under the back loop of the previous stitch to create a new back loop. This technique creates a clean, seamless edge.
Turn the last round of double crochet outward to form the rim of the pot.
PART 4: The Soil
With brown yarn and a D-3 (3.5 mm) hook:
- Round 1: 6 sc in a magic ring. (6)⚠️ Do not close the magic ring too tightly!
- Round 2: inc 6 times. (12 sc)
- Round 3: [1 sc in next st, i1 nc in next st] x6. (18)
Slip stitch, fasten off, and leave a long tail to sew the soil securely into the pot.
PART 5: The Leaf
With green yarn and a D-3 (3.5 mm) hook:
ch 7
1 sc in 2nd ch from hook, 1 sc in next 2 ch, 1 HDC in next 2 ch, 1 DC in next ch, 3 DC in next ch.Working on the opposite side of the chain: 1 DC in next ch, 1 HDC in next 2 ch, 1 sc in next 2 ch. (13 stitches)
Join with a slip stitch to the first single crochet.Fasten off, leaving a long tail to attach to the stem.
PART 6: Assembling the Flower
Insert the lollipop stick into the magic ring of the soil piece. Decide how tall you want your flower to be. I left about 1.5” (4 cm) between the base of the heart and the soil. Once satisfied, close the magic ring tightly around the stick.
Attach the leaf at the base of the stem, just above the soil. For extra security, you can tie the yarn ends together underneath the soil.
Sew the soil into the pot. I added a ceramic magnet at the bottom of the pot for extra weight, then filled it with plastic pellets.
Finally, sew the soil piece to the pot just under the last round of double crochet so the seam remains invisible.
🎉 Congratulations!
Congratulations—you’ve finished your Valentine’s Day Crochet Flower! 🌸💖I hope you enjoyed making this heart-shaped flower as much as I enjoyed designing it. Whether you created it as a gift or kept it for yourself, you now have a sweet handmade piece that’s sure to bring smiles.
I would love to see your finished project! Please share your creations on social media using #natalinacraft, or post them in my Facebook group so we can all admire your beautiful work.
Thank you so much for crocheting with me!
Copyright Notice
All rights reserved. This pattern and all accompanying photographs are the property of Natalina Craft and are protected by copyright law. This pattern is for personal use only. Any unauthorized reproduction, redistribution, or publication of this pattern, in whole or in part, is strictly prohibited.
You are welcome to sell finished items made from this pattern in small quantities. While crediting Natalina Craft as the designer is not required, it is always greatly appreciated—especially when selling online—so others can find the original pattern.Thank you for respecting these guidelines.
Thanks for the beautiful pattern!!
Thank you very much for your kind words.
Köszönöm ezt a mintát!
Nagyon jó és érthető a minta leírás.
Külön köszönöm a mellékelt fotókat, és magyarázatoka
Üdvözletemet küldöm :
Zsuzsa .
Thank you very much for your kind words!