
Get ready to add some wild stripes to your projects! 🦓✨
I’m thrilled to share my latest free crochet pattern: a Zebra Appliqué. Whether you want to spice up a t-shirt, decorate a tote bag, or create a fun patch for a blanket, this little zebra is the perfect touch.
Don’t forget to join my facebook group (here), you can ask your questions, share your finished projects and I will regularly ask you what pattern you would like to see next (or you can even suggest something even if I am not asking!).
If you make this cute zebra crochet applique, snap a photo and hashtag it #natalinacraft. I’d love to see your creations on Instagram , Facebook. I love to see your photos! I hope you will enjoy and understand the pattern. If you have any questions, feel free to write to me.
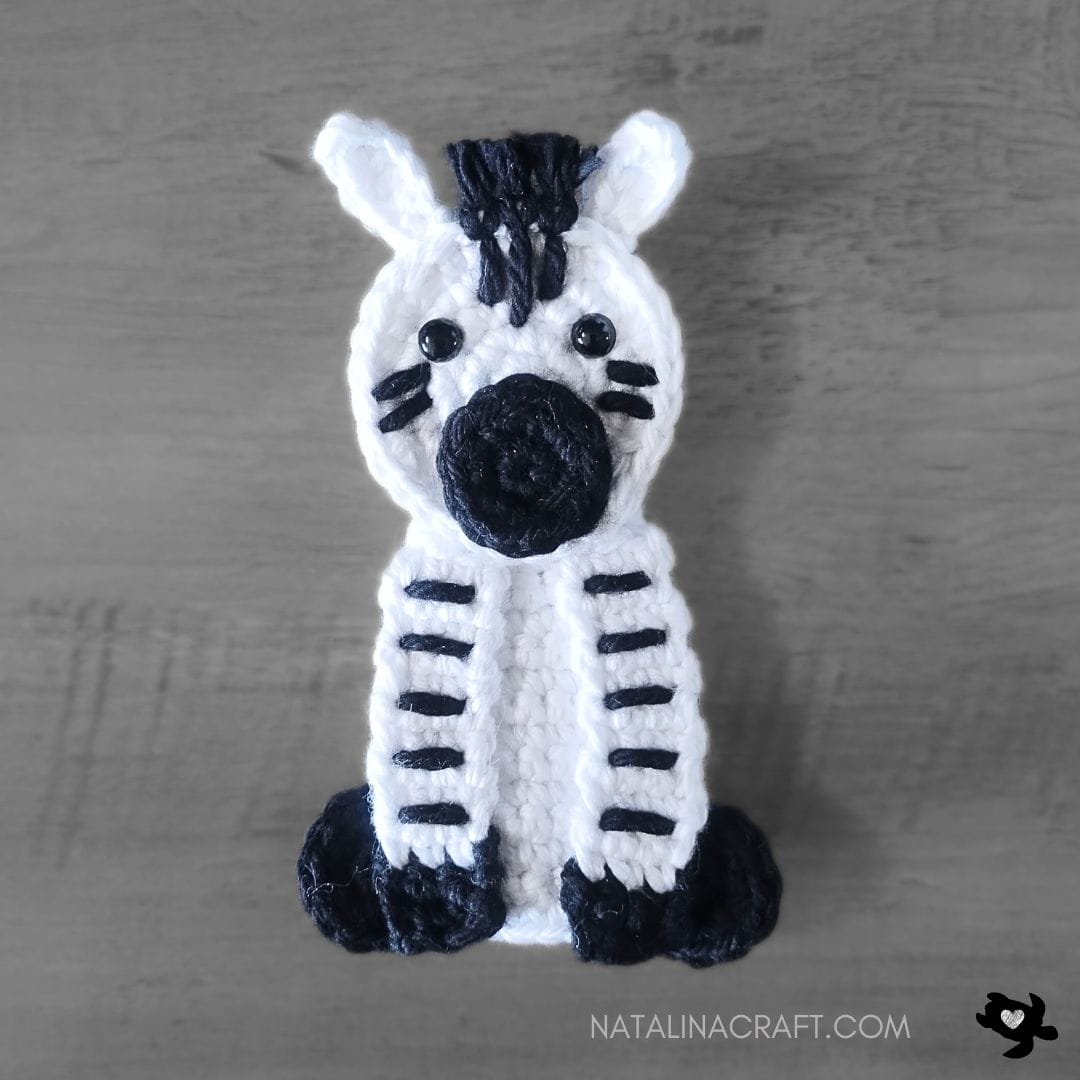
Crochet zebra appliqué
Please read the entire pattern before starting.
- Terms: US Crochet Terms
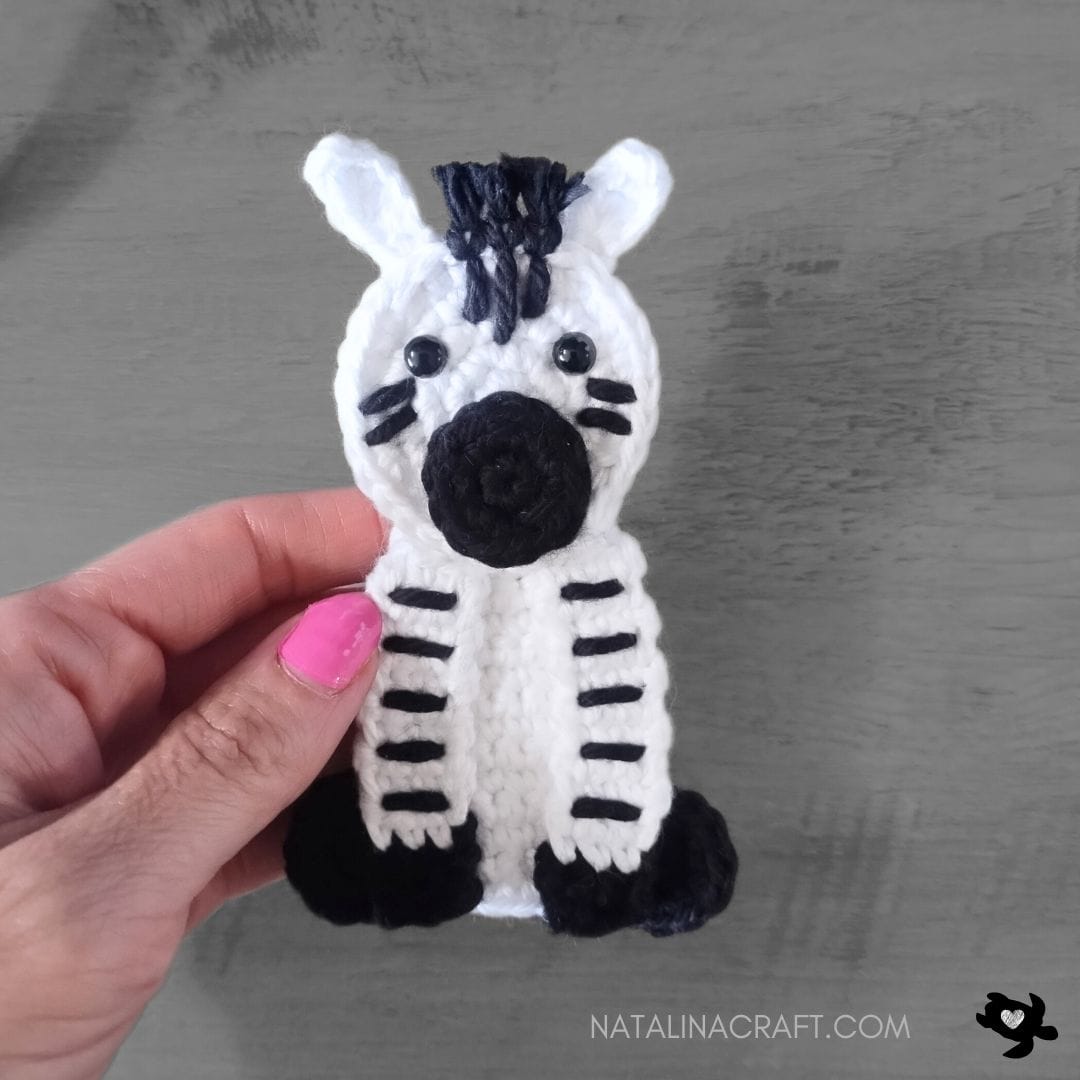
- Finished Size: Approx. 4 inches/10 cm tall
- Skill Level: Beginner/Intermediate
Parts:
- 1 body
- 1 head
- 1 muzzle
- 2 ears
- 2 front legs
- 2 back legs
Material:
- Yarn: Worsted-weight yarn in white and black
- Size 2.75 mm crochet hook
- 2 black safety eyes (6 mm)
- Stitch markers (if needed)
- Tapestry needle
Abbreviations:
- chain (ch)
- magic ring (mr)
- single crochet (sc)
- increase (inc)
- invisible decrease (dec)
- half double crochet (hdc)
- double crochet (dc)
- slip stitch (sl st)
- st(s): stitch(es)
Looking for more Applique ideas?

Pattern: How do you crochet a Zebra appliqué?
Head
- Work in rounds; do not turn unless specified. If needed, use a stitch marker for the first stitch of each round.
With a 2.75 mm crochet and white.
- Round 1: 6 sc in a magic ring. (6)
- Round 2: inc 6 times. (12)
- Round 3: [1 sc in next st, 1 inc in next st] x6. (18)
- Round 4: [1 sc in next 1 st, 1 inc in next st, 1 sc in next 1 st ] x6. (24)
- Round 5: [1 inc in next st, 1 sc in next 3 st] x6. (30)
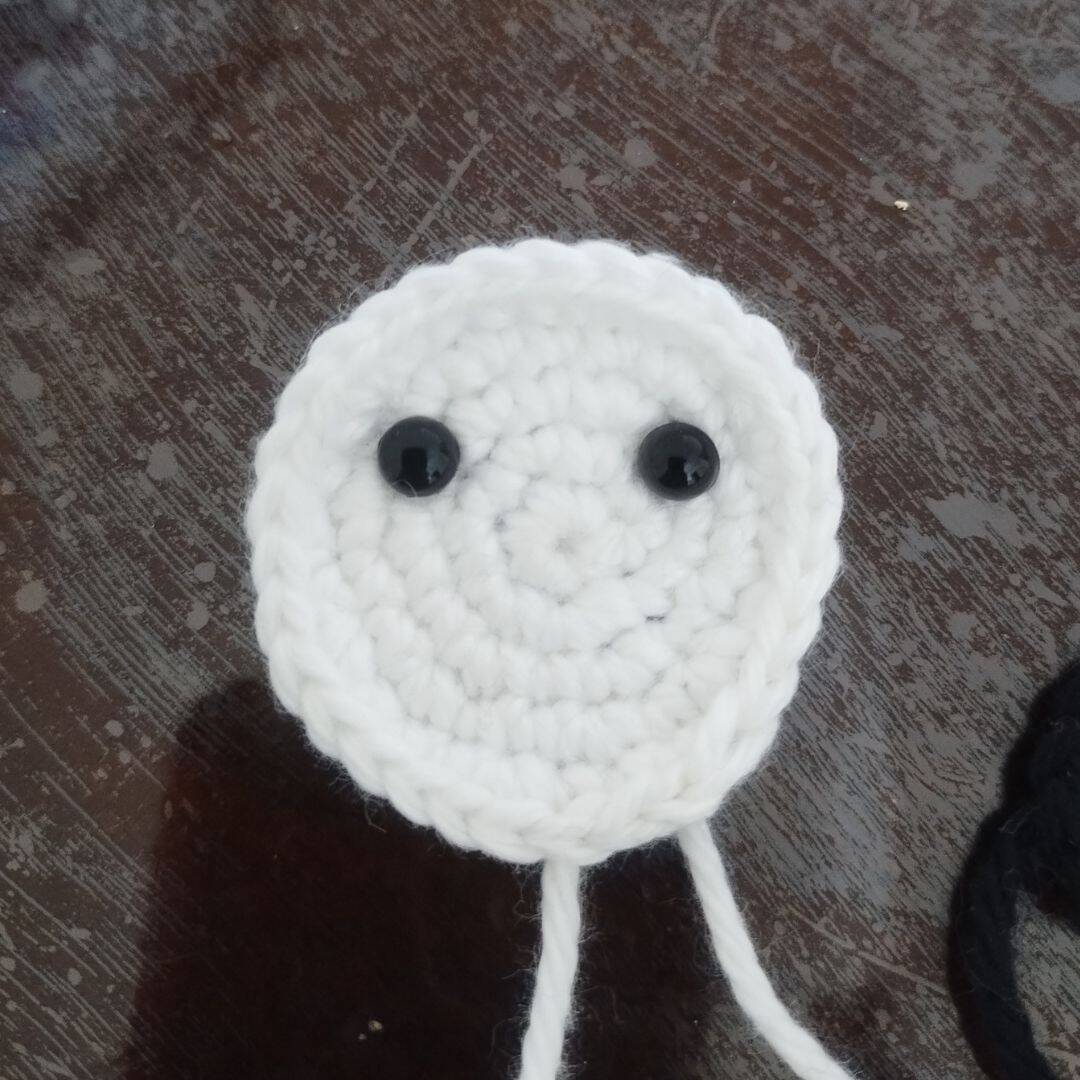
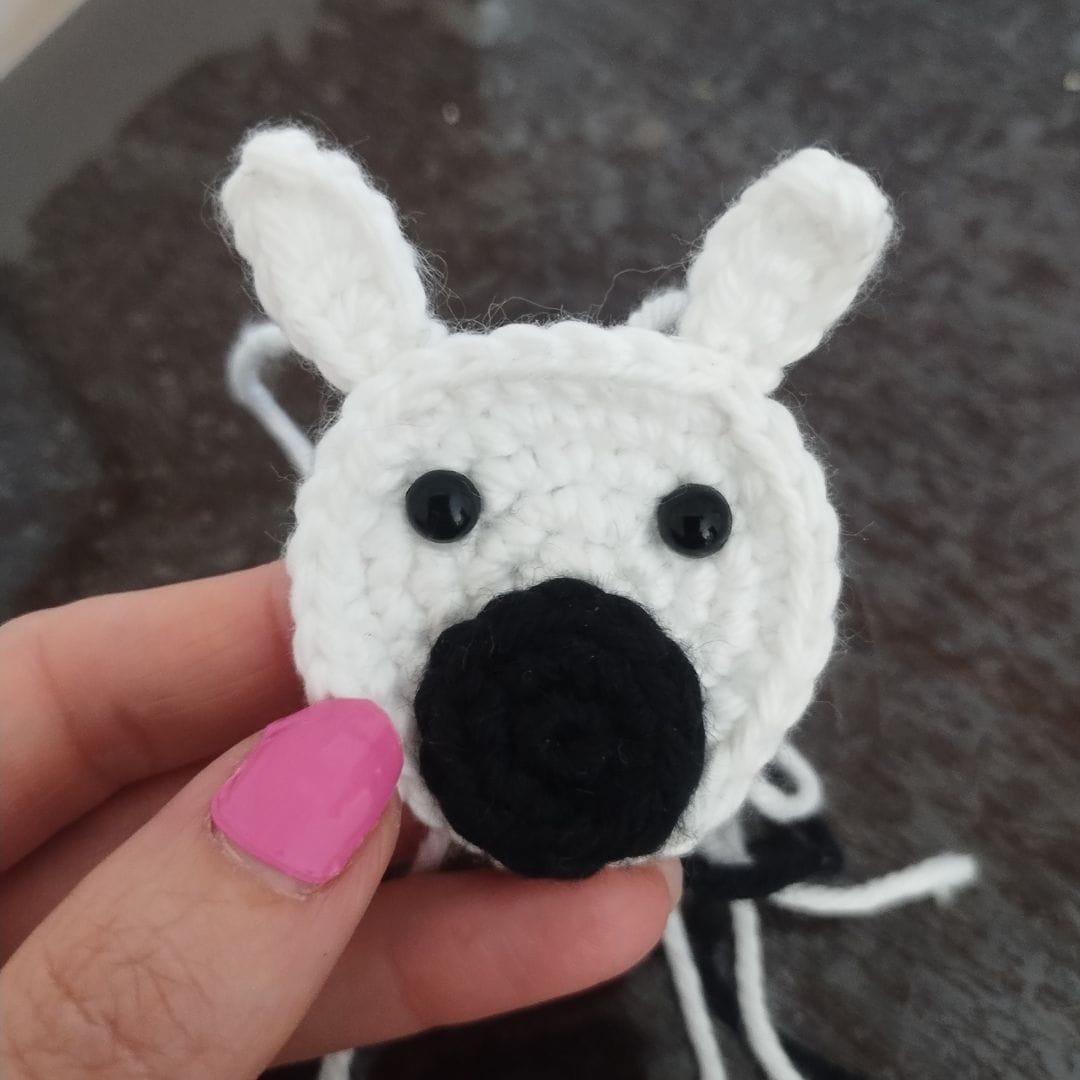
Cut the yarn, and fasten off. Put the eyes between rounds 3 and 4, spaced by 5 st.
Muzzle
- Work in rounds; do not turn unless specified. If needed, use a stitch marker for the first stitch of each round.
With a 2.75 mm crochet and black.
- Round 1: 6 sc in a magic ring. (6)
- Round 2: [1 inc in all st]. (12)
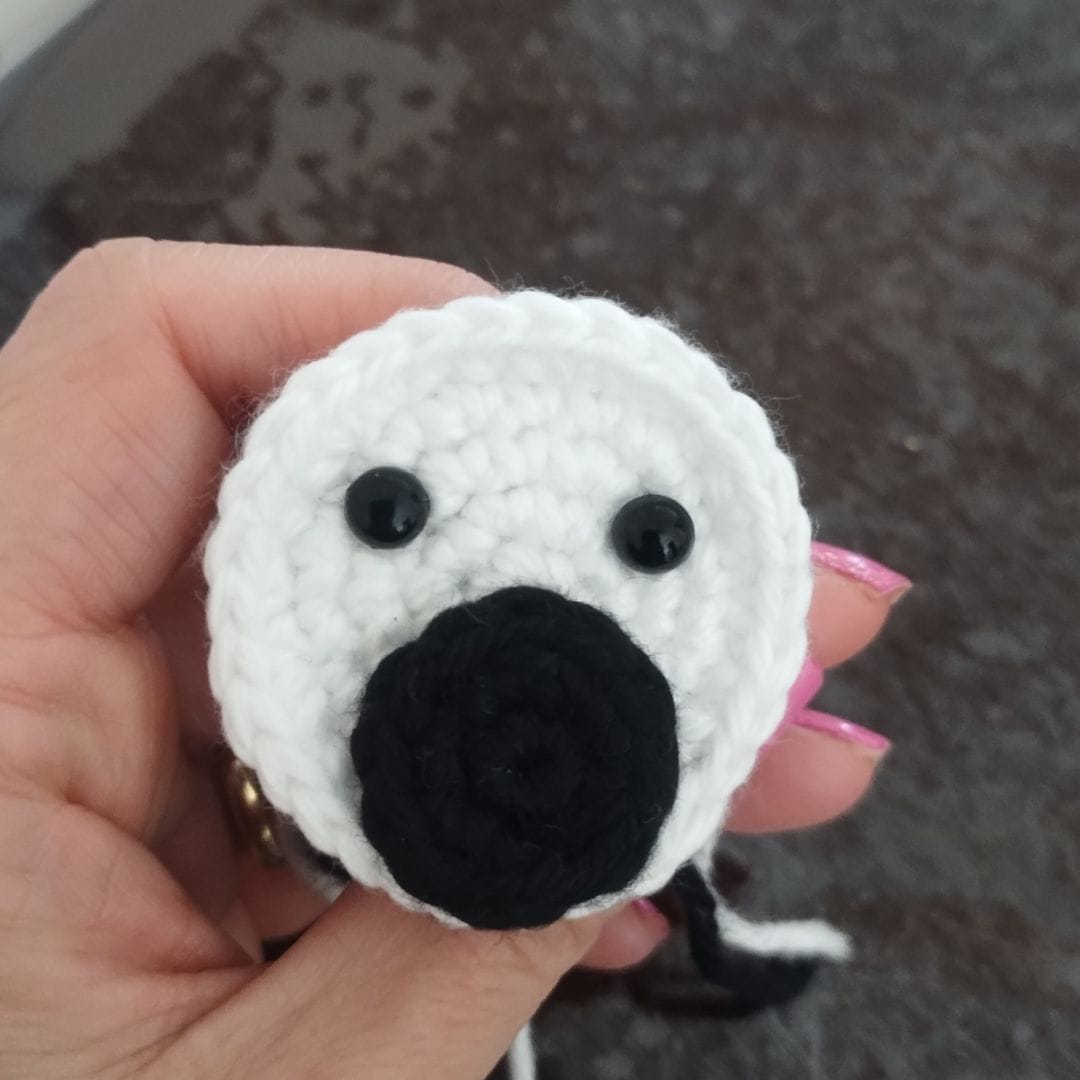
Cut the yarn (leave a long tail for sewing) and fasten off. With your tapestry needle, sew the muzzle to the head. See the pictures below.
Ears (make 2)
- Work in rows.
With a 2.75 mm crochet and white.
- Row 1: ch 6. (6)
- Row 2: starting in the 2nd ch from the hook: 1 sc, 1 hdc, 1 dc, 1 hdc, 1 sc. (5)
Cut the yarn (leave a long tail for sewing). With your tapestry needle, sew the ears on the head, spaced by 3 st and over 2 st.
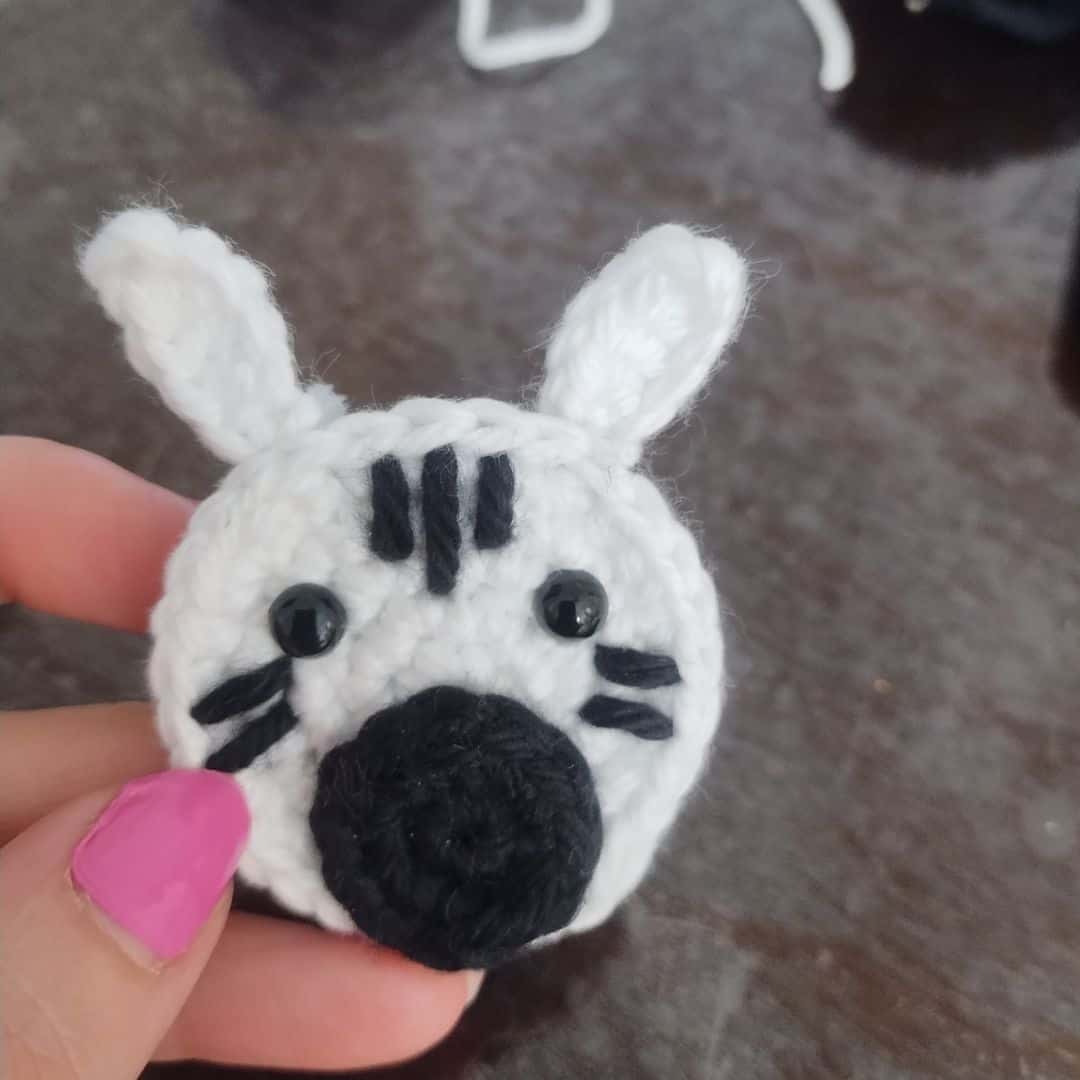
Stripes (head)
With your tapestry needle and the black yarn, add some stripes to the head. I added 3 at the top of the head, between the ears: the left one over 2 st, the middle one over 3 st and the right one over 2 st. I added two stripes on each side of the head, over 2 stitches. The picture below can help you.
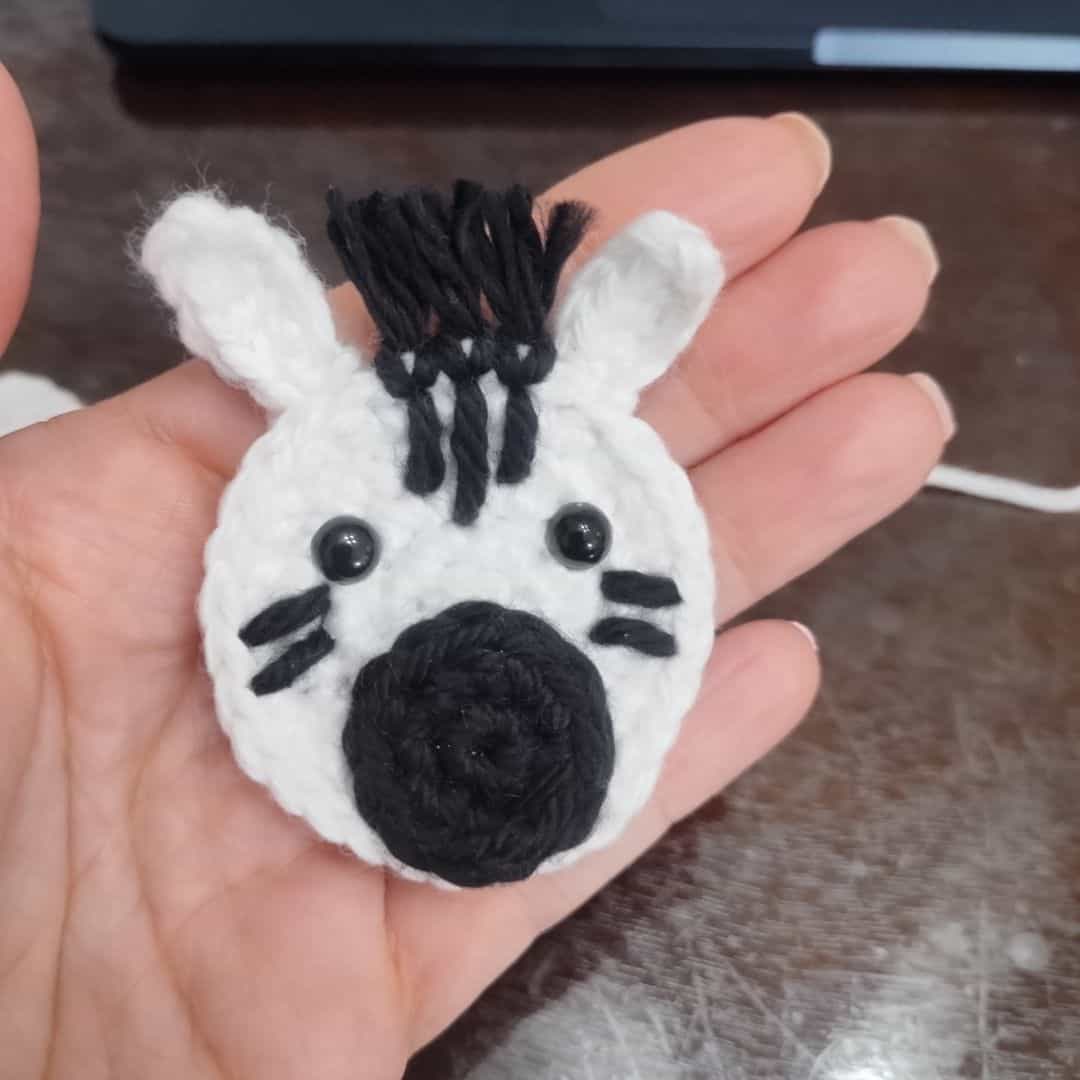
Mane
With black yarn:
Cut three strands of yarn, approximately 4 inches (10 cm) long. Fold each strand in half.
Using your hook, insert the folded yarn at the top of the head (above each stripe), pulling it through by the folded loop. Pass the loose ends through the loop and tighten gently to secure.
Separate the strands to make the hair fluffier, then trim to the desired length.
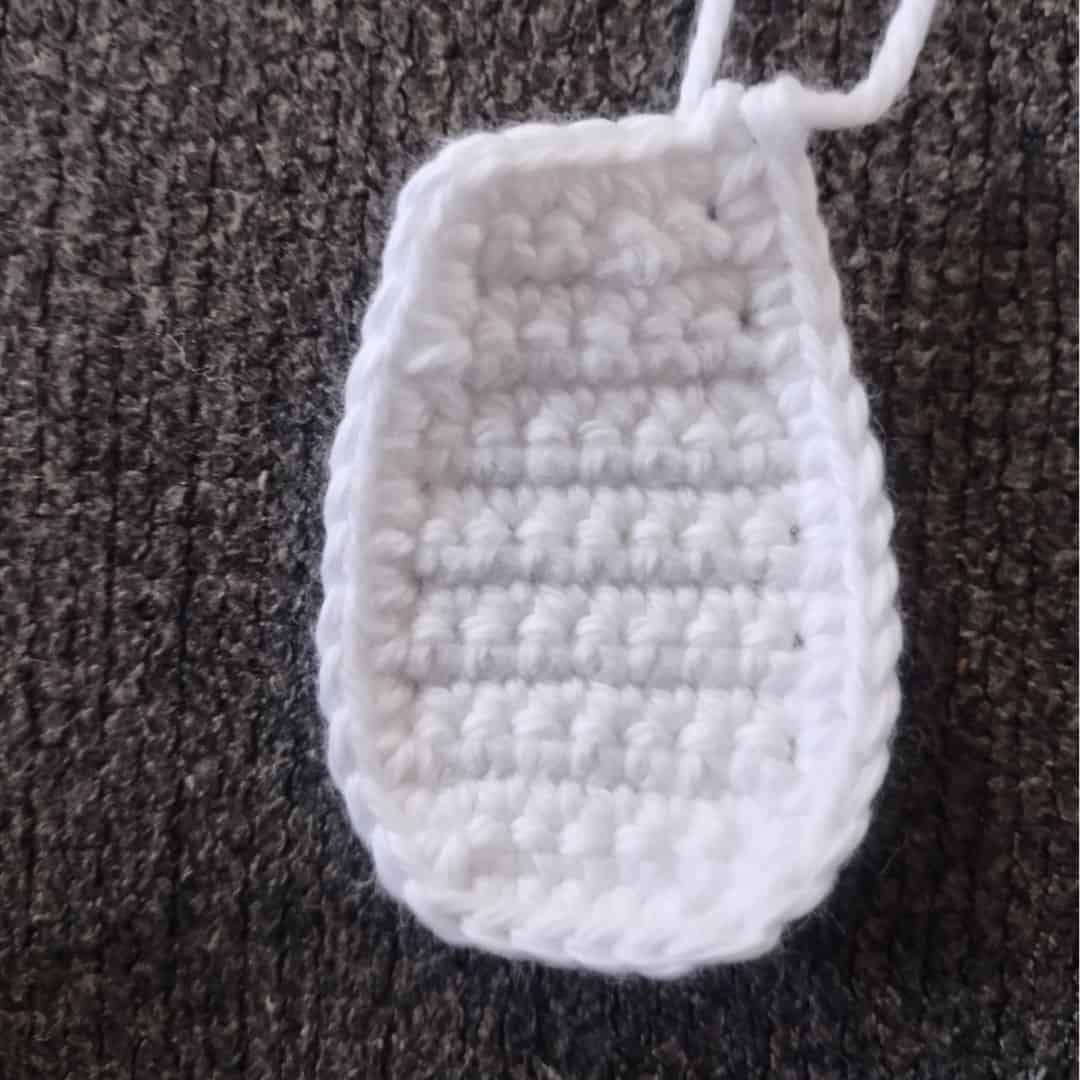
Body
- Work in rows.
With a 2.75 mm crochet and white.
- Row 1: ch 7. (7)
- Row 2: starting from the 2nd ch from the hook: 1 sc in the next 6 ch. (6)
- Row 3: ch1, turn; 1 inc, 1 sc in the next 4 st, 1 inc. (8)
- Rows 4 to 10: ch1, turn; 1 sc in all st. (8)
- Row 11: ch1, turn; 1 dec, 1 sc in the next 4 st, 1 dec. (6)
- Rows 12 to 13: ch1, turn; 1 sc in all st. (6)
- Row 14: ch1, turn; 1 sc in the next 2 st, 1 dec, 1 sc in the next 2 st. (5)
- Row 15: ch1, turn; 1 sc in all st. (5)
- do not turn, make 1 sc evenly all around (you do not want to crochet too tight for this part – you can also use a bigger size crochet). (approx. 32 st)
Cut the yarn (leave a long tail to sew the head on) and fasten off.
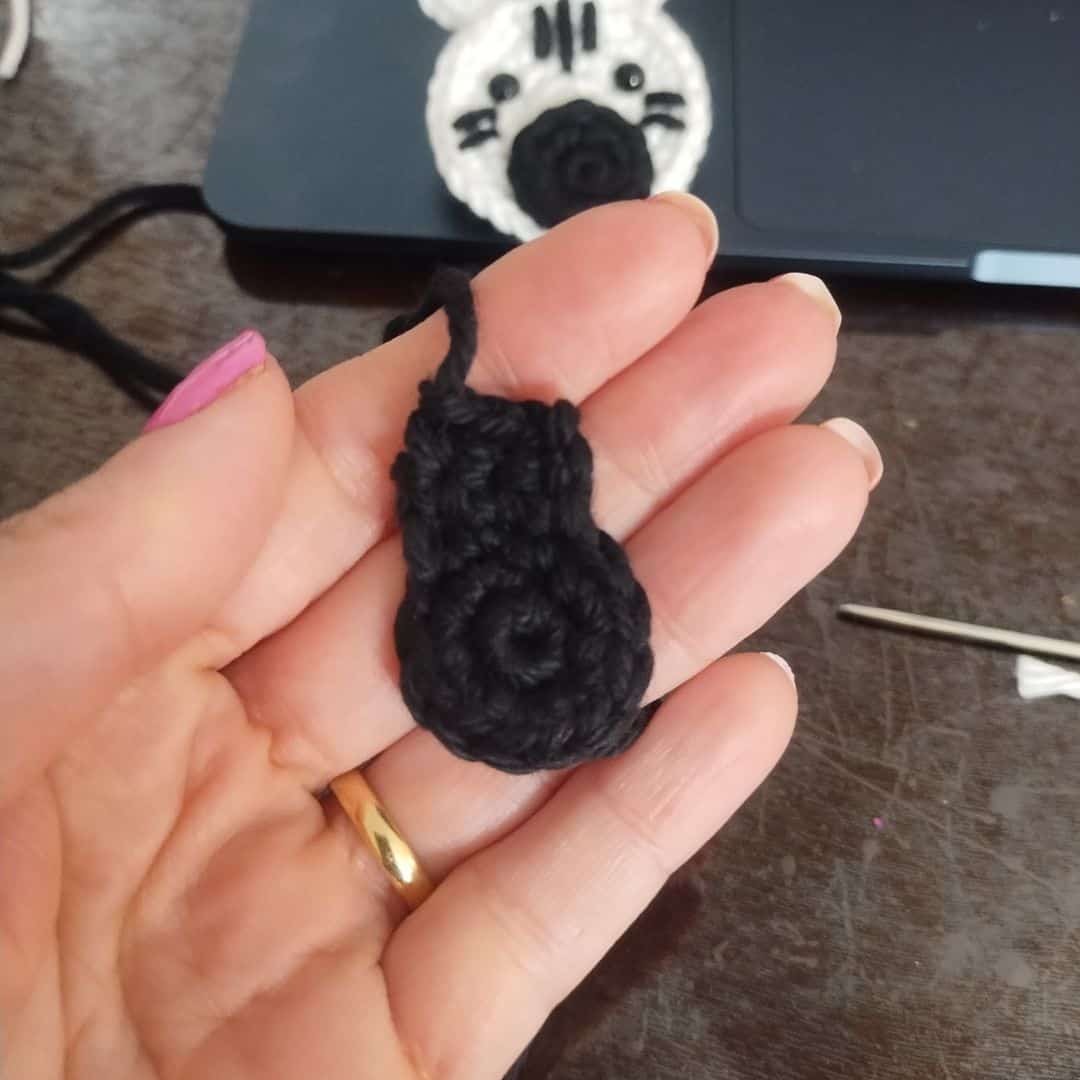
Back legs (make 2)
- Work in rounds; do not turn unless specified. If needed, use a stitch marker for the first stitch of each round.
With a 2.75 mm crochet and black.
- Round 1: 6 sc in a magic ring. (6)
- Round 2: [1 inc in all st]. (12)
We will now be working in rows:
- Row 3: 1 sc in the next 3 st. (3)
- Row 4: ch1, turn; 1 sc in all st. (3)
- Row 5: ch1, turn; 1 sc in all st. (3)
Cut the yarn (leave a long tail for sewing) and fasten off. With your tapestry needle, sew the back legs behind the body (I used a little piece of white yarn to sew them). Position them so only the “foot” (the rounded part) is visible from the front.

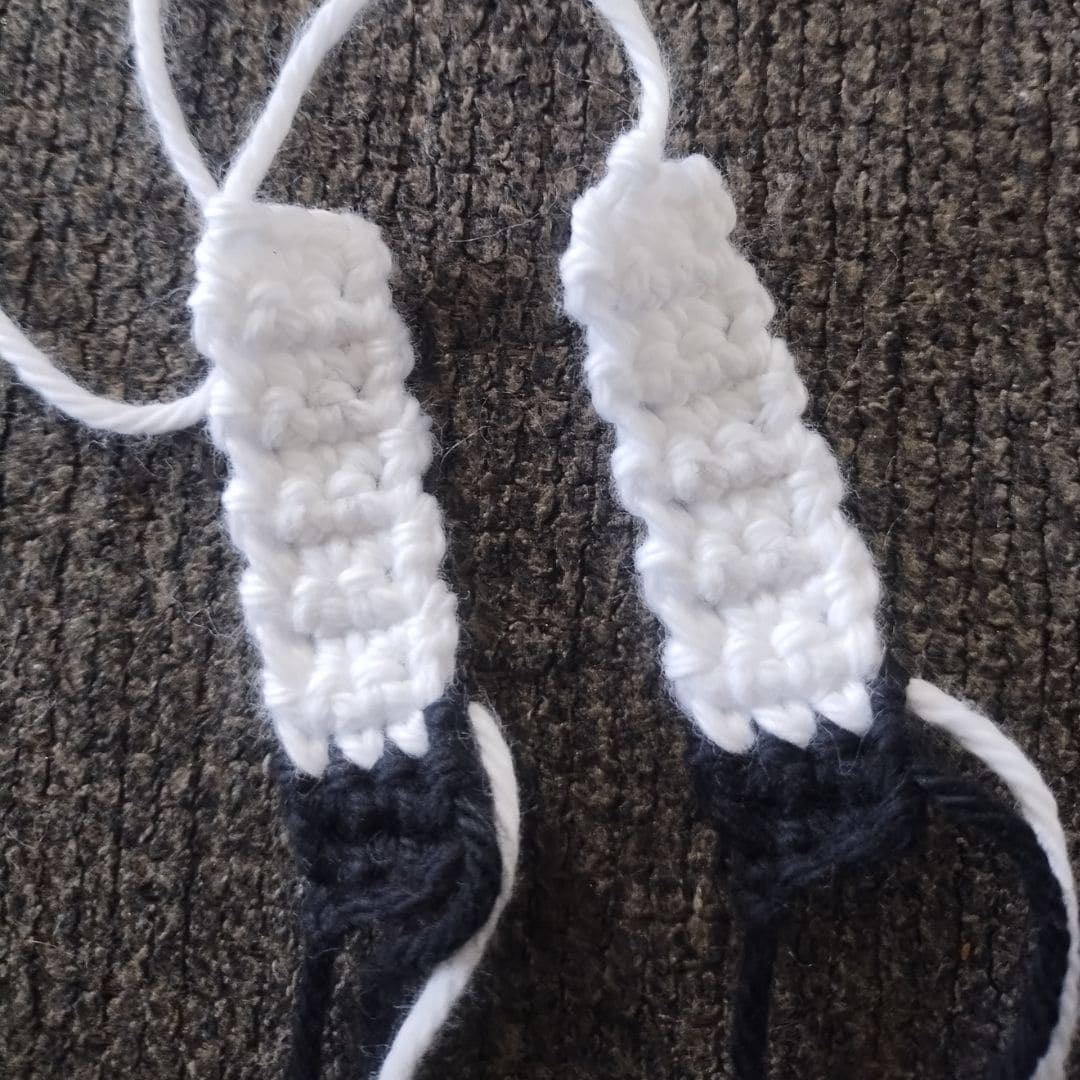
Front legs (make 2)
- Work in rows.
With a 2.75 mm crochet and black
- Row 1: ch 4. (4)
- Row 2: starting in the 2nd ch from the hook: 1 sc in all st. (3)
- Rows 3: ch1, turn; 1 sc in all st. (3)
Change for the white
- Rows 4 to 14: ch1, turn; 1 sc in all st. (3)
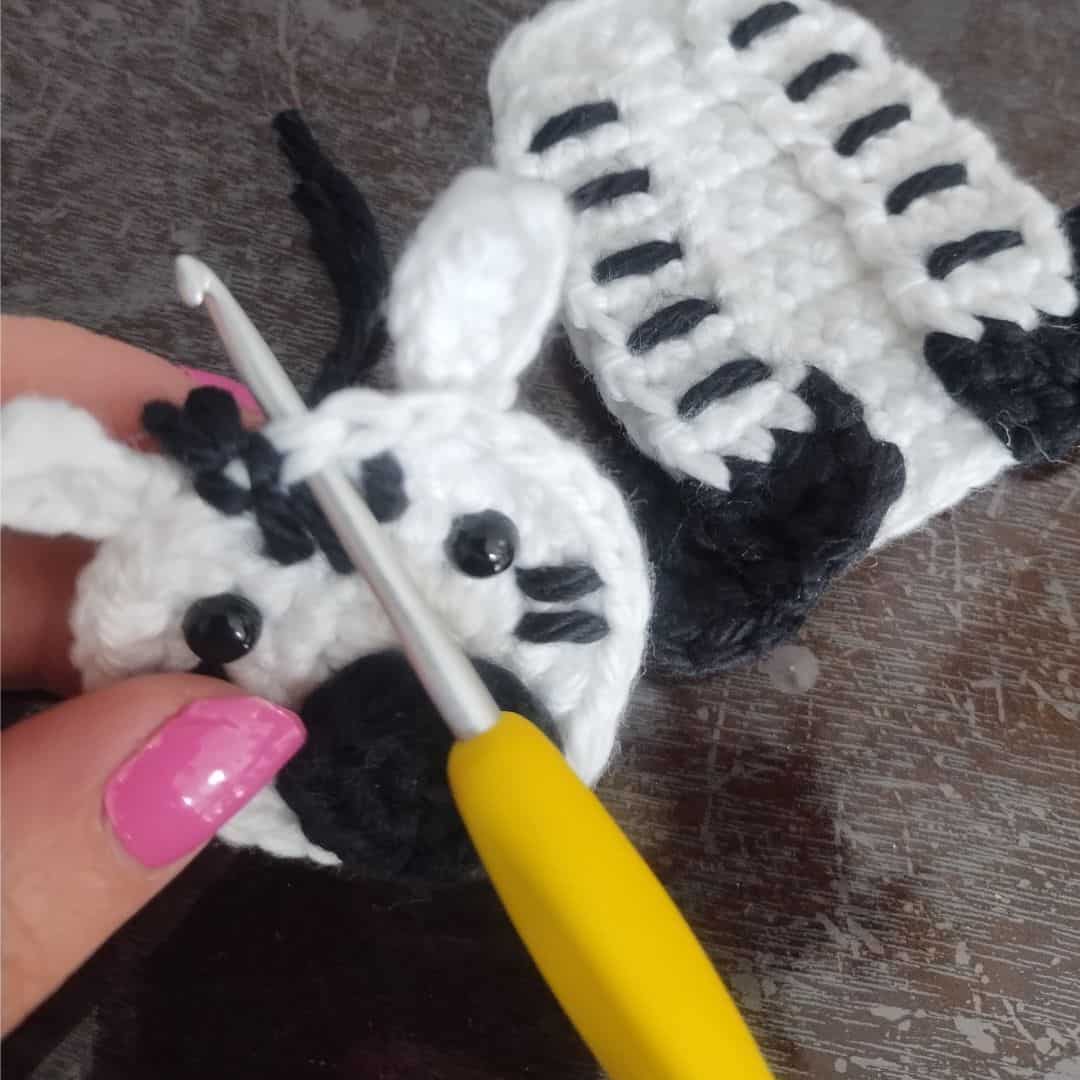
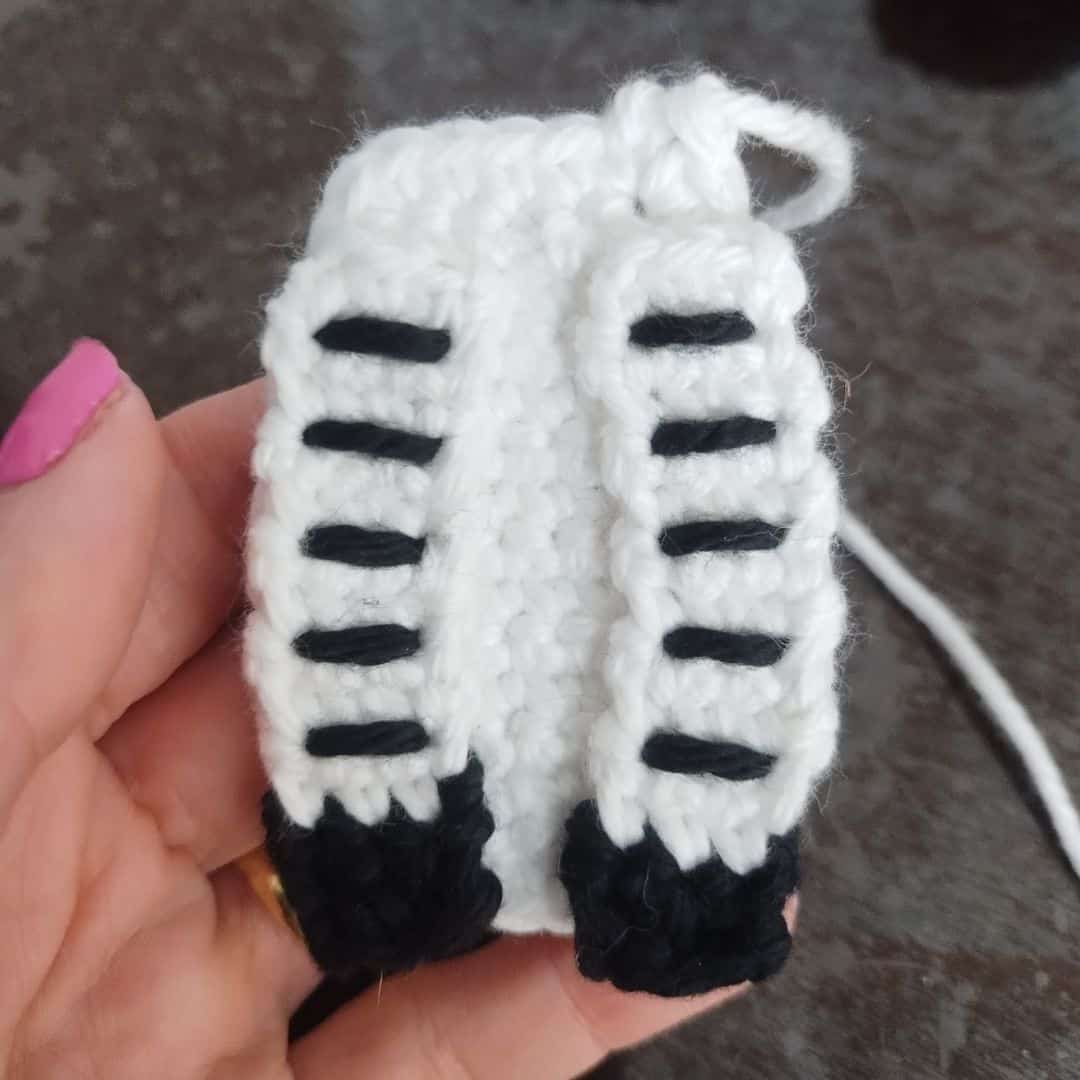
Cut the yarn (leave a long tail for sewing). With your tapestry needle, sew the front legs to the front of the body (see picture below). Make stripes: using black yarn and a tapestry needle, embroider 5 evenly spaced stripes on each front leg.

Final Step – Attach Head
Sew the head securely to the top of the body.
You may also love…
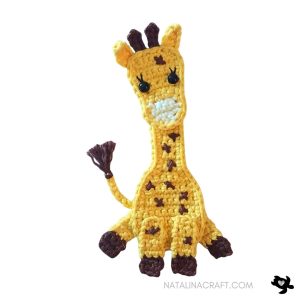
Crochet Appliques – Giraffe

Crochet Applique – Elephant
Copyright Notice:
All rights reserved. The pattern and photographs presented in this document are the sole property of Natalina Craft and are protected under copyright law. This pattern is provided for personal use only. Any unauthorized reproduction, in whole or in part, or distribution of this pattern or its contents is strictly prohibited.
You are permitted to sell finished items created from this pattern in limited quantities. If you choose to sell your finished products online, it would be greatly appreciated if you include a statement attributing the pattern to Natalina Craft and provide a link back to the original post. Thank you for your understanding and adherence to these guidelines.
Zebra Applique – Free crochet pattern
Zebra Applique Crochet Pattern
Instructions
Crochet zebra appliqué
Please read the entire pattern before starting.
- Terms: US Crochet Terms
- Finished Size: Approx. 4 inches/10 cm tall
- Skill Level: Beginner/Intermediate
Parts:
- 1 body
- 1 head
- 1 muzzle
- 2 ears
- 2 front legs
- 2 back legs
Material:
- Yarn: Worsted-weight yarn in white and black
- Size 2.75 mm crochet hook
- 2 black safety eyes (6 mm)
- Stitch markers (if needed)
- Tapestry needle
Abbreviations:
- chain (ch)
- magic ring (mr)
- single crochet (sc)
- increase (inc)
- invisible decrease (dec)
- half double crochet (hdc)
- double crochet (dc)
- slip stitch (sl st)
- st(s): stitch(es)
Pattern: How do you crochet a Zebra appliqué?
Head
- Work in rounds; do not turn unless specified. If needed, use a stitch marker for the first stitch of each round.
With a 2.75 mm crochet and white.
- Round 1: 6 sc in a magic ring. (6)
- Round 2: inc 6 times. (12)
- Round 3: [1 sc in next st, 1 inc in next st] x6. (18)
- Round 4: [1 sc in next 1 st, 1 inc in next st, 1 sc in next 1 st ] x6. (24)
- Round 5: [1 inc in next st, 1 sc in next 3 st] x6. (30)
Cut the yarn, and fasten off. Put the eyes between rounds 3 and 4, spaced by 5 st..
Muzzle
- Work in rounds; do not turn unless specified. If needed, use a stitch marker for the first stitch of each round.
With a 2.75 mm crochet and black.
- Round 1: 6 sc in a magic ring. (6)
- Round 2: [1 inc in all st]. (12)
Cut the yarn (leave a long tail for sewing) and fasten off. With your tapestry needle, sew the muzzle to the head. See the pictures below.
Ears (make 2)
- Work in rows.
With a 2.75 mm crochet and white.
- Row 1: ch 6. (6)
- Row 2: starting in the 2nd ch from the hook: 1 sc, 1 hdc, 1 dc, 1 hdc, 1 sc. (5)
Cut the yarn (leave a long tail for sewing). With your tapestry needle, sew the ears on the head, spaced by 3 st and over 2 st.
Stripes
With your tapestry needle and the black yarn, add some stripes to the head. I added 3 at the top of the head, between the ears: the left one over 2 st, the middle one over 3 st and the right one over 2 st. I added two stripes on each side of the head, over 2 stitches. The picture below can help you.
Mane
With black yarn:
Cut three strands of yarn, approximately 4 inches (10 cm) long. Fold each strand in half.
Using your hook, insert the folded yarn at the top of the head (above each stripe), pulling it through by the folded loop. Pass the loose ends through the loop and tighten gently to secure.
Separate the strands to make the hair fluffier, then trim to the desired length.
Body
- Work in rows.
With a 2.75 mm crochet and white.
- Row 1: ch 7. (7)
- Row 2: starting from the 2nd ch from the hook: 1 sc in the next 6 ch. (6)
- Row 3: ch1, turn; 1 inc, 1 sc in the next 4 st, 1 inc. (8)
- Rows 4 to 10: ch1, turn; 1 sc in all st. (8)
- Row 11: ch1, turn; 1 dec, 1 sc in the next 4 st, 1 dec. (6)
- Rows 12 to 13: ch1, turn; 1 sc in all st. (6)
- Row 14: ch1, turn; 1 sc in the next 2 st, 1 dec, 1 sc in the next 2 st. (5)
- Row 15: ch1, turn; 1 sc in all st. (5)
- do not turn, make 1 sc evenly all around (you do not want to crochet too tight for this part - you can also use a bigger size crochet). (approx. 32 st)
Cut the yarn (leave a long tail to sew the head on) and fasten off.
Back legs (make 2)
- Work in rounds; do not turn unless specified. If needed, use a stitch marker for the first stitch of each round.
With a 2.75 mm crochet and black.
- Round 1: 6 sc in a magic ring. (6)
- Round 2: [1 inc in all st]. (12)
We will now be working in rows:
- Row 3: 1 sc in the next 3 st. (3)
- Row 4: ch1, turn; 1 sc in all st. (3)
- Row 5: ch1, turn; 1 sc in all st. (3)
Cut the yarn (leave a long tail for sewing) and fasten off. With your tapestry needle, sew the back legs behind the body (I used a little piece of white yarn to sew them). Position them so only the "foot" (the rounded part from Rnd 2) is visible from the front.
Front legs (make 2)
- Work in rows.
With a 2.75 mm crochet and black
- Row 1: ch 4. (4)
- Row 2: starting in the 2nd ch from the hook: 1 sc in all st. (3)
- Rows 3: ch1, turn; 1 sc in all st. (3)
Change for the white
- Rows 4 to 14: ch1, turn; 1 sc in all st. (3)
Cut the yarn (leave a long tail for sewing). With your tapestry needle, sew the front legs to the front of the body (see picture below). Make stripes: using black yarn and a tapestry needle, embroider 5 evenly spaced stripes on each front leg.
Final Step - Attach Head
Sew the head securely to the top of the body.
Copyright Notice:
All rights reserved. The pattern and photographs presented in this document are the sole property of Natalina Craft and are protected under copyright law. This pattern is provided for personal use only. Any unauthorized reproduction, in whole or in part, or distribution of this pattern or its contents is strictly prohibited.
You are permitted to sell finished items created from this pattern in limited quantities. If you choose to sell your finished products online, it would be greatly appreciated if you include a statement attributing the pattern to Natalina Craft and provide a link back to the original post. Thank you for your understanding and adherence to these guidelines.