
Looking for a quick and adorable crochet project? 🐻❄️
This mini polar bear is fast to make, beginner-friendly, and works up in one main piece—perfect if you don’t enjoy sewing lots of parts. You can even turn it into a keychain or dress it up with a scarf or hoodie!
The body and head are crocheted in one piece, and you’ll only need to sew on the arms and ears.
Join my Facebook group to ask questions and share your finished projects! I regularly ask what patterns you’d like to see next—and you’re always welcome to suggest ideas.
I hope you enjoy this pattern and find it easy to follow. If you have any questions, feel free to reach out—I’ll do my best to help. I’d also love to see your finished bears!


Crochet Pattern Mini Polar Bear
Start Here
-
Please read the entire pattern before starting.
-
This pattern is written using US crochet terminology.
This Pattern Includes
- Body and head (1 part)
- 2 ears
- 2 arms
- Optional: 1 tail
- Optional: 1 hat or 1 scarf
Finished Size
Approximately 4 inches (10 cm) tall.
Material:
- Yarn calling for a 5.5 mm hook in white
- Small amount of a secondary color (optional, for scarf or hoodie)
- 3.5 mm crochet hook
- 2 black safety eyes (7.5 mm)
- Cotton thread: Black (eyebrows and nose) and Pink (cheeks)
- Stitch marker (optional)
- Tapestry needle
-
Polyfill stuffing
Abbreviations:
- ch = chain
- mr = magic ring
- sc = single crochet
- inc = increase
- dec = invisible decrease
- sl st = slip stitch
- hdc = half double crochet
-
dc = double crochet
Pattern: How to crochet a Mini Polar Bear?
Legs
- The legs are worked in continuous rounds (as a spiral). Use a stitch marker if needed.
- Stuff as you go.
– Leg 1:
With white yarn and a 3.5 mm hook:
-
- Round 1: 6 sc in a magic ring. (6)
- Round 2: [2 sc, 1 inc] x2. (8)
- Rounds 3-5: [1 sc in all st]. (8)
Stuff the leg lightly.
Fasten off and set aside.
– Leg 2:
Repeat Rounds 1–5 exactly as for Leg 1.
Stuff the leg lightly.
Do not cut the yarn.
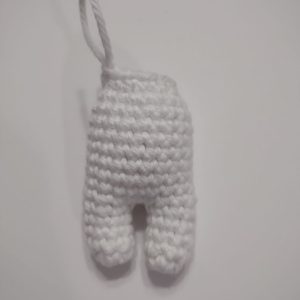
Next, you will join both legs and continue with the body and head.
You may also like:


Body and head
- The body and head are worked in continuous rounds (as a spiral). Use a stitch marker if needed.
- Stuff as you go.
Joining the Legs
- Round 6:
Continue working in Leg 2:
2 sc, ch 2;
now work in Leg 1: 8 sc;
2 sc in the ch-2;
return to Leg 2: 6 sc. (20) - Rounds 7-14: [1 sc in all st]. (20)
- Round 15: [8 sc, 1 dec] x2. (18)
- Round 16: [1 sc, 1 dec] x6. (12)
-
- Round 17: [1 sc in all st]. (12)
- Round 18: [1 sc, 1 inc] x6. (18)
- Round 19: [2 sc, 1 inc] x6. (24)
- Rounds 20-24: [1 sc in all st]. (24)
- Round 25: [2 sc, 1 dec] x6. (18)
Do not cut the yarn yet.
Facial Features
Insert the safety eyes between Rounds 22 and 23, spaced 3 stitches apart.
Using black cotton thread and a tapestry needle:
-
Embroider a small nose between Rounds 21 and 22 (double strand, worked twice)
-
Add a small vertical stitch under the nose (single strand)
-
Embroider the eyebrows over Round 24 (single strand)
Using pink thread:
-
Add two small cheek stitches between Rounds 20 and 21 (single strand)


Finish the Head
- Round 26: [1 sc, 1 dec] x6. (12)
- Round 27: [1 sc, 1 dec] x4. (8)
- Round 28: Working in the front loops only, close the head using your tapestry needle.
Fasten off and weave in ends.


Ears (make 2)
With white yarn and a 3.5 mm hook:
-
- Round 1: 8 sc in a magic ring. (8)
- Round 2: 1 sl st in the next st.
Fasten off, leaving a long tail.
Sew the ears to the top of the head between Rounds 25 and 26.


Arms (make 2)
- The arms are worked in continuous rounds (as a spiral). Use a stitch marker if needed.
With white yarn and a 3.5 mm hook:
- Round 1: 6 sc in a magic ring. (6)
- Round 2: [1 inc, 2 sc] x2. (8)
- Rounds 3-9: [1 sc in all st]. (8)
Stuff only the bottom of the arm.
Fasten off, leaving a long tail.
Close the opening and sew the arms to the body between Rounds 15 and 16.

Optional Tail
With white yarn and a 3.5 mm hook:
-
- Round 1: 6 sc in a magic ring. (6)
- Round 2: 1 sl st in the next st.
Fasten off, leaving a long tail, and sew to the back of the body.
Optional Scarf
- The scarf is worked in rows.
With your chosen color and a 3.5 mm hook:
- Row 1: ch 33. (33)
- Row 2: Working in the 2nd ch from the hook:
25 sc, ch 2, skip 1 stitch, 6 sc. (33)
Fasten off and weave in ends.

Optional Hat
- The hat is worked in rounds first, then in rows.
With your chosen color and a 3.5 mm hook:
- Round 1: 6 sc in a magic ring. (6)
- Round 2: [6 inc]. (12)
- Round 3: [1 sc, 1 inc] x6. (18)
- Round 4: [2 sc, 1 inc] x6. (24)
- Round 5: [1 inc, 16 sc, 1 inc, 6 sc]. (26)
Work in Rows
- Row 6: turn; 20 dc, 1 sl st. (21)
- Row 7: Turn; skip sl st,
6 dc, ch 1, skip 1 st,
6 dc, ch 1, skip 1 st,
6 dc, ch 13. (33) - Row 8: Turn; starting in the 2nd ch from the hook:
30 sc, ch 2, skip 1 st, 1 sc. (33)
Fasten off and weave in ends.


🎉 Congratulations! Your mini crochet polar bear is complete!
Don’t forget to share a photo and tag me—I love seeing your creations 💛
Copyright Notice
All rights reserved.
This pattern and its photographs are the property of Natalina Craft and are protected under copyright law.
This pattern is for personal use only. Reproduction or distribution, in whole or in part, is prohibited.
You may sell finished items made from this pattern in limited quantities. Attribution is appreciated but not required.
Crochet Pattern Mini Polar Bear
Mini Polar Bear Crochet Pattern
Instructions
Looking for a quick and adorable crochet project? 🐻❄️This mini polar bear is fast to make, beginner-friendly, and works up in one main piece—perfect if you don’t enjoy sewing lots of parts. You can even turn it into a keychain or dress it up with a scarf or hoodie!
The body and head are crocheted in one piece, and you’ll only need to sew on the arms and ears.
Join my Facebook group to ask questions and share your finished projects! I regularly ask what patterns you’d like to see next—and you’re always welcome to suggest ideas.
I hope you enjoy this pattern and find it easy to follow. If you have any questions, feel free to reach out—I’ll do my best to help. I’d also love to see your finished bears!
Crochet Pattern Mini Polar Bear
Start Here
- Please read the entire pattern before starting.
- This pattern is written using US crochet terminology.
This Pattern Includes
- Body and head (1 part)
- 2 ears
- 2 arms
- Optional: 1 tail
- Optional: 1 hat or 1 scarf
Finished Size
Approximately 4 inches (10 cm) tall.
Material:
- Yarn calling for a 5.5 mm hook in white
- Small amount of a secondary color (optional, for scarf or hoodie)
- 3.5 mm crochet hook
- 2 black safety eyes (7.5 mm)
- Cotton thread: Black (eyebrows and nose) and Pink (cheeks)
- Stitch marker (optional)
- Tapestry needle
- Polyfill stuffing
Abbreviations:
- ch = chain
- mr = magic ring
- sc = single crochet
- inc = increase
- dec = invisible decrease
- sl st = slip stitch
- hdc = half double crochet
- dc = double crochet
Pattern: How to crochet a Mini Polar Bear?
Legs
- The legs are worked in continuous rounds (as a spiral). Use a stitch marker if needed.
- Stuff as you go.
- Leg 1:
With white yarn and a 3.5 mm hook:
- Round 1: 6 sc in a magic ring. (6)
- Round 2: [2 sc, 1 inc] x2. (8)
- Rounds 3-5: [1 sc in all st]. (8)
Stuff the leg lightly.
Fasten off and set aside.
- Leg 2:
Repeat Rounds 1–5 exactly as for Leg 1.
Stuff the leg lightly.Do not cut the yarn. Next, you will join both legs and continue with the body and head.
Body and head
- The body and head are worked in continuous rounds (as a spiral). Use a stitch marker if needed.
- Stuff as you go.
Joining the Legs
- Round 6:Continue working in Leg 2:2 sc, ch 2; now work in Leg 1: 8 sc;2 sc in the ch-2 ; return to Leg 2: 6 sc. (20)
- Rounds 7-14: [1 sc in all st]. (20)
- Round 15: [8 sc, 1 dec] x2. (18)
- Round 16: [1 sc, 1 dec] x6. (12)
- Round 17: [1 sc in all st]. (12)
- Round 18: [1 sc, 1 inc] x6. (18)
- Round 19: [2 sc, 1 inc] x6. (24)
- Rounds 20-24: [1 sc in all st]. (24)
- Round 25: [2 sc, 1 dec] x6. (18)
Do not cut the yarn yet.
Facial Features
Insert the safety eyes between Rounds 22 and 23, spaced 3 stitches apart.
Using black cotton thread and a tapestry needle:
- Embroider a small nose between Rounds 21 and 22 (double strand, worked twice)
- Add a small vertical stitch under the nose (single strand)
- Embroider the eyebrows over Round 24 (single strand)
Using pink thread:
- Add two small cheek stitches between Rounds 20 and 21 (single strand)
Finish the Head
- Round 26: [1 sc, 1 dec] x6. (12)
- Round 27: [1 sc, 1 dec] x4. (8)
- Round 28: Working in the front loops only, close the head using your tapestry needle.
Fasten off and weave in ends.
Ears (make 2)
With white yarn and a 3.5 mm hook:
- Round 1: 8 sc in a magic ring. (8)
- Round 2: 1 sl st in the next st.
Fasten off, leaving a long tail.
Sew the ears to the top of the head between Rounds 25 and 26.
Arms (make 2)
- The arms are worked in continuous rounds (as a spiral). Use a stitch marker if needed.
With white yarn and a 3.5 mm hook:
- Round 1: 6 sc in a magic ring. (6)
- Round 2: [1 inc, 2 sc] x2. (8)
- Rounds 3-9: [1 sc in all st]. (8)
Stuff only the bottom of the arm. Fasten off, leaving a long tail.
Close the opening and sew the arms to the body between Rounds 15 and 16.
Optional Tail
With white yarn and a 3.5 mm hook:
- Round 1: 6 sc in a magic ring. (6)
- Round 2: 1 sl st in the next st.
Fasten off, leaving a long tail, and sew to the back of the body.
Optional Scarf
- The scarf is worked in rows.
With your chosen color and a 3.5 mm hook:
- Row 1: ch 33. (33)
- Row 2: Working in the 2nd ch from the hook:25 sc, ch 2, skip 1 stitch, 6 sc. (33)
Fasten off and weave in ends.
Optional Hat
- The hat is worked in rounds first, then in rows.
With your chosen color and a 3.5 mm hook:
- Round 1: 6 sc in a magic ring. (6)
- Round 2: [6 inc]. (12)
- Round 3: [1 sc, 1 inc] x6. (18)
- Round 4: [2 sc, 1 inc] x6. (24)
- Round 5: [1 inc, 16 sc, 1 inc, 6 sc]. (26)
Work in Rows
- Row 6: turn; 20 dc, 1 sl st. (21)
- Row 7: Turn; skip sl st,6 dc, ch 1, skip 1 st,6 dc, ch 1, skip 1 st,6 dc, ch 13. (33)
- Row 8: Turn; starting in the 2nd ch from the hook:30 sc, ch 2, skip 1 st, 1 sc. (33)
Fasten off and weave in ends.
🎉 Congratulations! Your mini crochet polar bear is complete! Don’t forget to share a photo and tag me—I love seeing your creations 💛
Copyright Notice
All rights reserved. This pattern and its photographs are the property of Natalina Craft and are protected under copyright law.
This pattern is for personal use only. Reproduction or distribution, in whole or in part, is prohibited.
You may sell finished items made from this pattern in limited quantities. Attribution is appreciated but not required.