
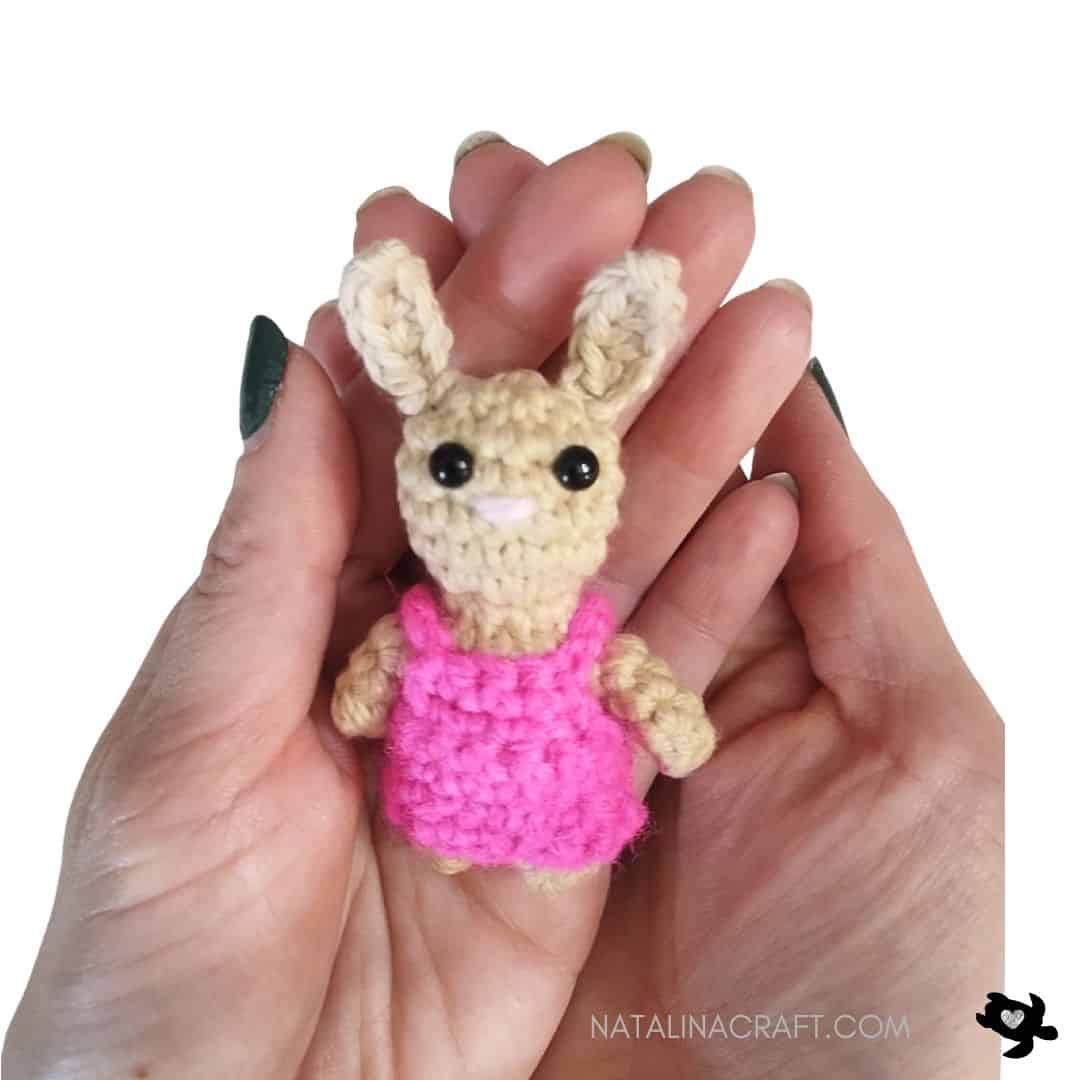
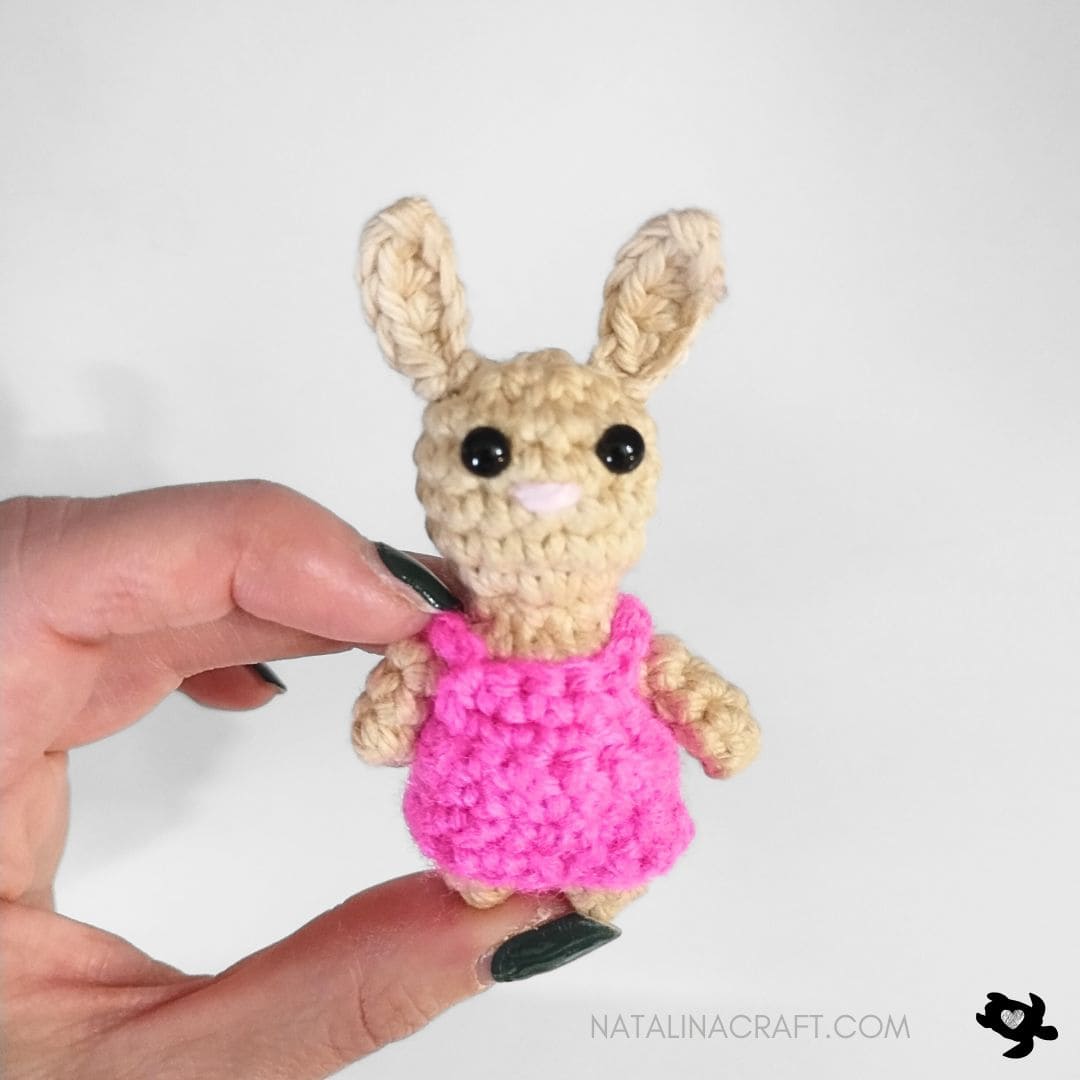
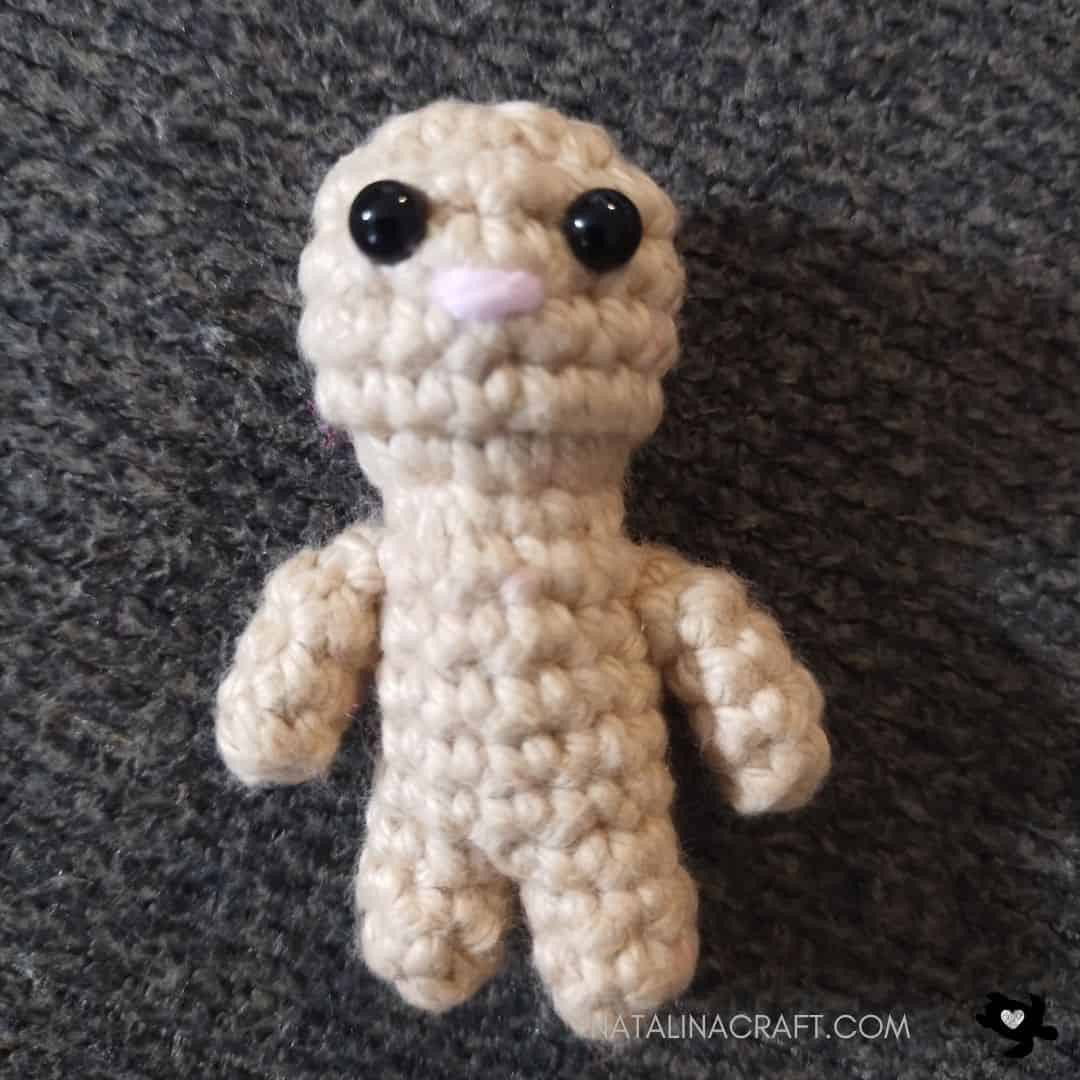
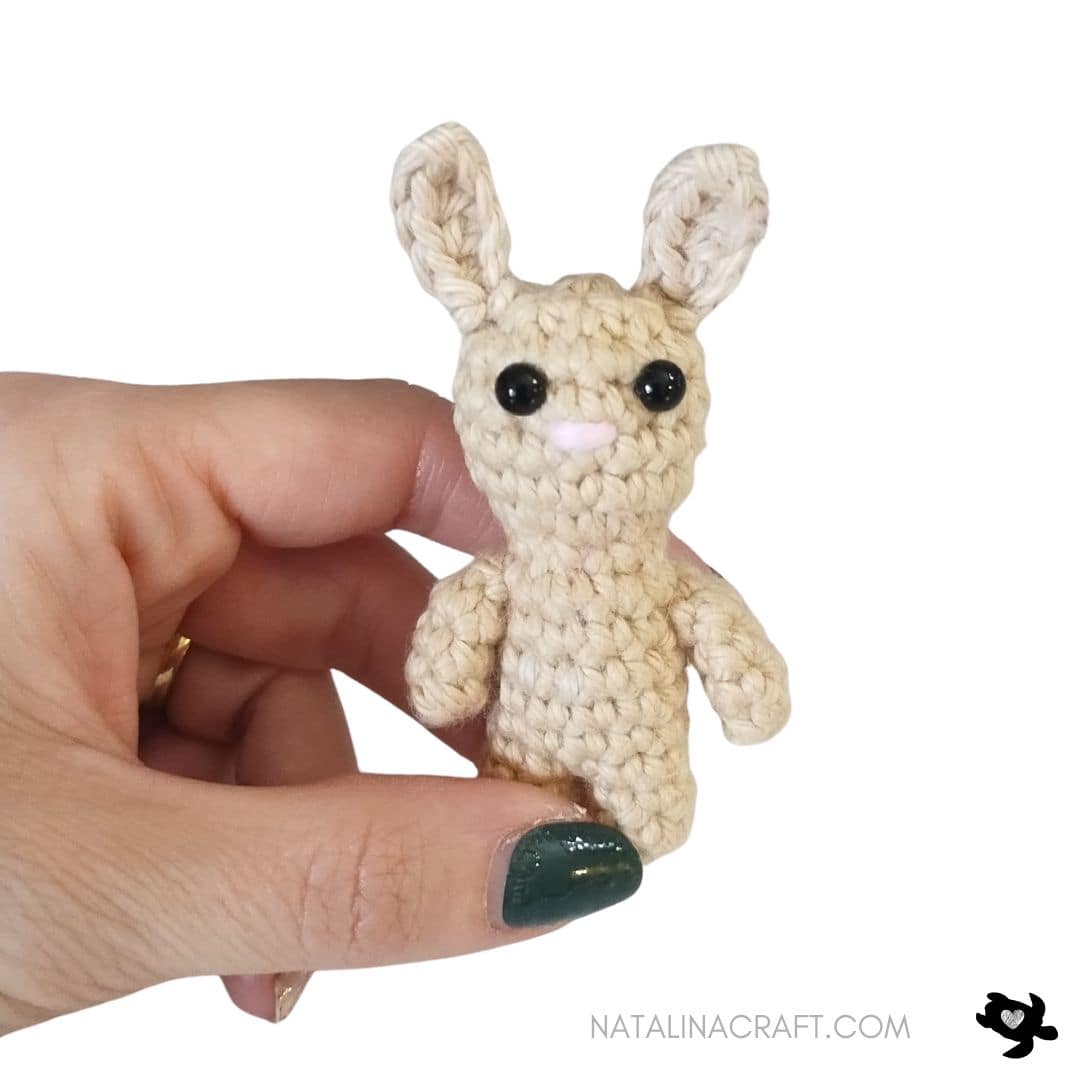
Looking for your next quick and adorable crochet project? This free pattern will help you create a tiny pocket bunny that’s as charming as it is versatile. Whether you make it as a little companion to carry with you, a sweet keychain, or a thoughtful handmade gift, this bunny is the perfect choice. It’s beginner-friendly, fast to make, and uses only a small amount of yarn — ideal for using up scraps. In no time, you’ll have a soft, pocket-sized friend sure to bring smiles.
Don’t forget to join my Facebook group, you can ask your questions, and share your finished projects. I will regularly ask you what pattern you would like to see next (or you can even suggest something even if I am not asking!).
I hope you will enjoy and understand the pattern. If you have any questions, please write to me, I will try my best to help you. And I would love to see your work!
Did you know this little bunny belongs to the Buttonwood Bunny Family? Be sure to check out the rest of the collection 💛🐰

Crochet Adult Bunny – Free Pattern
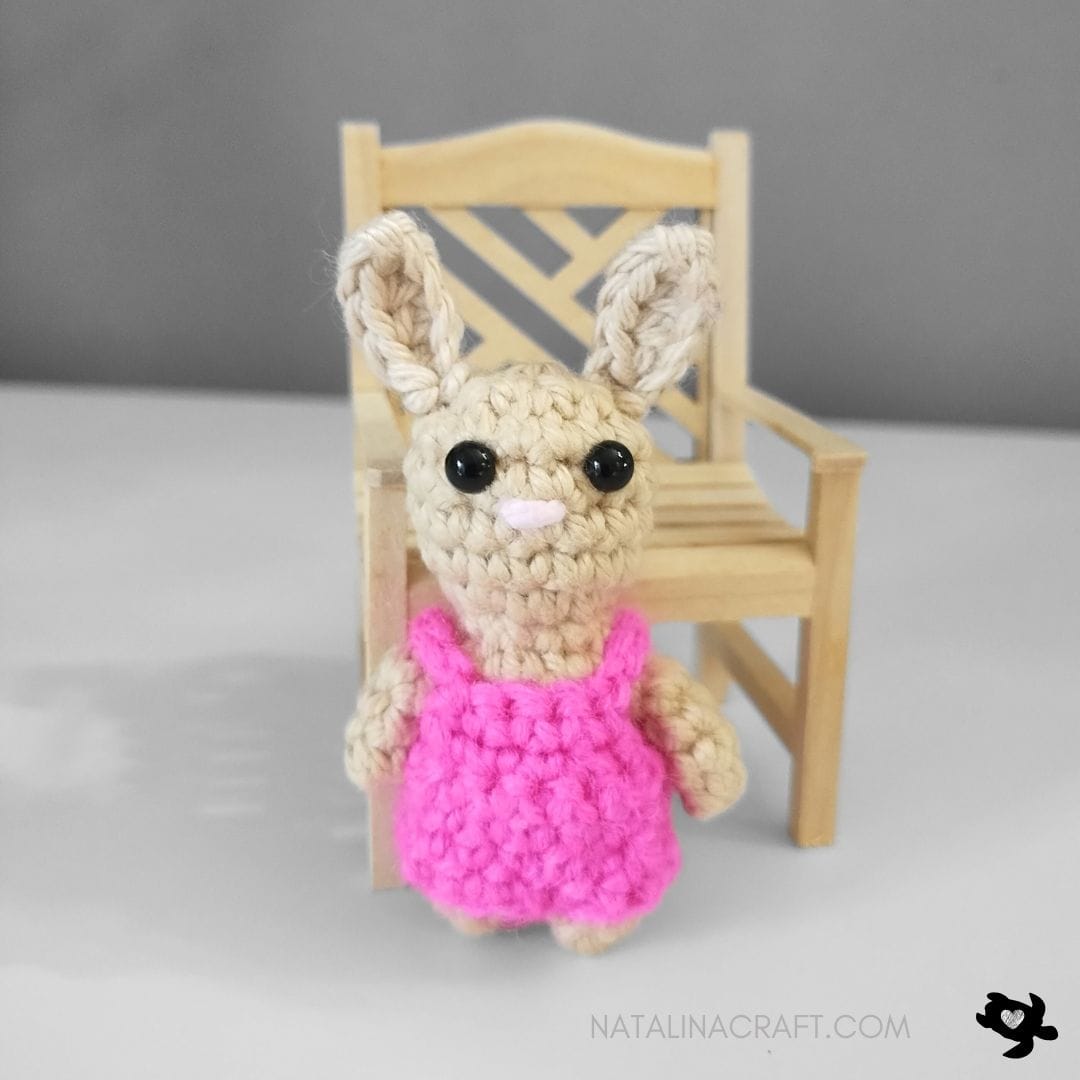

Crochet Pattern: Pocket Bunny
Start Here:
- Please read the whole pattern properly before starting.
- The pattern is written using US terms.
Parts:
- Body (legs/body/head in one piece)
- 2 ears
- 2 arms
- 1 tail
Size:
- 2.25 inches (6 cm)
Material:
- For the bunny: Worsted in brown and a small amount of pink for the nose
- For the outfit: Worsted yarn in pink
- Size 2.75 mm crochet hook
- 2 black safety eyes (5 mm)
- Stitch markers (if needed)
- Tapestry needle
Abbreviations:
- chain (ch)
- magic ring (mr)
- single crochet (sc)
- increase (inc)
- invisible decrease (dec)
- half double crochet (hdc)
- slip stitch (sl st)
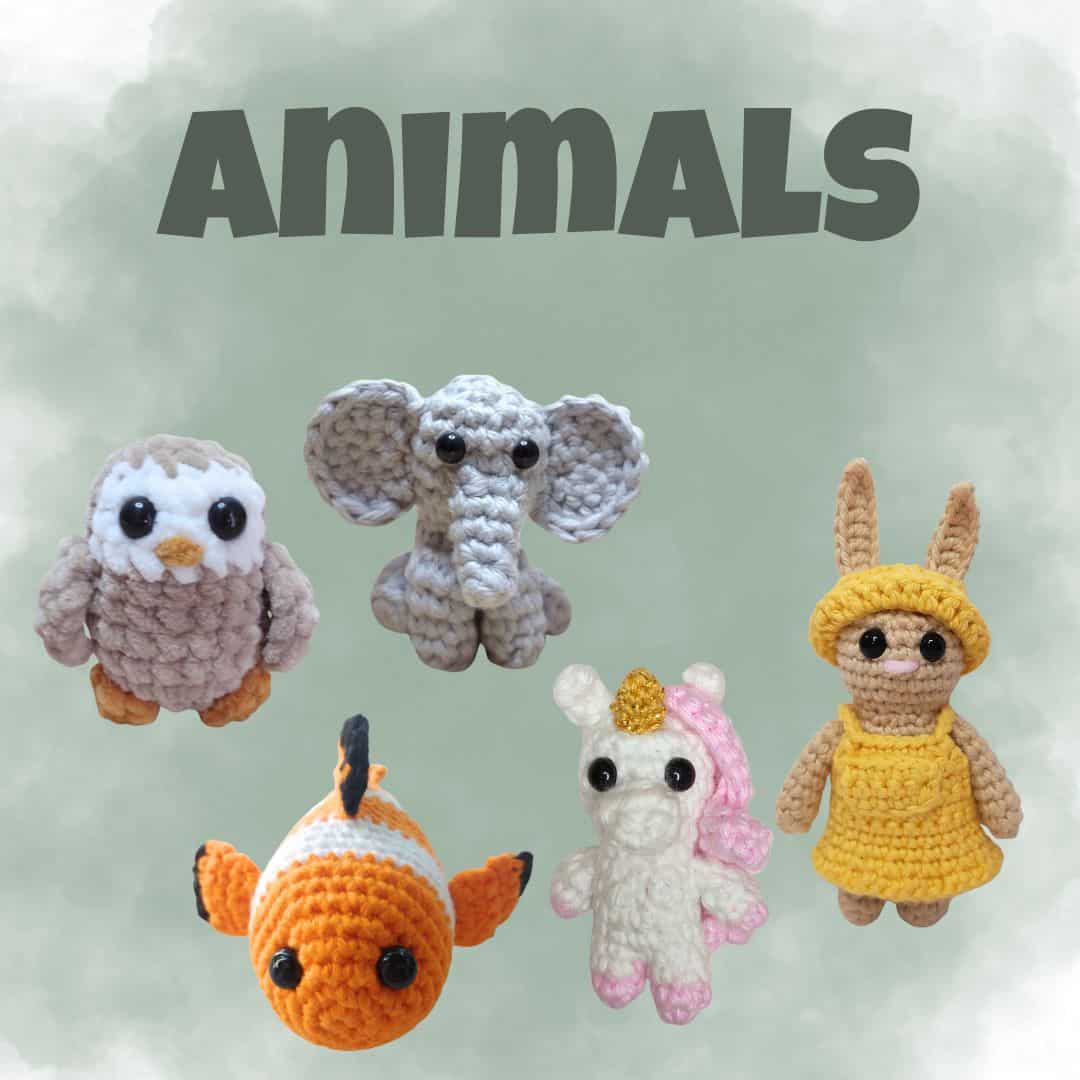
Looking for more Animal ideas?
How to crochet a pocket bunny?
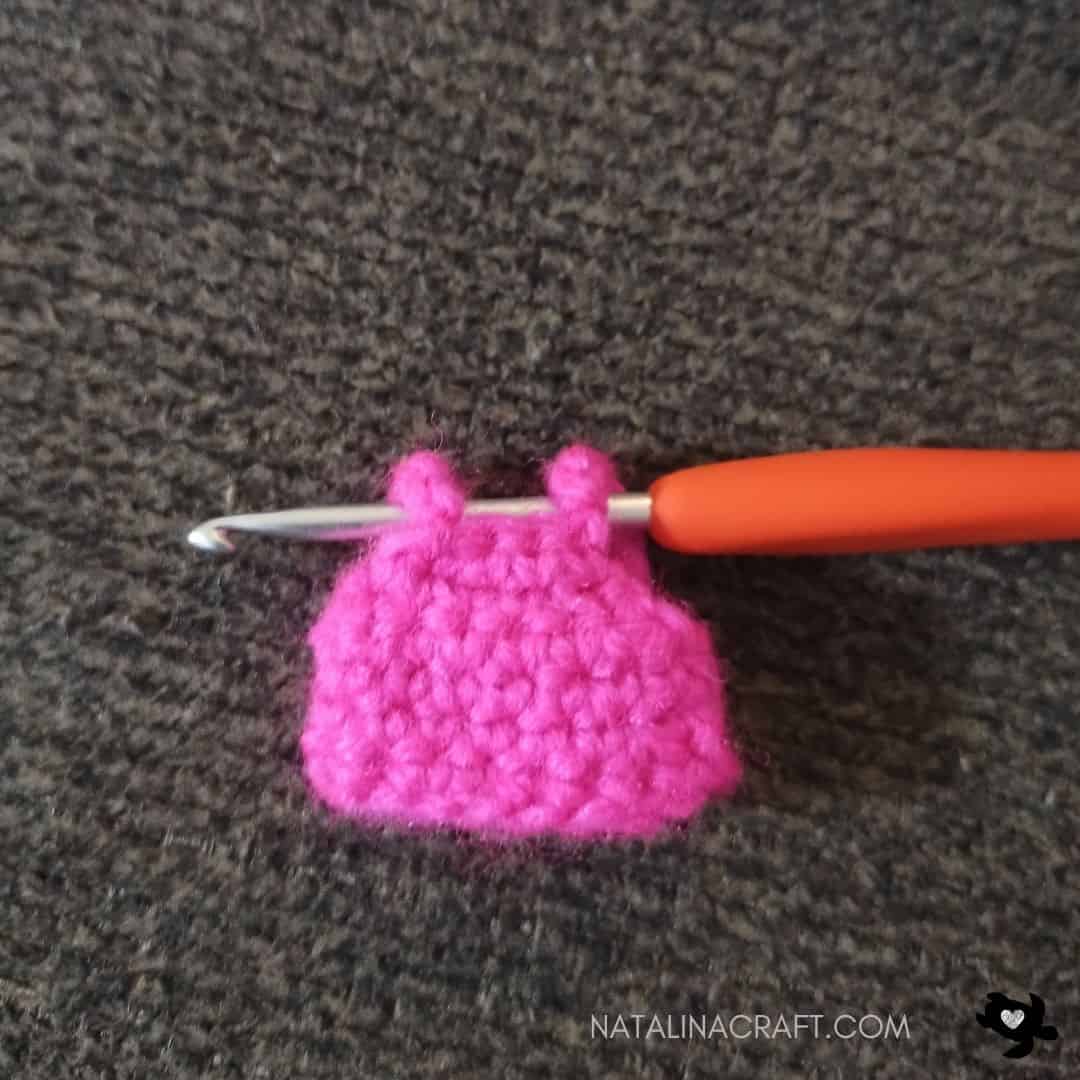
Ears (make 2)
- Worked in rows.
With a 2.75 mm crochet and yarn in brown:
- Ch 6
- Row 1: starting in the 2nd ch from the hook: 1 sc, 3 hdc, 1 sc. (5)
Cut the yarn but leave a long tail for sewing.
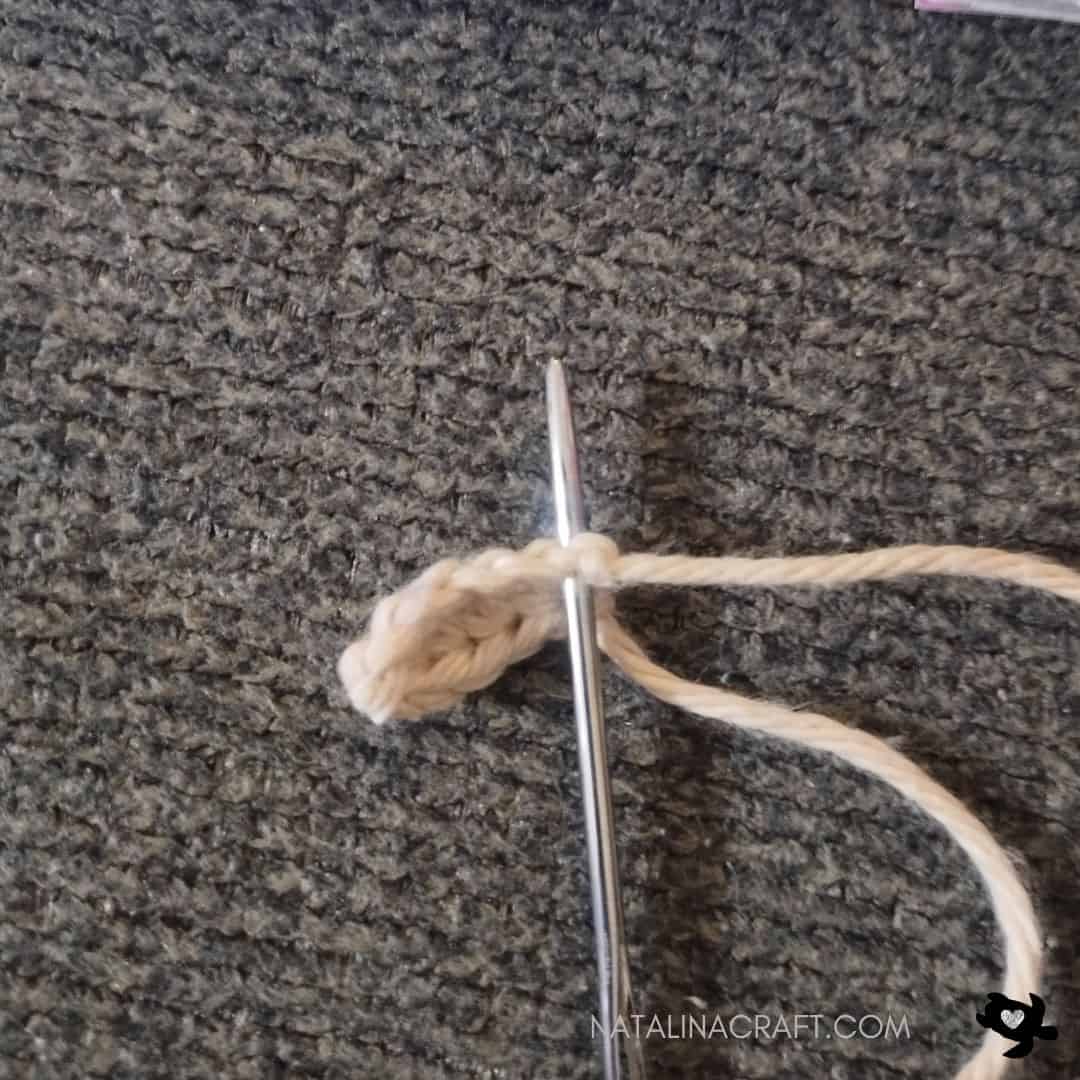
Thread the yarn tail through the first chain to close the base neatly.
Set aside for later.

Body
Legs
- Worked in continuous rounds (as a spiral). Use a stitch marker if needed.
- Stuff as you go.
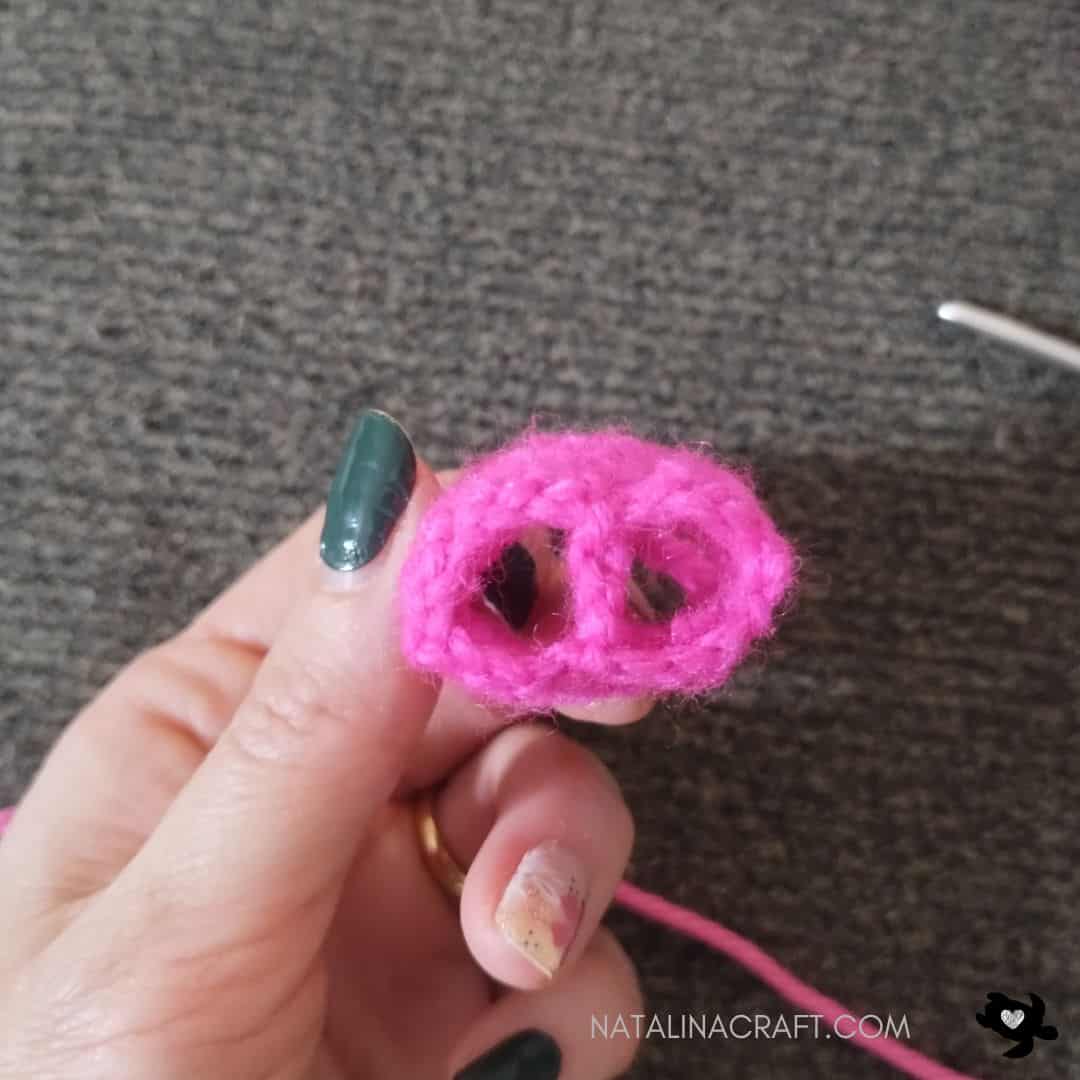
– Leg 1:
With a 2.75 mm crochet and brown:
-
- Round 1: 6 sc in a magic ring. (6)
- Rounds 2-3: [1 sc in all st]. (6)
Fasten off. Stuff lightly. Set aside.
– Leg 2:
With a 2.75 mm crochet and brown:
-
- Round 1: 6 sc in a magic ring. (6)
- Rounds 2-3: [1 sc in all st]. (6)
Do NOT cut yarn. Stuff lightly.
Join legs:
- Round 4: Continue from Leg 2, working into Leg 1: 6 sc, then 6 sc around Leg 2. (12)
- Rounds 5-9: [1 sc in all st]. (12)
Head:
- Round 10: [1 sc, 1 dec] x4. (8)
- Round 11: [8 inc]. (16)
- Rounds 12-15: [1 sc in all st]. (16)
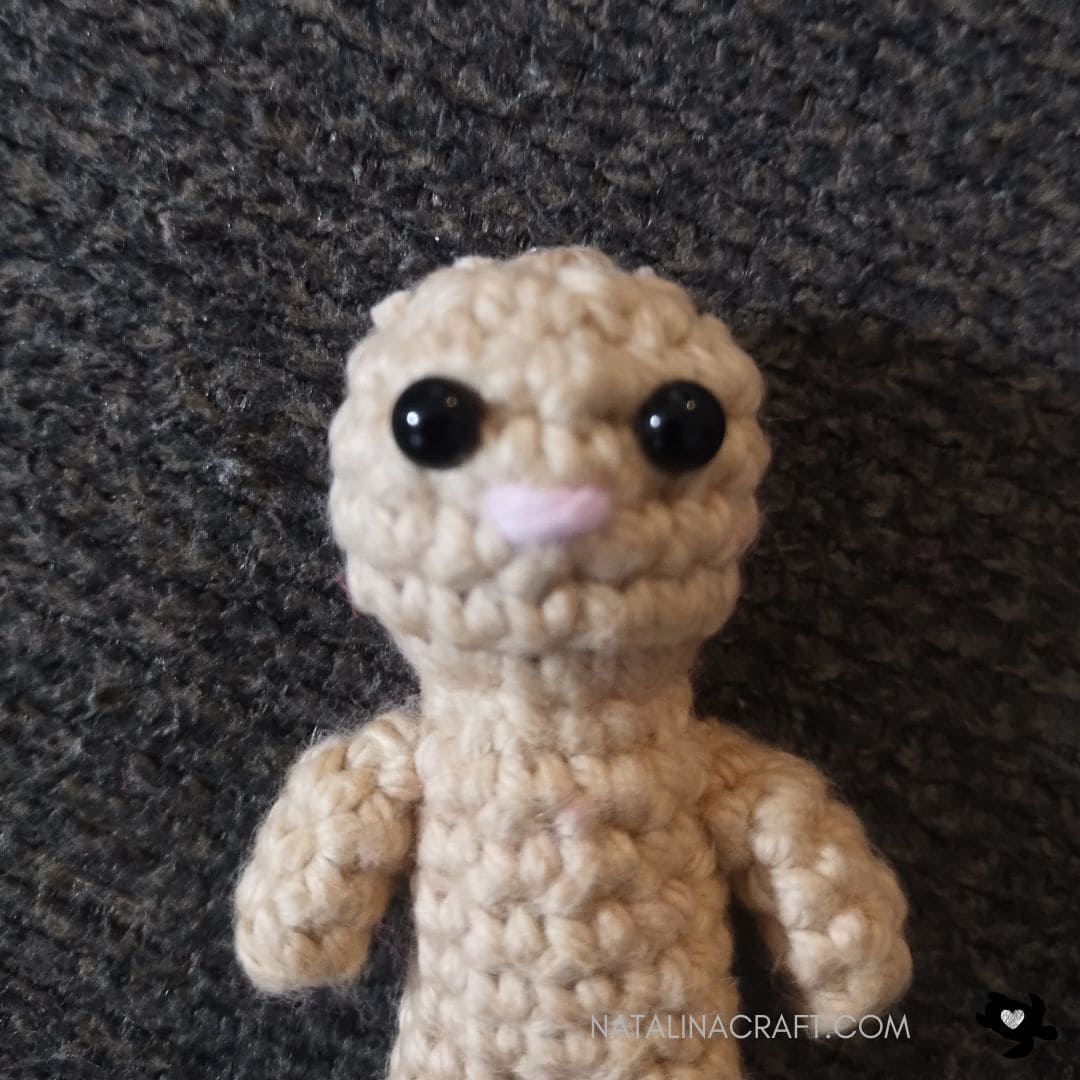
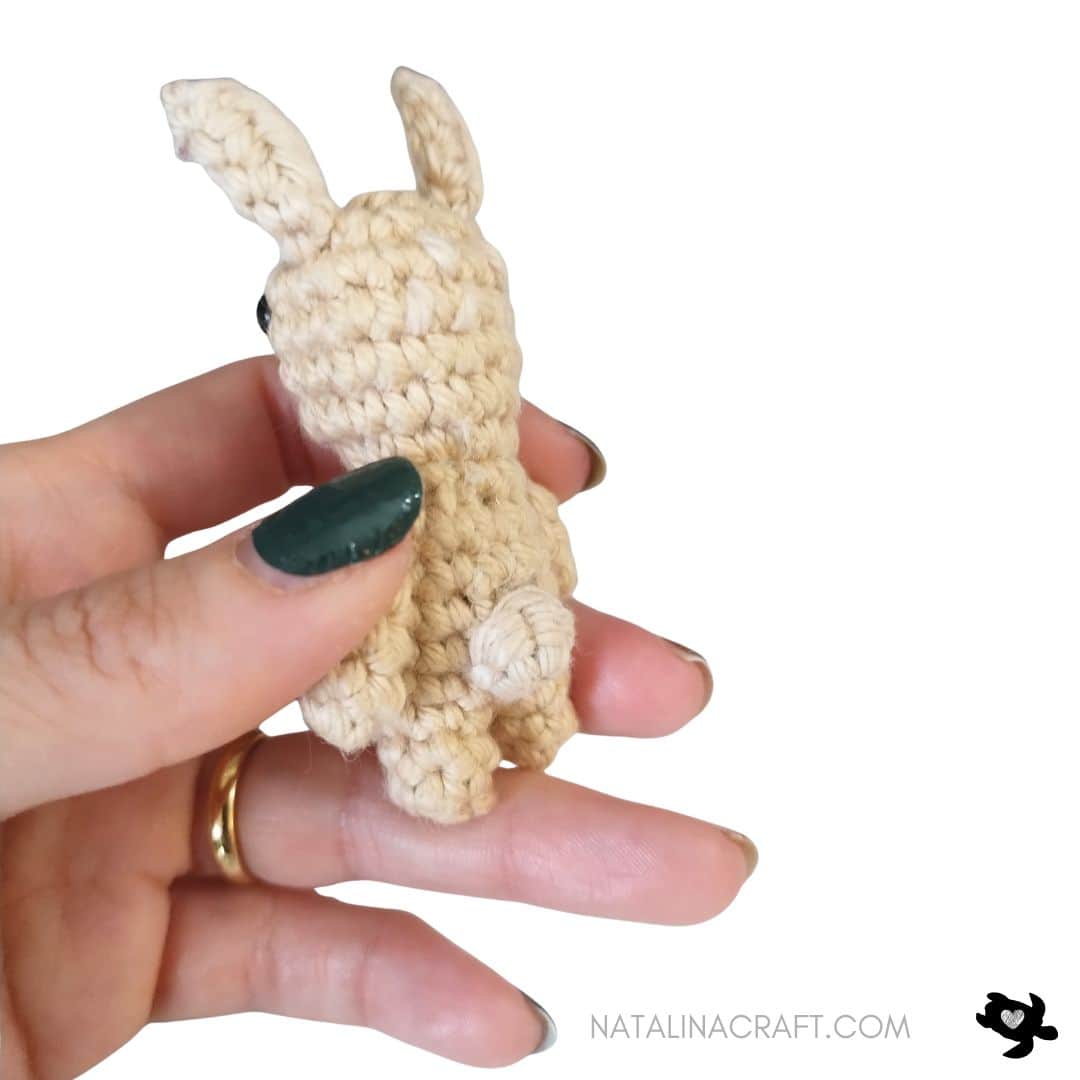
Place the eyes between Rounds 14 and 15, spaced 2 st appart.
With your tapestry needle and pink yarn, stitch a little nose over 1 stitch between Rounds 13 and 14, centered below the eyes.
- Round 16: [8 dec]. (8)
Stuff firmly. Fasten off and close.
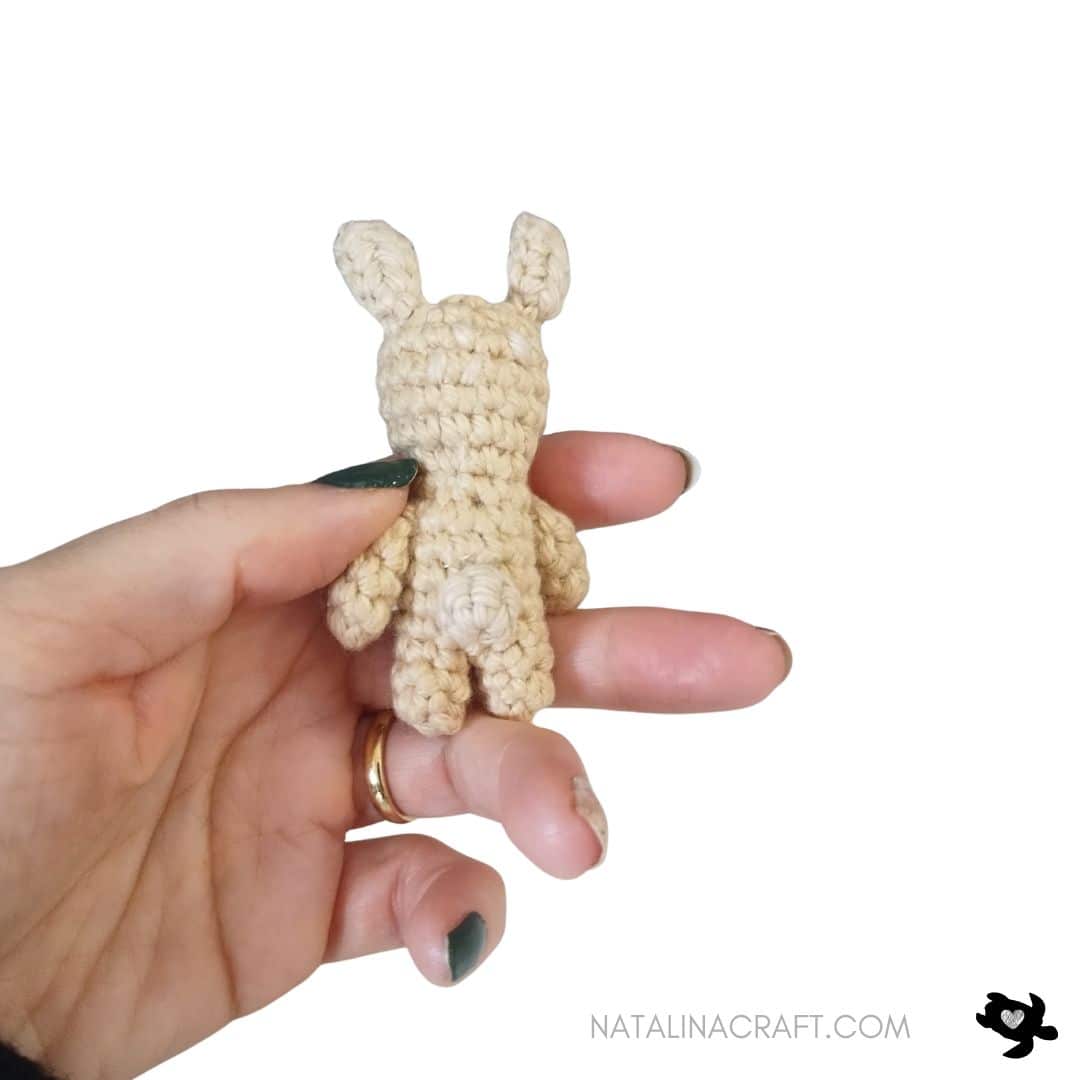
Sew the ears to the head over Rounds 16.

Arms (make 2)
- Worked in continuous rounds (as a spiral). Use a stitch marker if needed.
With a 2.75 mm crochet and yarn in brown:
- Round 1: 5 sc in a magic ring. (5)
- Rounds 2-4: [1 sc in all st]. (5)
Do not stuff.
Fasten off, leaving a long tail
Sew the arms to the body. The top of the arms should be between rounds 8 and 9.
Tail
- Worked in continuous rounds.
With a 2.75 mm crochet and yarn in brown:
- Round 1: 4 sc in a magic ring. (4)
Cut the yarn but leave a long tail for sewing. Sew the tail at the back of the body over rounds 5 and 6.
Outfit: Dress or Overalls
- Worked in continuous rounds, then rows.
With chosen color:
- Round 1: ch 18; 1 sl st in the first ch to form a ring.
- Round 2: [1 sc in all ch]. (18)
- Round 3: [1 dec, 1 sc in the next 7 st]x2. (16)
- Round 4: [1 sc in the next 8 st] – leave the remaining 8 st unworked. (8)
👉 Now work in rows.
- Row 5: ch1, turn: [1 dec, 1 sc in the next 2 st]. (6)
- Row 6: ch1, turn: [1 dec, 1 sc in the next st]. (4)
- Row 7: ch1, turn: [1 sc in the next 4. (4)
Ch 8 for first strap. Fasten off. Leave a long tail for sewing. Join yarn to first stitch of Row 7, ch 8 for second strap. Fasten off. Leave a long tail for sewing.
Sew straps to back of dress/overalls.
Dress Option
You are finished.
Overalls Option
Join yarn at the front center of Round 1, ch 3.
Fasten off leaving a long tail.
Sew the chain to the stitch directly opposite (back center).
Make sure there are 8 stitches from Round 1 on each side of the bottom separation.
Congratulations! Your little crochet pocket bunny is done! Don’t forget to share a picture with me and tag me on social networks!
You may also love…


All rights reserved.The pattern and photographs contained in this document are the property of Natalina Craft. This pattern is available for personal use only. No unauthorized reproduction, in whole or in part, or distribution of this pattern or content is allowed.You may sell finished items in limited amounts. If you sell your finished products online, I would be grateful if you can add a statement saying « Pattern by Natalina Craft » and link back to my post.
Crochet Pattern Pocket Bunny
Pocket Bunny Free Crochet Pattern
Instructions
Crochet Pattern: Pocket Bunny
Start Here:
- Please read the whole pattern properly before starting.
- The pattern is written using US terms.
Parts:
- Body (legs/body/head in one piece)
- 2 ears
- 2 arms
- 1 tail
Size:
- 2.25 inches (6 cm)
Material:
- For the bunny: Worsted in brown and a small amount of pink for the nose
- For the outfit: Worsted yarn in pink
- Size 2.75 mm crochet hook
- 2 black safety eyes (5 mm)
- Stitch markers (if needed)
- Tapestry needle
Abbreviations:
- chain (ch)
- magic ring (mr)
- single crochet (sc)
- increase (inc)
- invisible decrease (dec)
- half double crochet (hdc)
- slip stitch (sl st)
How to crochet a pocket bunny?
Ears (make 2)
- Worked in rows.
With a 2.75 mm crochet and yarn in brown:
- Ch 6
- Row 1: starting in the 2nd ch from the hook: 1 sc, 3 hdc, 1 sc. (5)
Cut the yarn but leave a long tail for sewing.
Thread the yarn tail through the first chain to close the base neatly.
Set aside for later.
Body
Legs
- Worked in continuous rounds (as a spiral). Use a stitch marker if needed.
- Stuff as you go.
- Leg 1:
With a 2.75 mm crochet and brown:
- Round 1: 6 sc in a magic ring. (6)
- Rounds 2-3: [1 sc in all st]. (6)
Fasten off. Stuff lightly. Set aside.
- Leg 2:
With a 2.75 mm crochet and brown:
- Round 1: 6 sc in a magic ring. (6)
- Rounds 2-3: [1 sc in all st]. (6)
Do NOT cut yarn. Stuff lightly.
Join legs:
- Round 4: Continue from Leg 2, working into Leg 1: 6 sc, then 6 sc around Leg 2. (12)
- Rounds 5-9: [1 sc in all st]. (12)
Head:
- Round 10: [1 sc, 1 dec] x4. (8)
- Round 11: [8 inc]. (16)
- Rounds 12-15: [1 sc in all st]. (16)
Place the eyes between Rounds 14 and 15, spaced 2 st appart.
With your tapestry needle and pink yarn, stitch a little nose over 1 stitch between Rounds 13 and 14, centered below the eyes.
- Round 16: [8 dec]. (8)
Stuff firmly. Fasten off and close.
Sew the ears to the head over Rounds 16.
Arms (make 2)
- Worked in continuous rounds (as a spiral). Use a stitch marker if needed.
With a 2.75 mm crochet and yarn in brown:
- Round 1: 5 sc in a magic ring. (5)
- Rounds 2-4: [1 sc in all st]. (5)
Do not stuff.
Fasten off, leaving a long tail
Sew the arms to the body. The top of the arms should be between rounds 8 and 9.
Tail
- Worked in continuous rounds.
With a 2.75 mm crochet and yarn in brown:
- Round 1: 4 sc in a magic ring. (4)
Cut the yarn but leave a long tail for sewing. Sew the tail at the back of the body over rounds 5 and 6.
Outfit: Dress or Overalls
- Worked in continuous rounds, then rows.
With chosen color:
- Round 1: ch 18; 1 sl st in the first ch to form a ring.
- Round 2: [1 sc in all ch]. (18)
- Round 3: [1 dec, 1 sc in the next 7 st]x2. (16)
- Round 4: [1 sc in the next 8 st] - leave the remaining 8 st unworked. (8)
👉 Now work in rows.
- Row 5: ch1, turn: [1 dec, 1 sc in the next 2 st]. (6)
- Row 6: ch1, turn: [1 dec, 1 sc in the next st]. (4)
- Row 7: ch1, turn: [1 sc in the next 4. (4)
Ch 8 for first strap. Fasten off. Leave a long tail for sewing. Join yarn to first stitch of Row 7, ch 8 for second strap. Fasten off. Leave a long tail for sewing.
Sew straps to back of dress/overalls.
Dress Option
You are finished.
Overalls Option
Join yarn at the front center of Round 1, ch 3.Fasten off leaving a long tail.Sew the chain to the stitch directly opposite (back center).
Make sure there are 8 stitches from Round 1 on each side of the bottom separation.
Congratulations! Your little crochet pocket bunny is done! Don't forget to share a picture with me and tag me on social networks!
All rights reserved.The pattern and photographs contained in this document are the property of Natalina Craft. This pattern is available for personal use only. No unauthorized reproduction, in whole or in part, or distribution of this pattern or content is allowed.You may sell finished items in limited amounts. If you sell your finished products online, I would be grateful if you can add a statement saying « Pattern by Natalina Craft » and link back to my post.
Crochet Pattern Pocket Bunny