
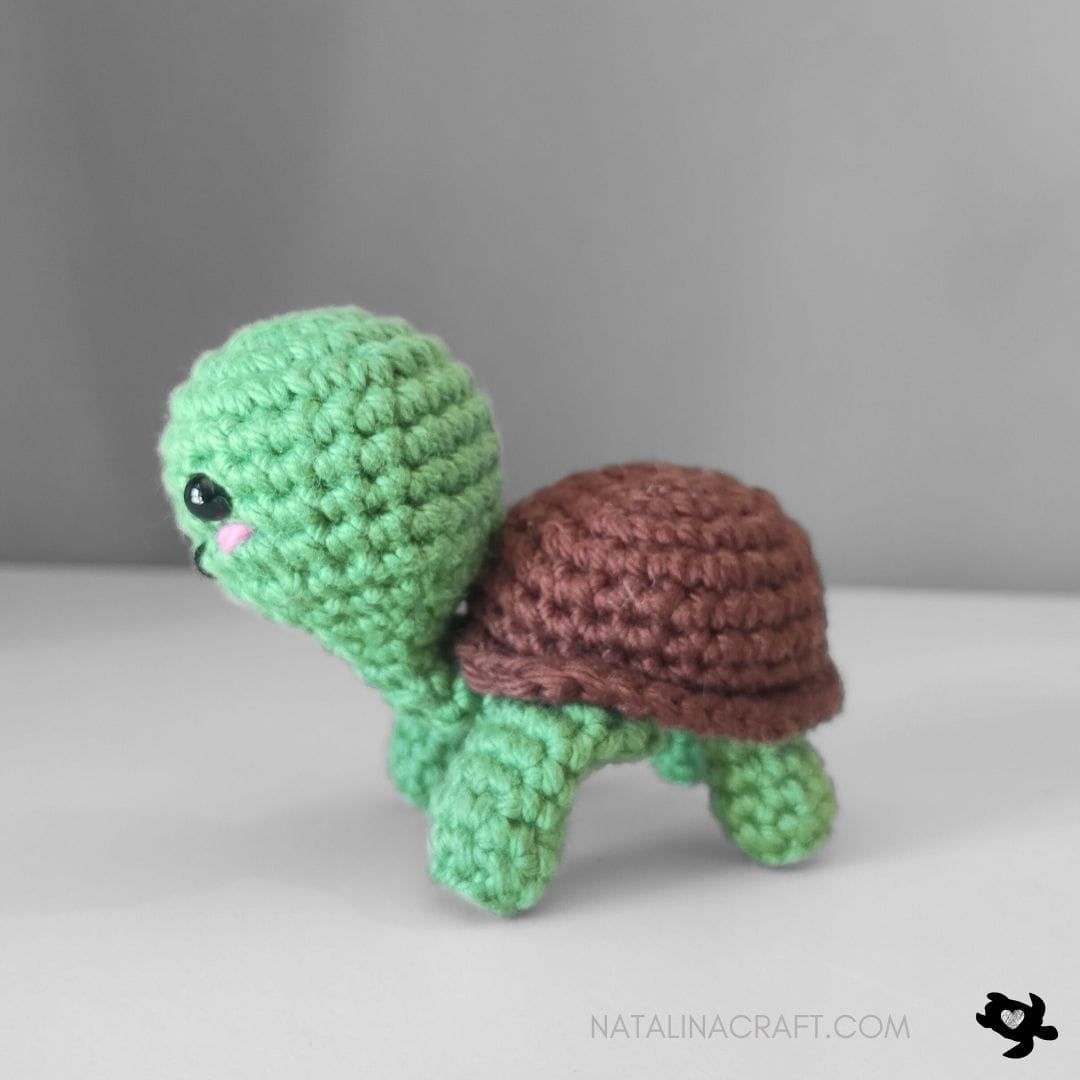
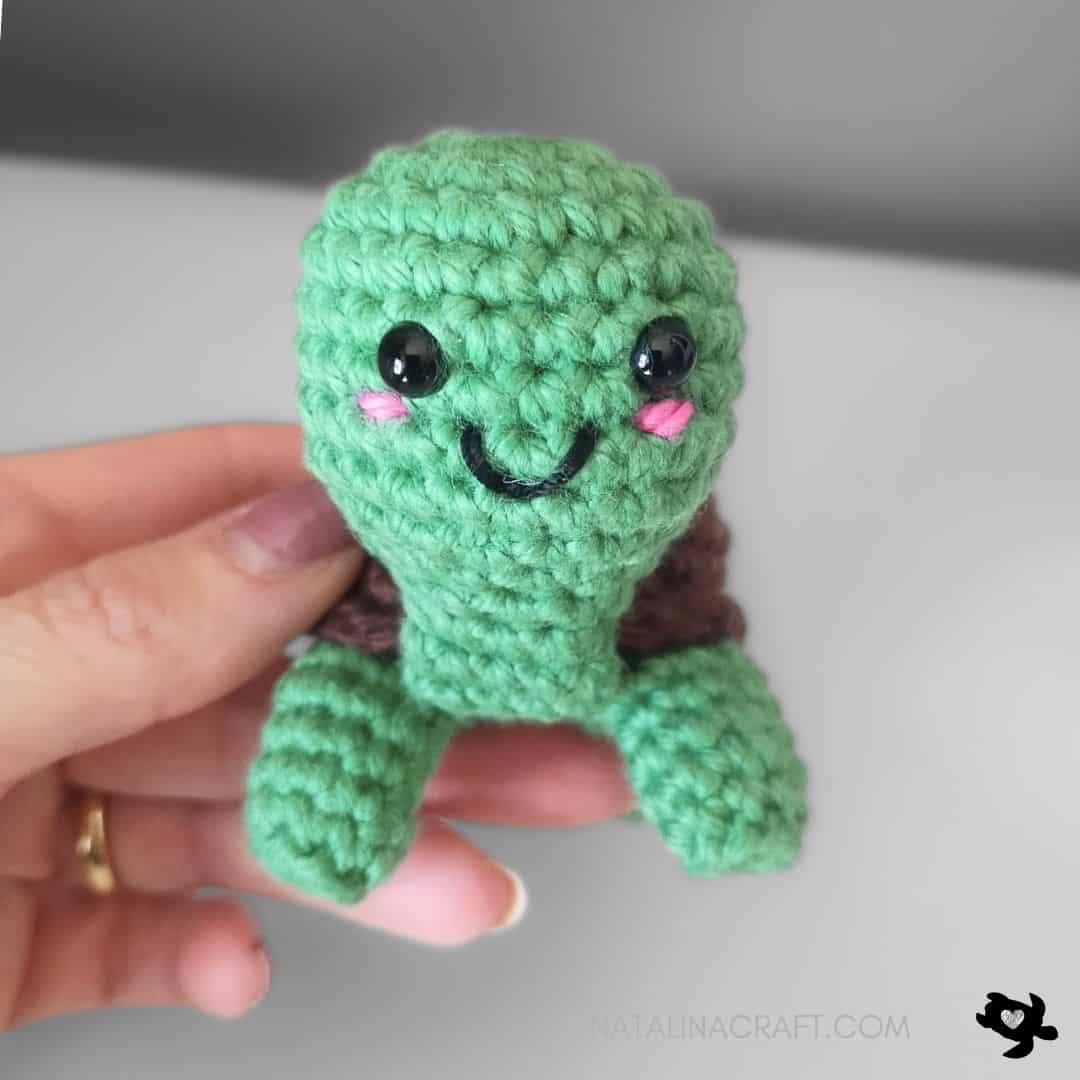
If you’re looking for a cute and beginner-friendly tortoise amigurumi crochet pattern, you’re in the right place! This adorable crochet tortoise works up quickly and makes a perfect handmade toy, gift, or woodland addition to your amigurumi collection.
With its round shell, sweet face, and optional little heart detail, this free crochet tortoise pattern is both simple and charming. It’s a small project that uses minimal yarn and is great for confident beginners or experienced crocheters looking for a quick make.
Don’t forget to join my Facebook group here, where you can ask your questions and share your finished projects. I will regularly ask you what pattern you would like to see next (or you can even suggest something even if I am not asking!).
I hope you will enjoy and understand the pattern. If you have any questions, feel free to write to me. I will try my best to help you. And I would love to see your work!

Crochet Pattern Tortoise
Start Here
- Please read the entire pattern before starting.
- Pattern is written in US terms
- Work in continuous rounds (spiral) unless stated otherwise
Parts:
- Head
- 2 back legs
- 2 front legs
- Shell
- Optional heart
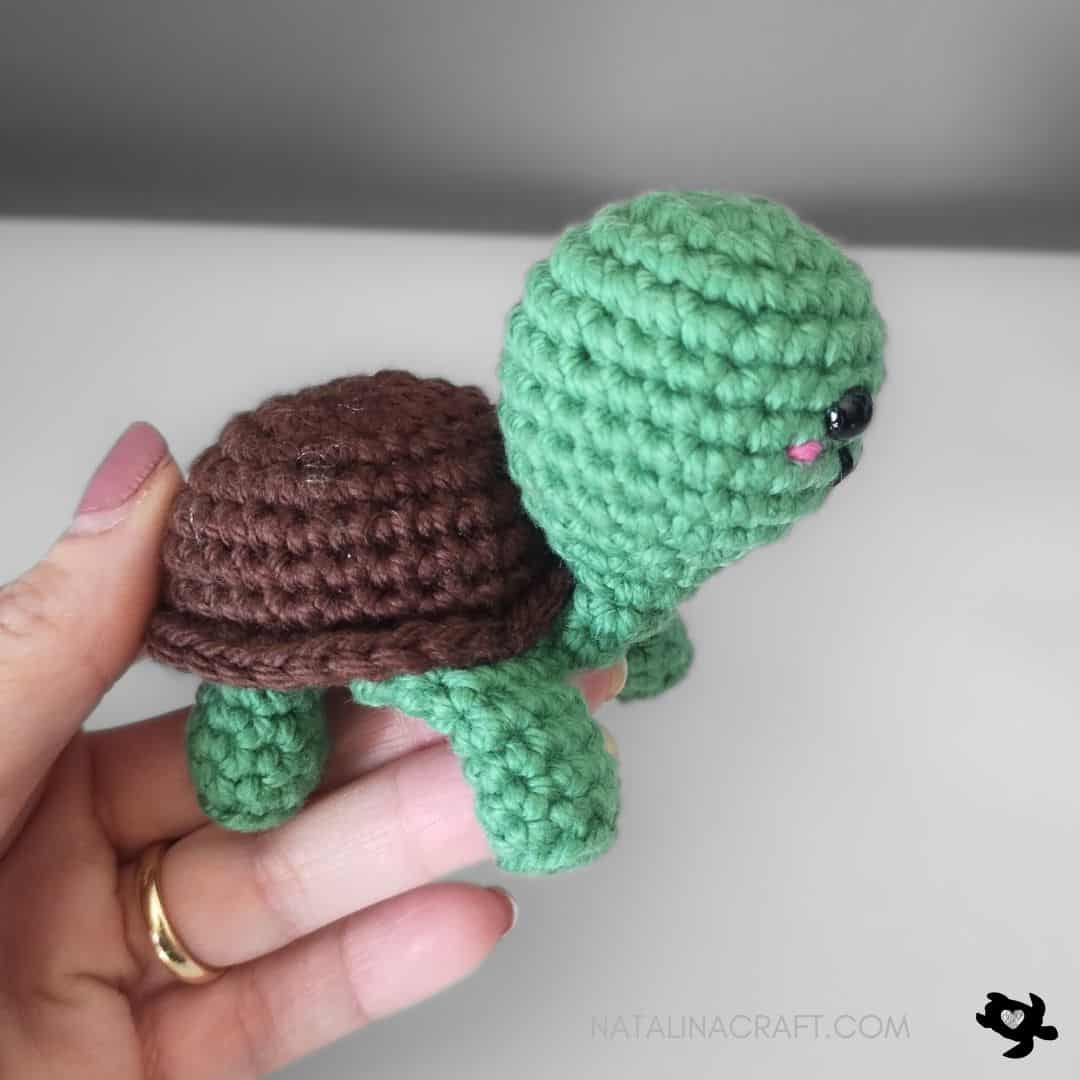
Finished Size:
Approx. 3 inches high and 3.5 inches long
Material:
- Worsted yarn in green, brown, and cream.
- Small amount of light pink yarn (cheeks)
- Optional color for the heart
- 2.75 mm crochet hook
- 2 black safety eyes (6 mm)
- black cotton thread (for the mouth)
- Stitch markers (if needed)
- Tapestry needle
- Polyfill stuffing
Abbreviations:
- chain (ch)
- magic ring (mr)
- single crochet (sc)
- increase (inc)
- invisible decrease (dec)
- slip stitch (sl st)
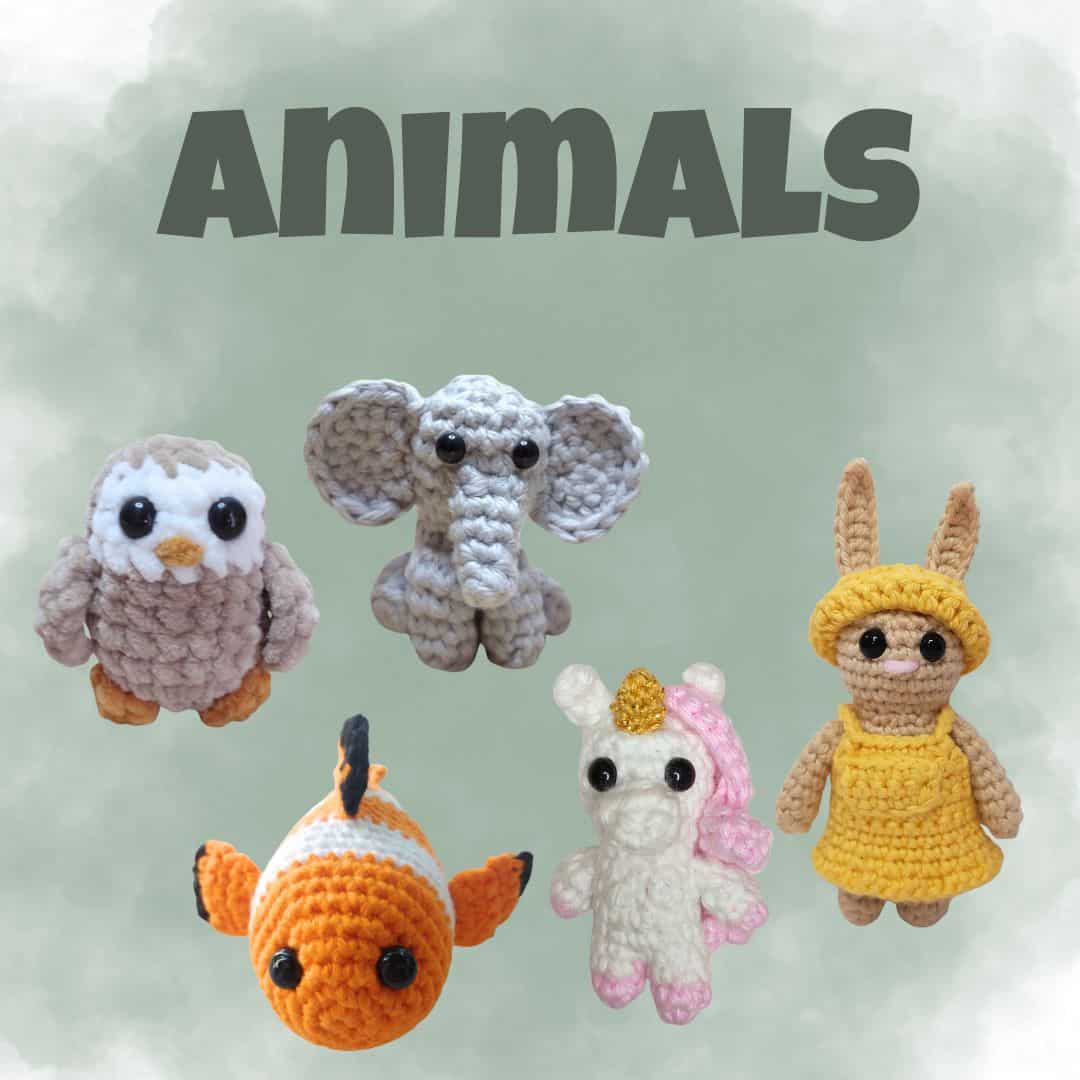
Looking for more Animal ideas?
How to crochet a Tortoise?
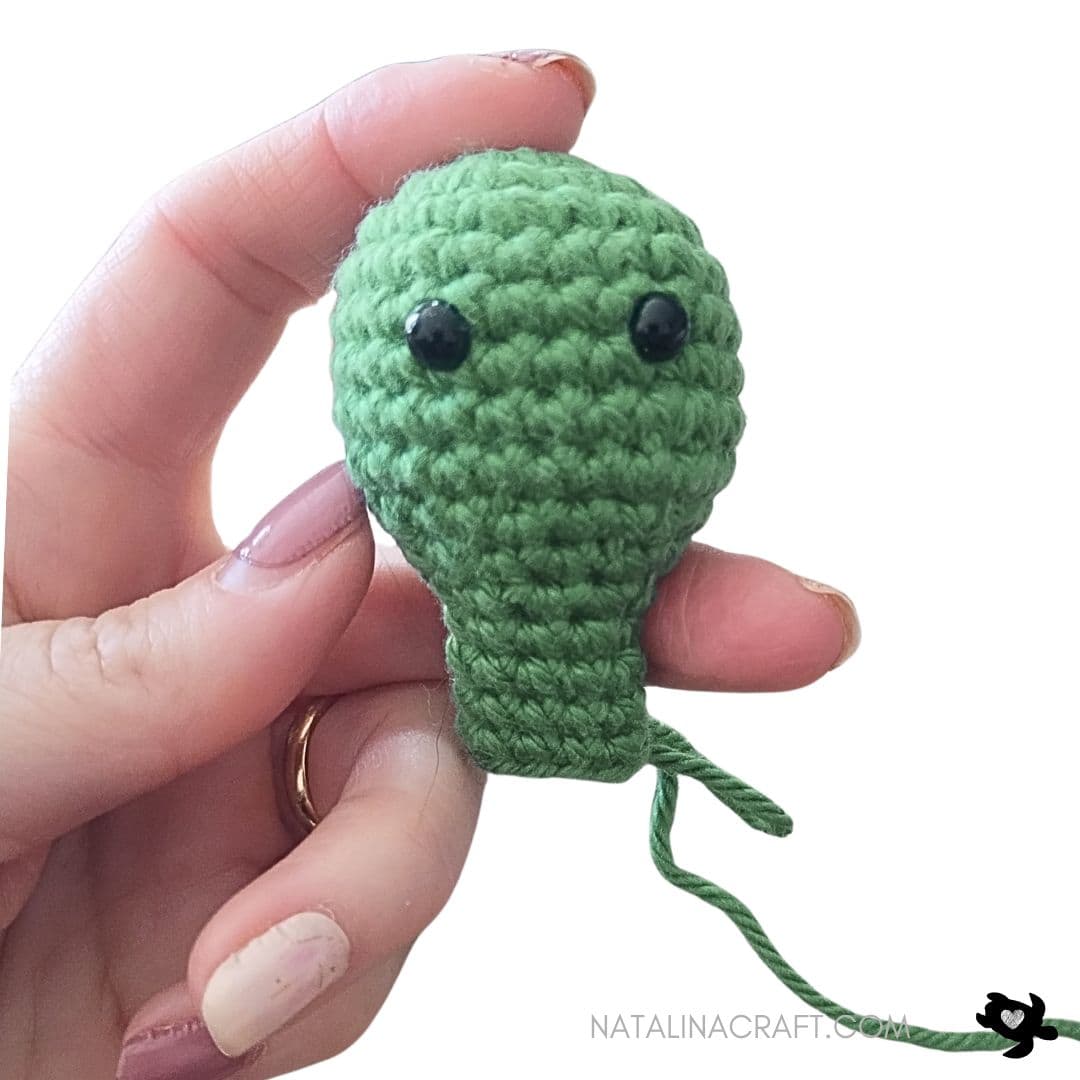
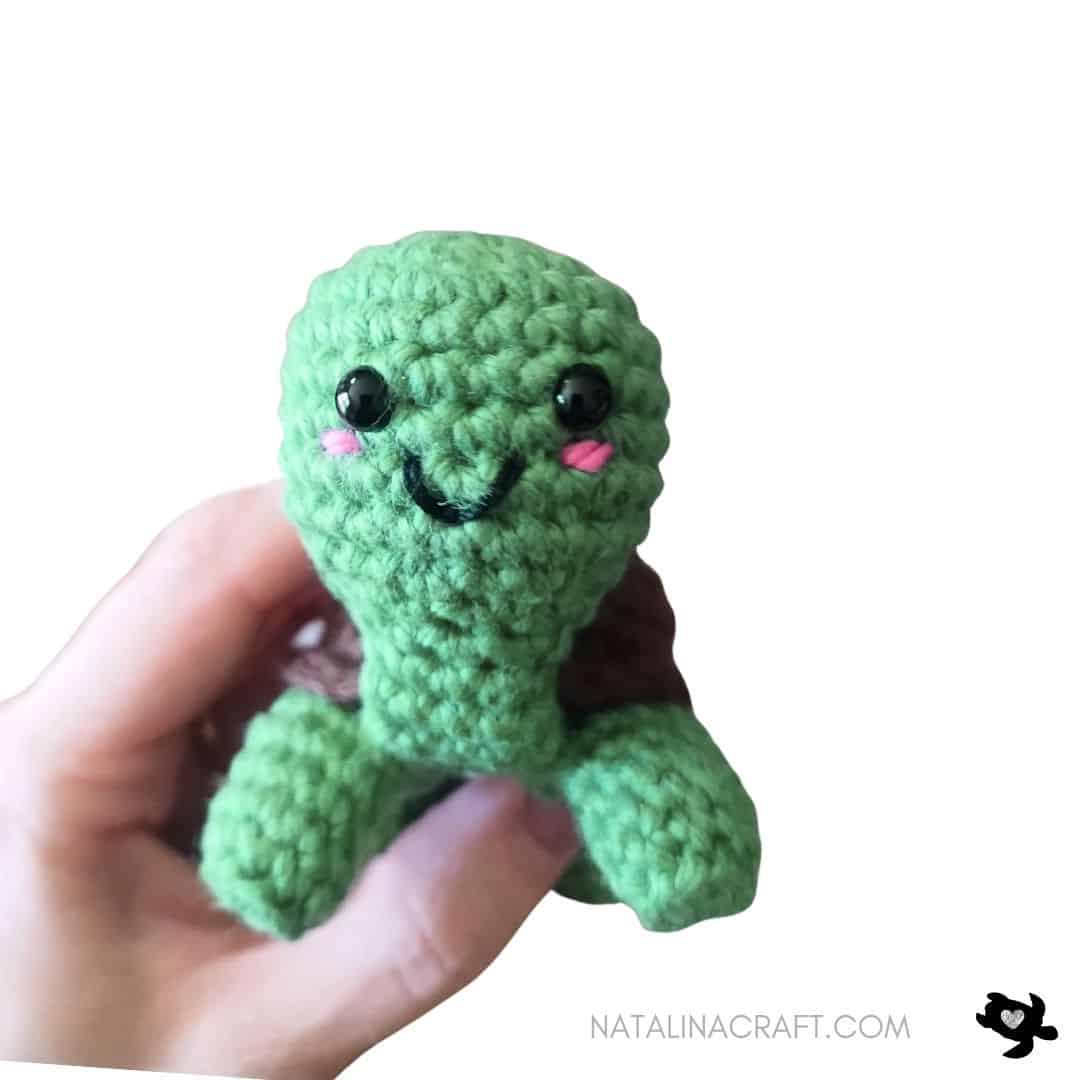
Head
- Worked in continuous rounds.
- Stuff lightly as you go.
With a 2.75 mm crochet and green yarn.
- Round 1: 6 sc in a magic ring. (6)
- Round 2: [6 inc]. (12)
- Round 3: [1 sc, 1 inc] x6. (18)
- Round 4: [2 sc, 1 inc] x6. (24)
- Rounds 5 to 9: [1 sc in all]. (24)
Place the eyes between Rounds 6 and 7, spaced by 3 stitches.
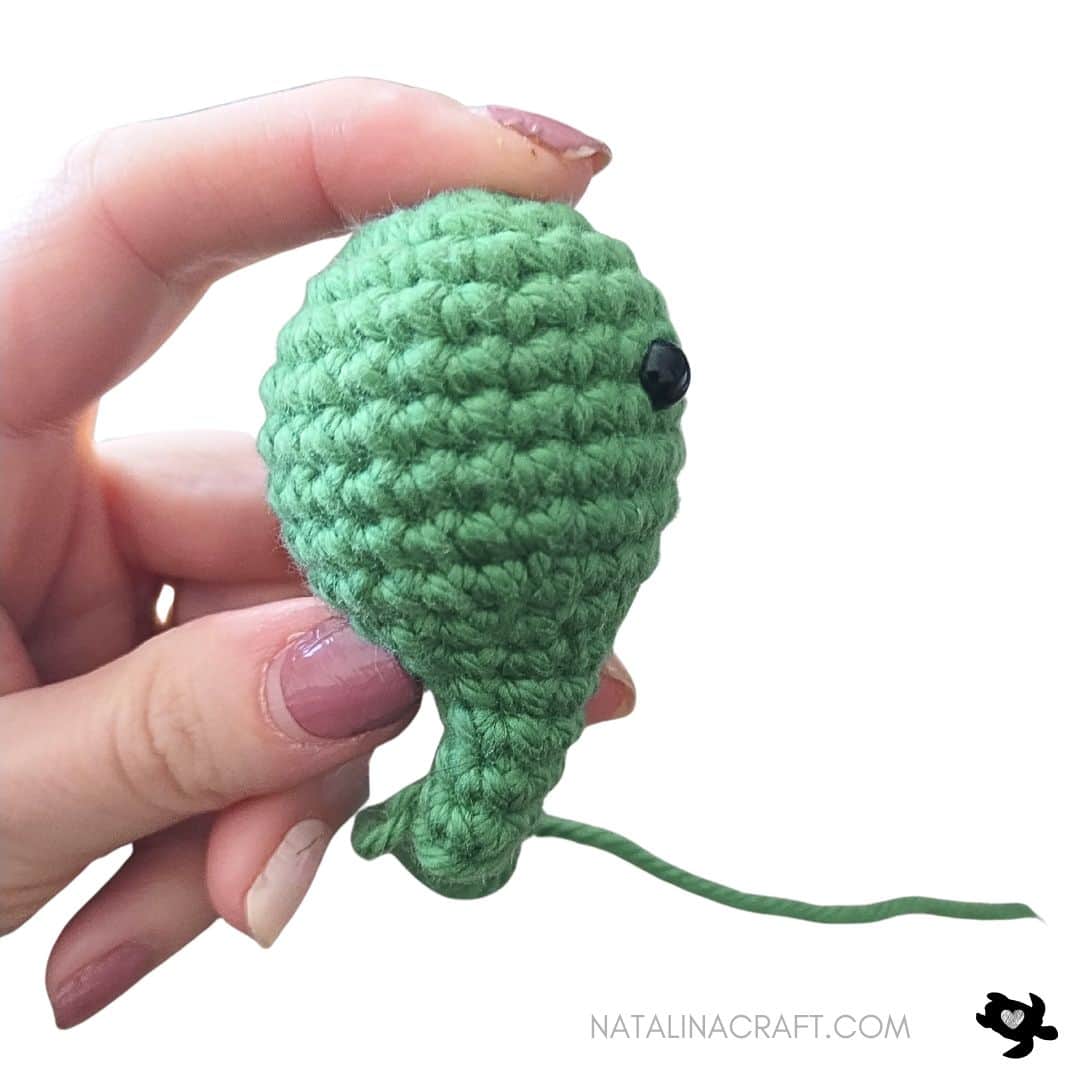
- Round 10: [2 sc, 1 dec] x6. (18)
Stuff the head.
- Round 11: [1 sc, 1 dec] x6. (12)
- Round 12: [2 sc, 1 dec] x3. (9)
- Rounds 13 to 16: [1 sc in all]. (9)
Do not stuff the neck section.
Fasten off. Set aside for later.
Shell
- Worked in continuous rounds.
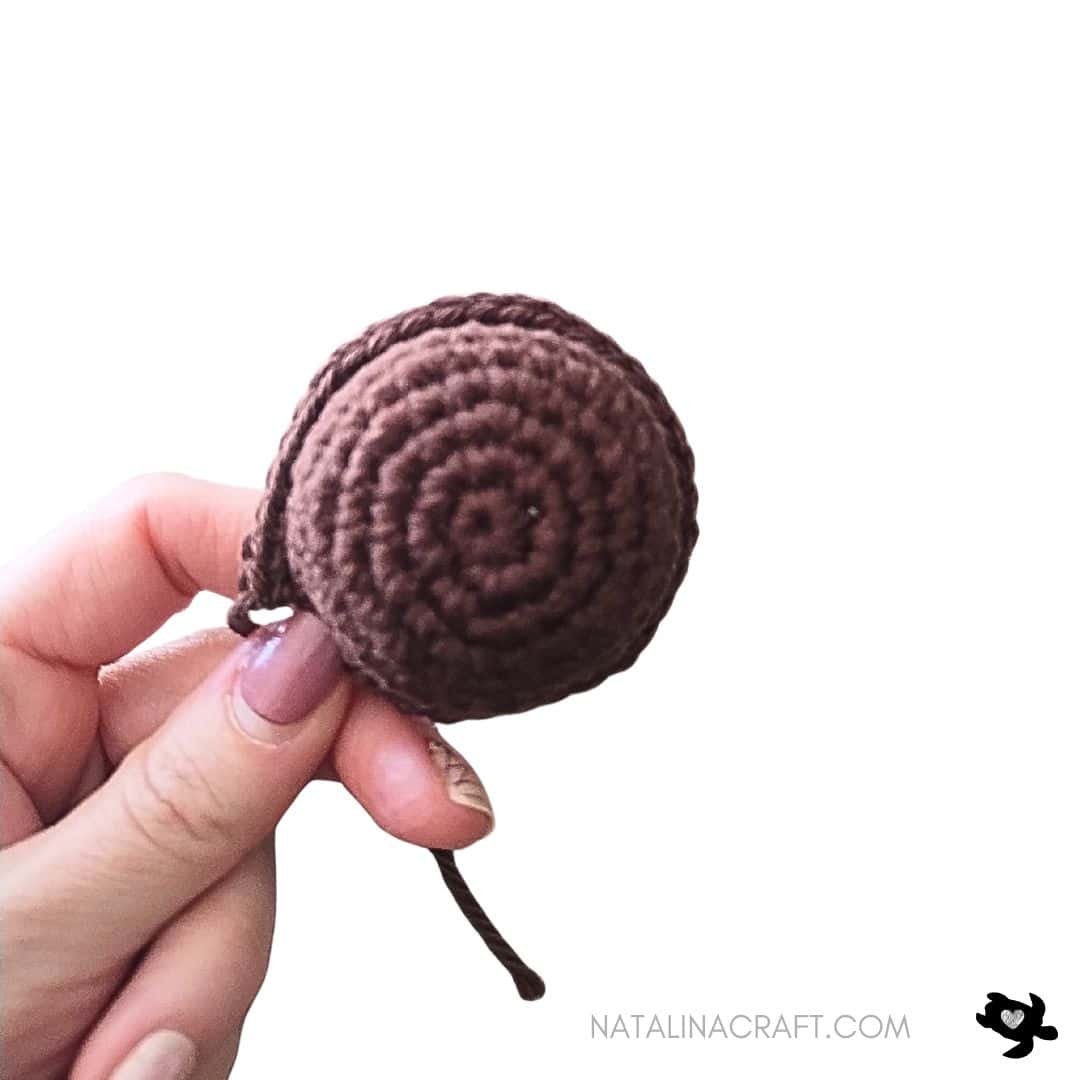
Top Part
With a 2.75 mm crochet and brown yarn.
- Round 1: 6 sc in a magic ring. (6)
- Round 2: [6 inc]. (12)
- Round 3: [1 sc, 1 inc] x6. (18)
- Round 4: [2 sc, 1 inc] x6. (24)
- Round 5: [3 sc, 1 inc] x6. (30)
- Rounds 6-8: [1 sc in all st]. (30)
- Round 9: Working in the front loops only: [4 sc, 1 inc] x6. (36)
Fasten off, leaving a long tail.
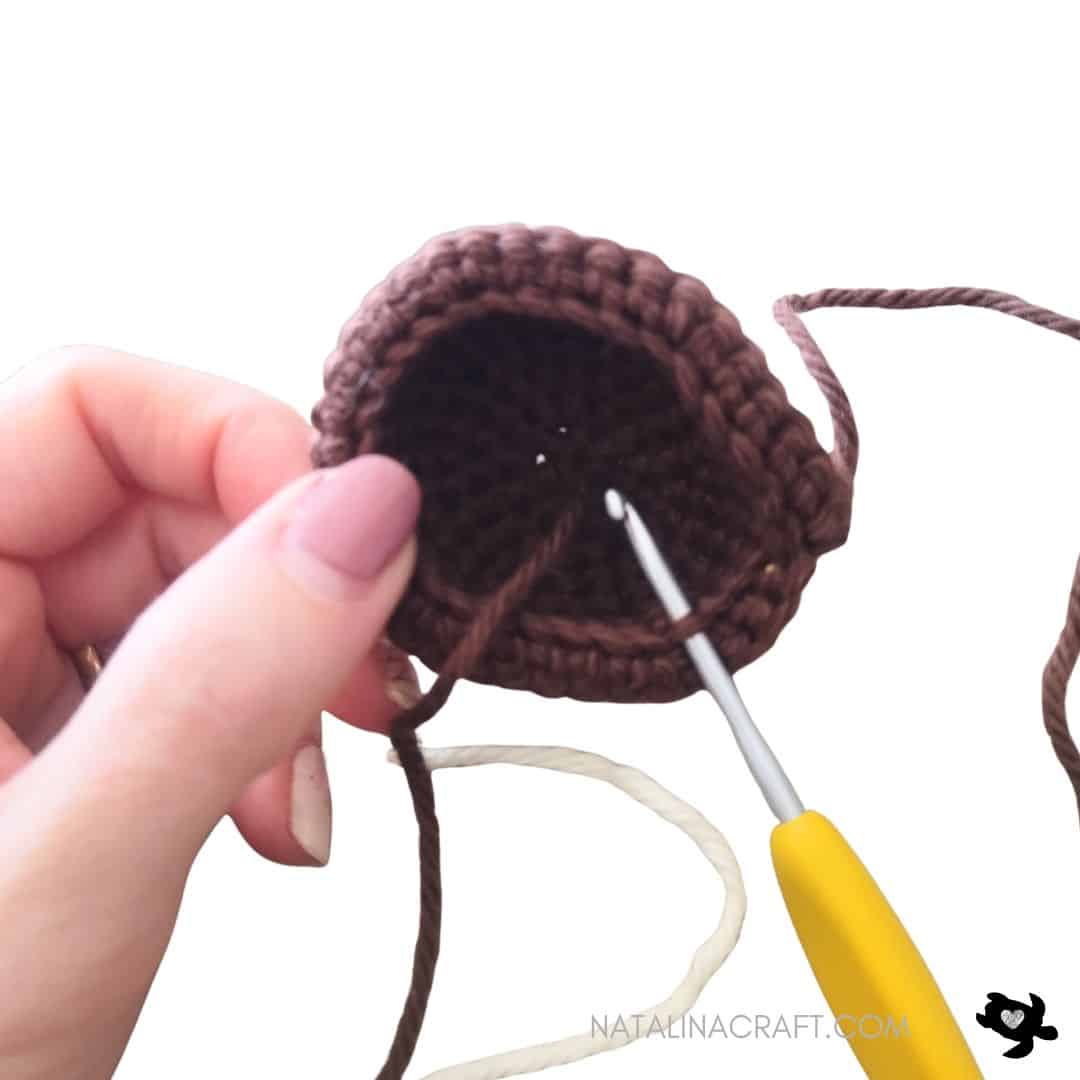
Bottom Part
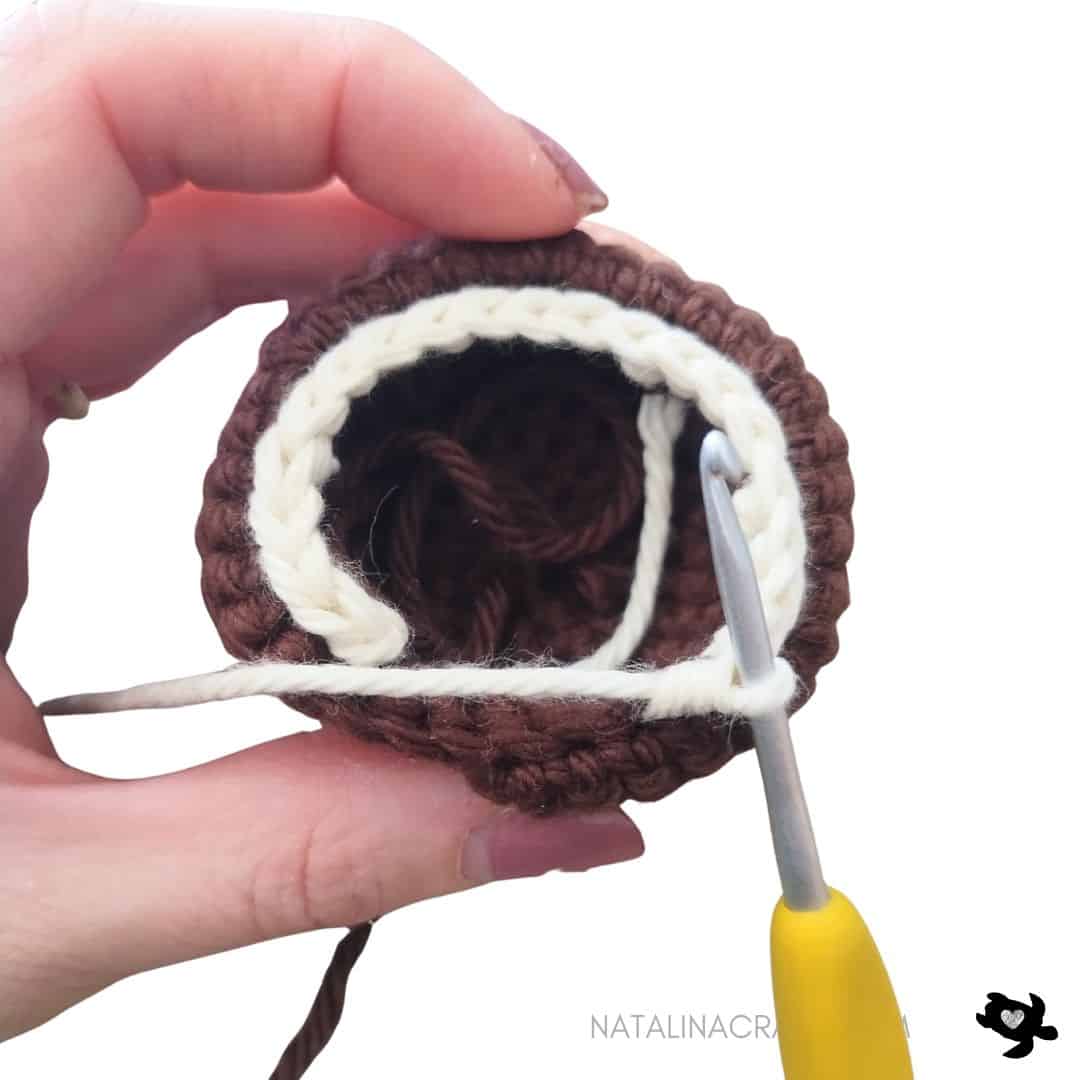
Join the cream yarn in any back loops from Round 8. Starting in the same loop where you joined:
- Round 1:
(4 sc, 1 dec) × 2
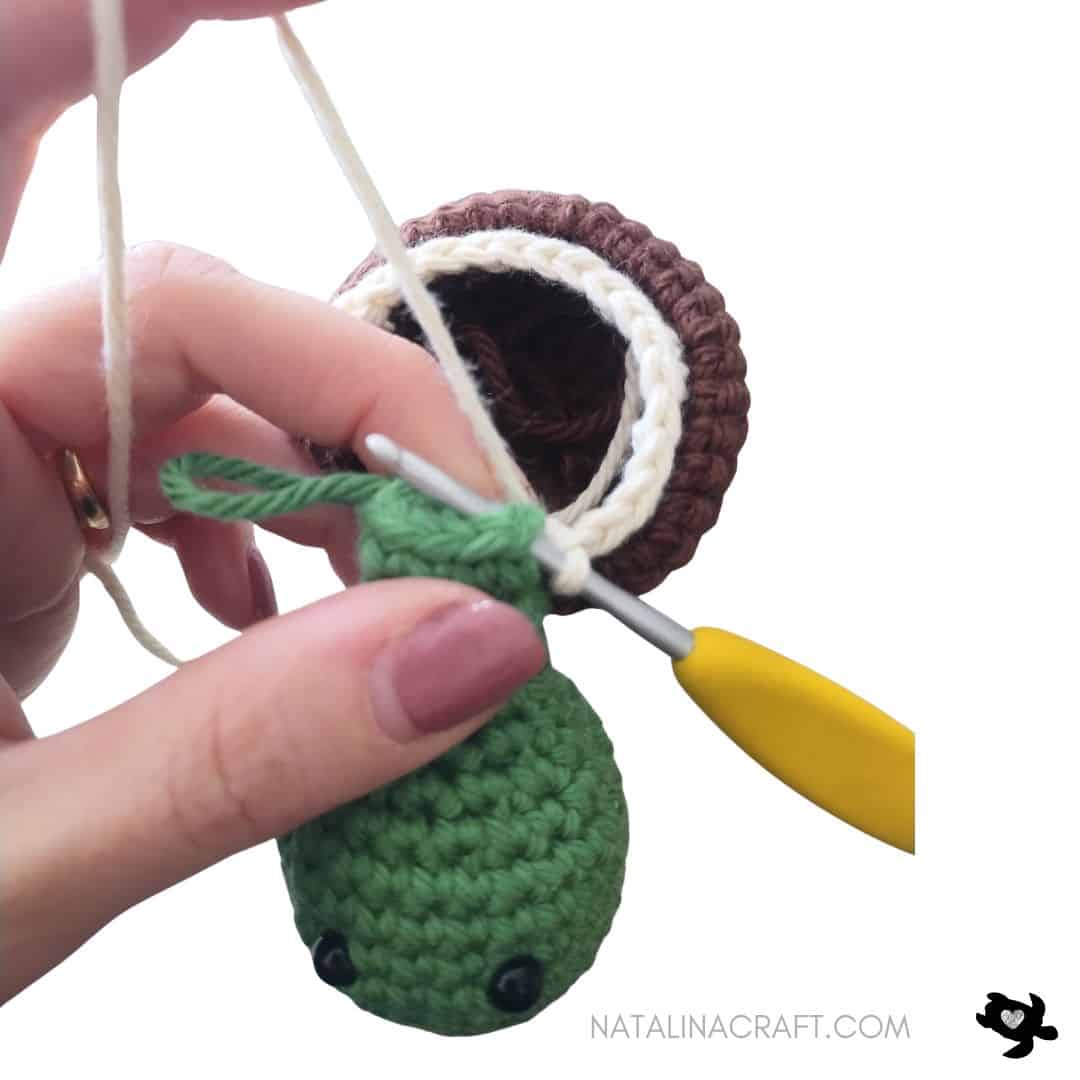
Leave 5 stitches unworked at the front opening.
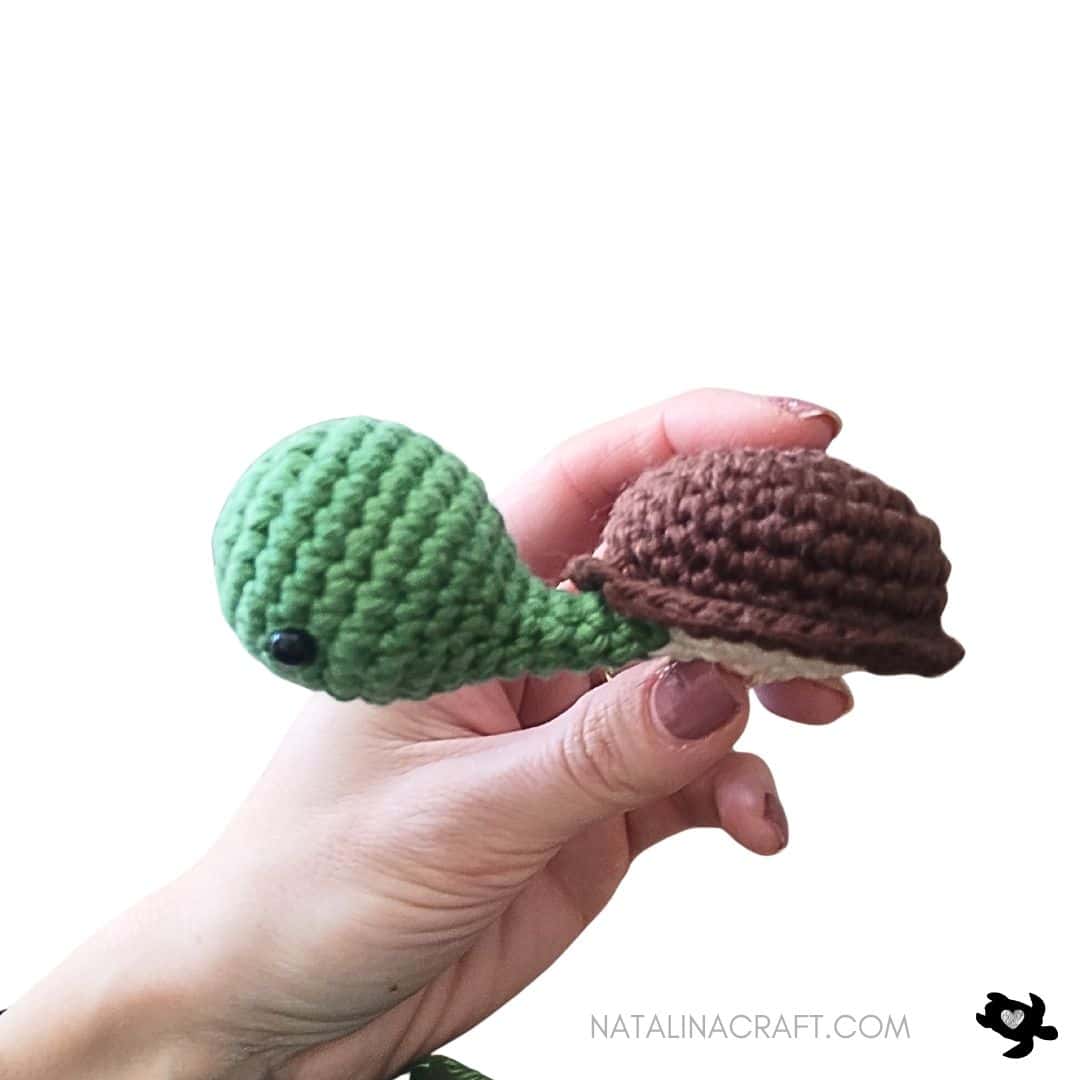
Attach the head by working 4 sc evenly through the stitches of Round 16 of the neck (front of the neck).
Continue around shell: (4 sc, 1 dec) × 3. (24)
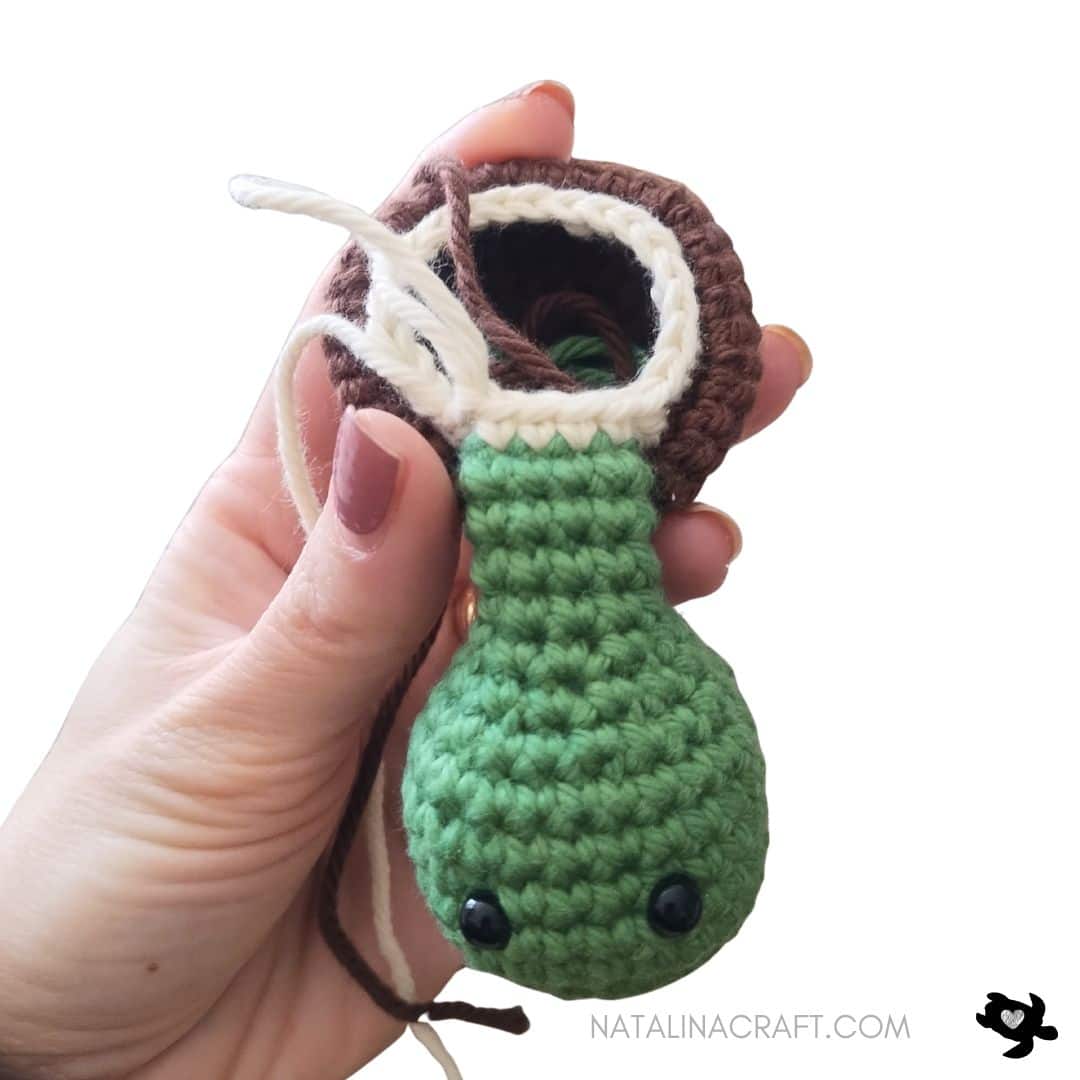
Sew the back of the neck securely to the shell opening (you can do it now or later when the shell is done).
- Round 2: [2 sc, 1 dec] x6. (18)
- Round 3: [1 sc, 1 dec] x6. (12)
Stuff the shell.
- Round 4: [6 dec]. (6)
Fasten off and close the opening.
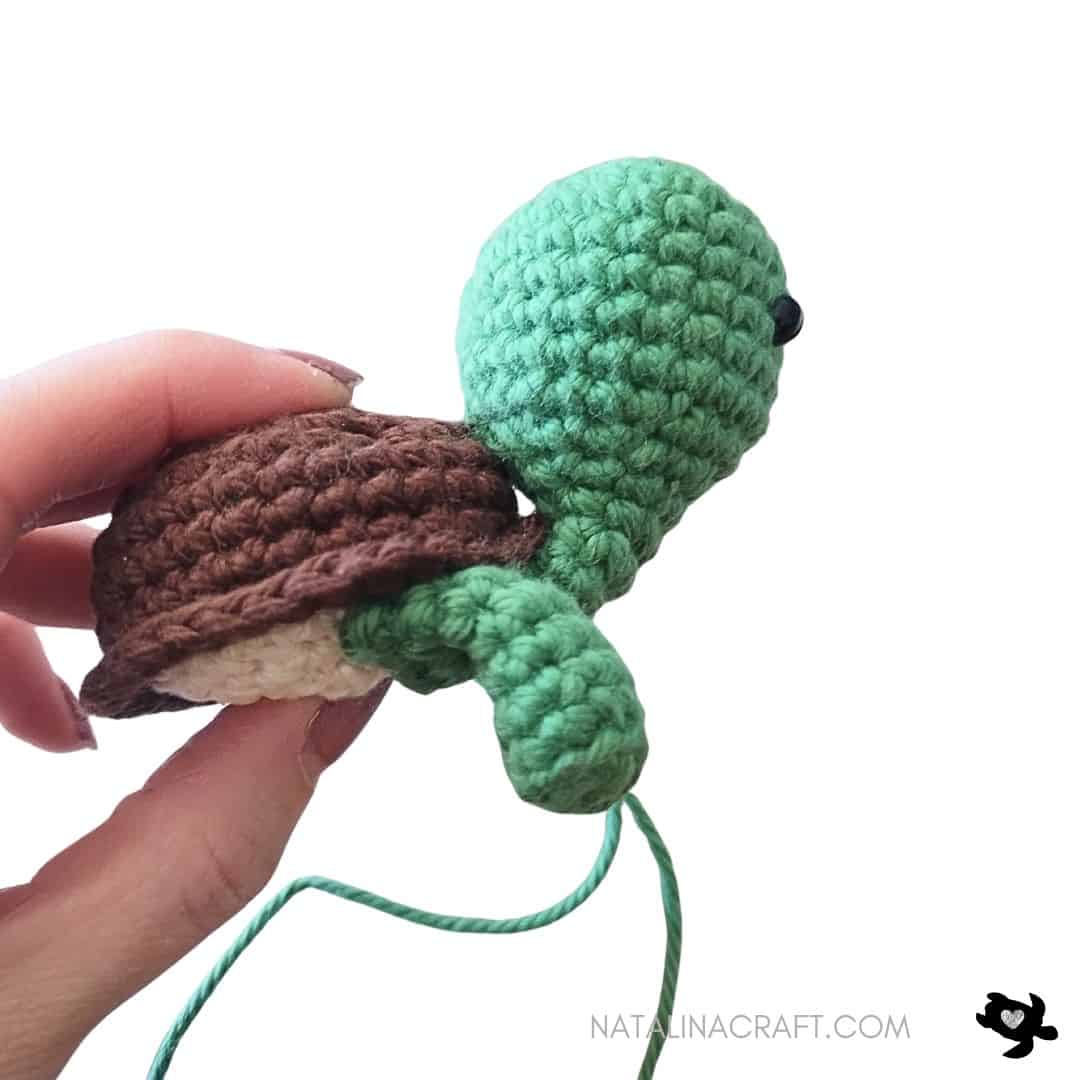
If the head tilts downward, secure the back of the head to the shell with a few stitches.
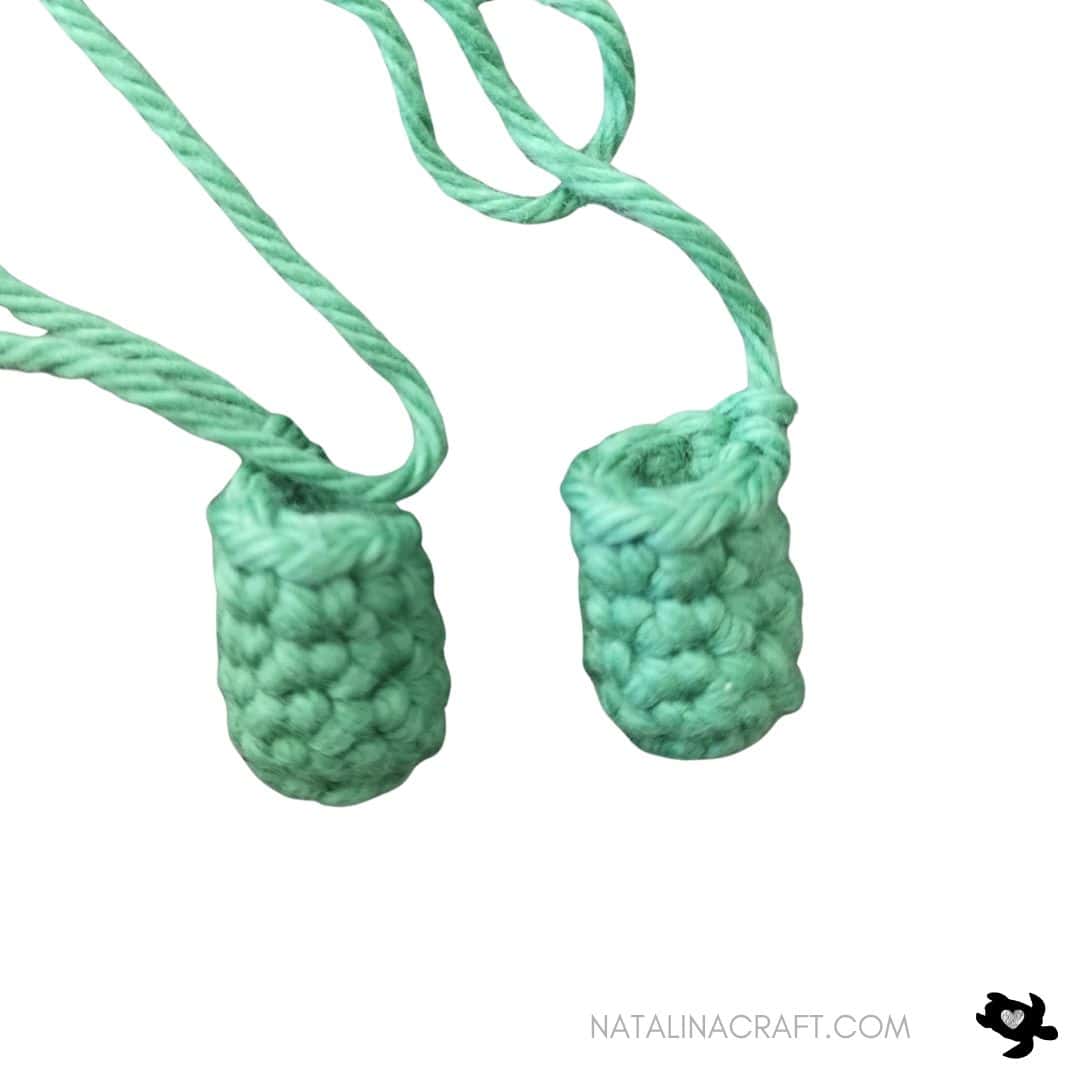
Front Legs (make 2)
- Worked in continuous rounds.
- Only stuff the bottom of the legs.
Note About the Front Legs
After giving this tortoise to my son, I noticed that the front legs tend to lay flat. He actually loves it because he can make his tortoise “sleep” 😊
However, if you prefer your tortoise to stand more upright, you can make all four legs the same as the back legs instead. This will give the tortoise a more stable shape and prevent the front legs from flattening.
With green yarn and a 2.75 mm hook:
- Round 1: 8 sc in a magic ring. (8)
- Rounds 2-8: [1 sc in all st]. (8)
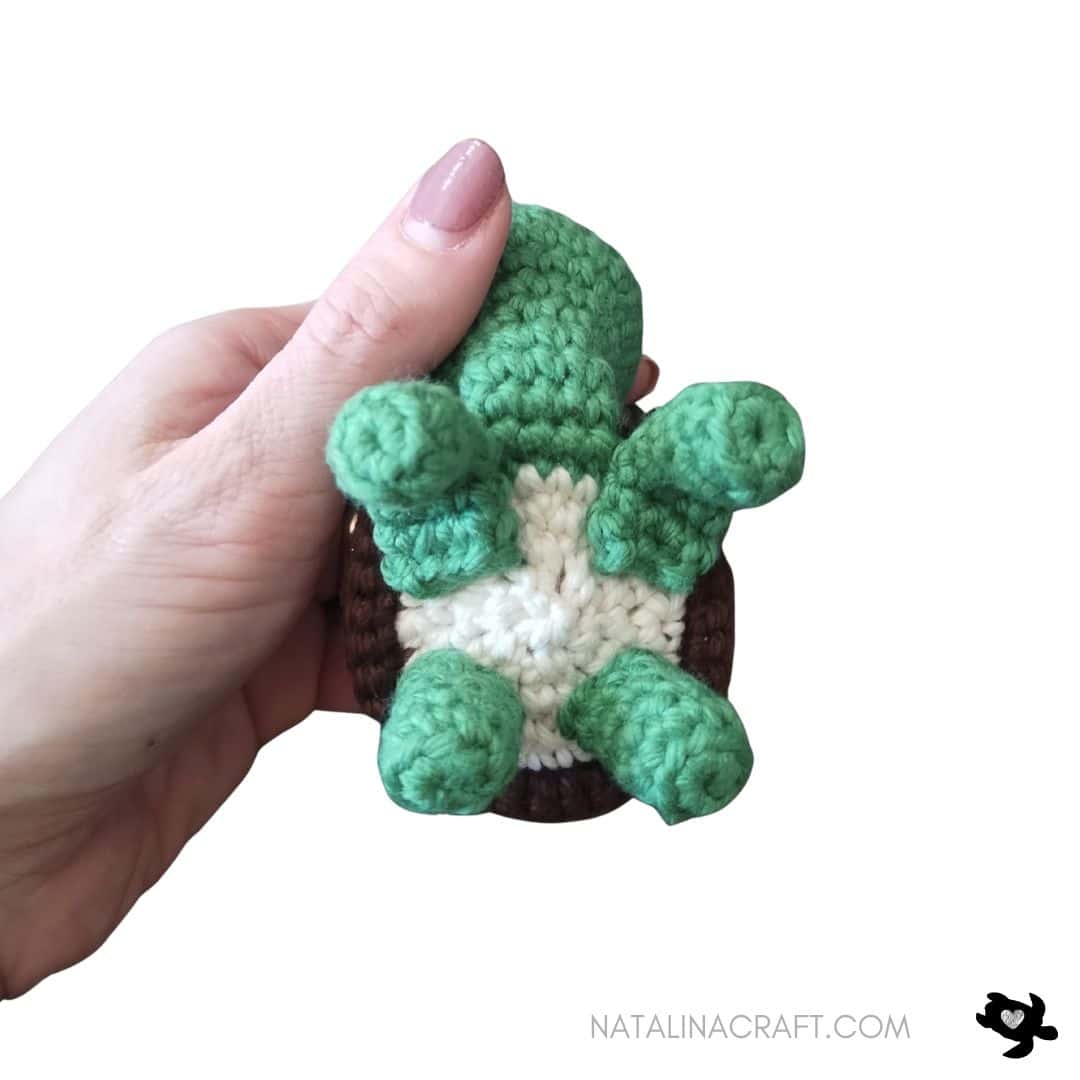
The top part of the legs will be sewn to the body (legs will have a L-shape).
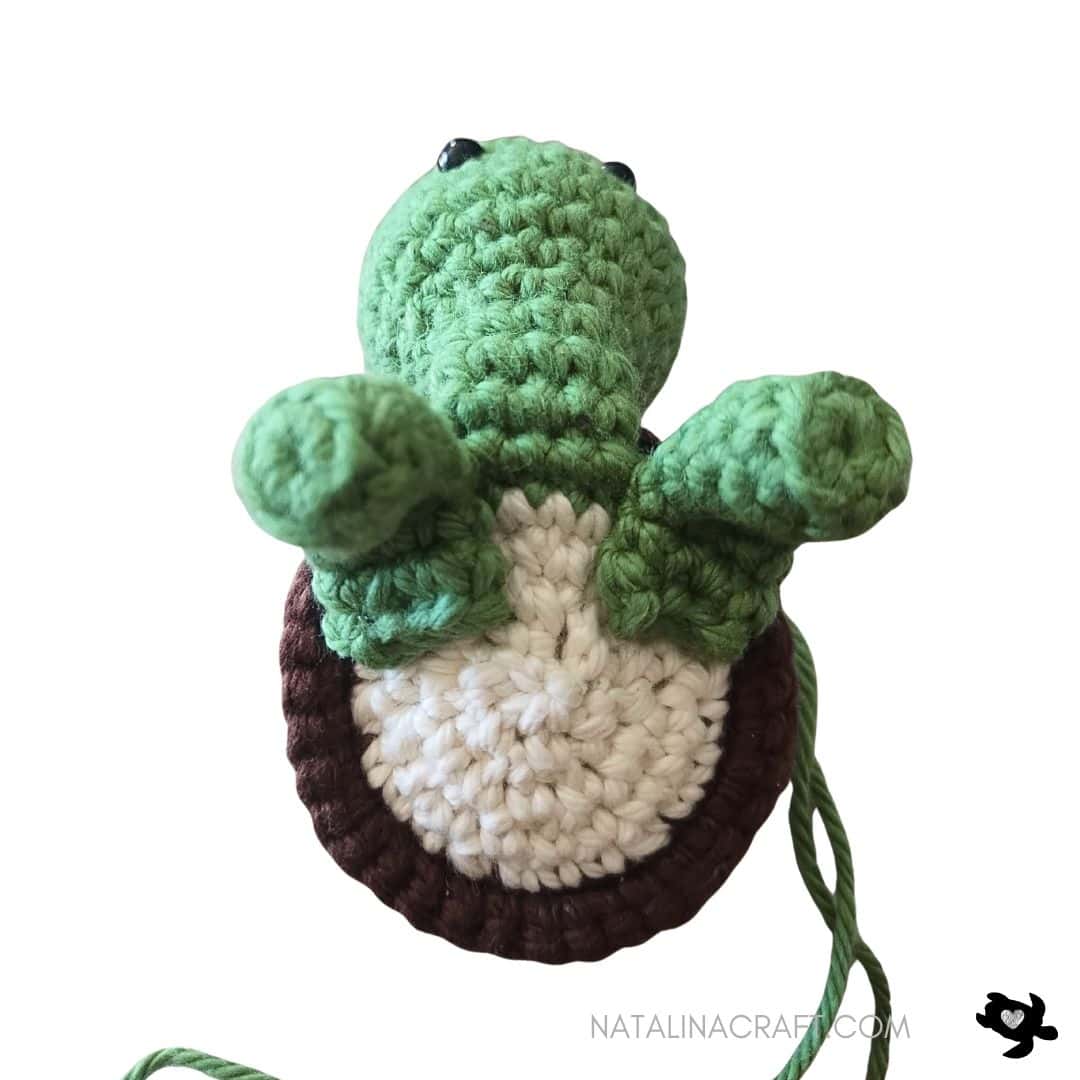
Sew the top part of the legs onto the cream underside of the shell.
Back Legs
- Worked in continuous rounds.
- Stuff as you go.
With green yarn and a 2.75 mm hook:
- Round 1: 8 sc in a magic ring. (8)
- Rounds 2-5: [1 sc in all st]. (8)
Stuff and sew onto the back of the shell underside.

Face Details
- With black cotton thread, embroider a small mouth over Round 8
- With pink yarn, embroider 2 small cheek stitches between Rounds 7-8
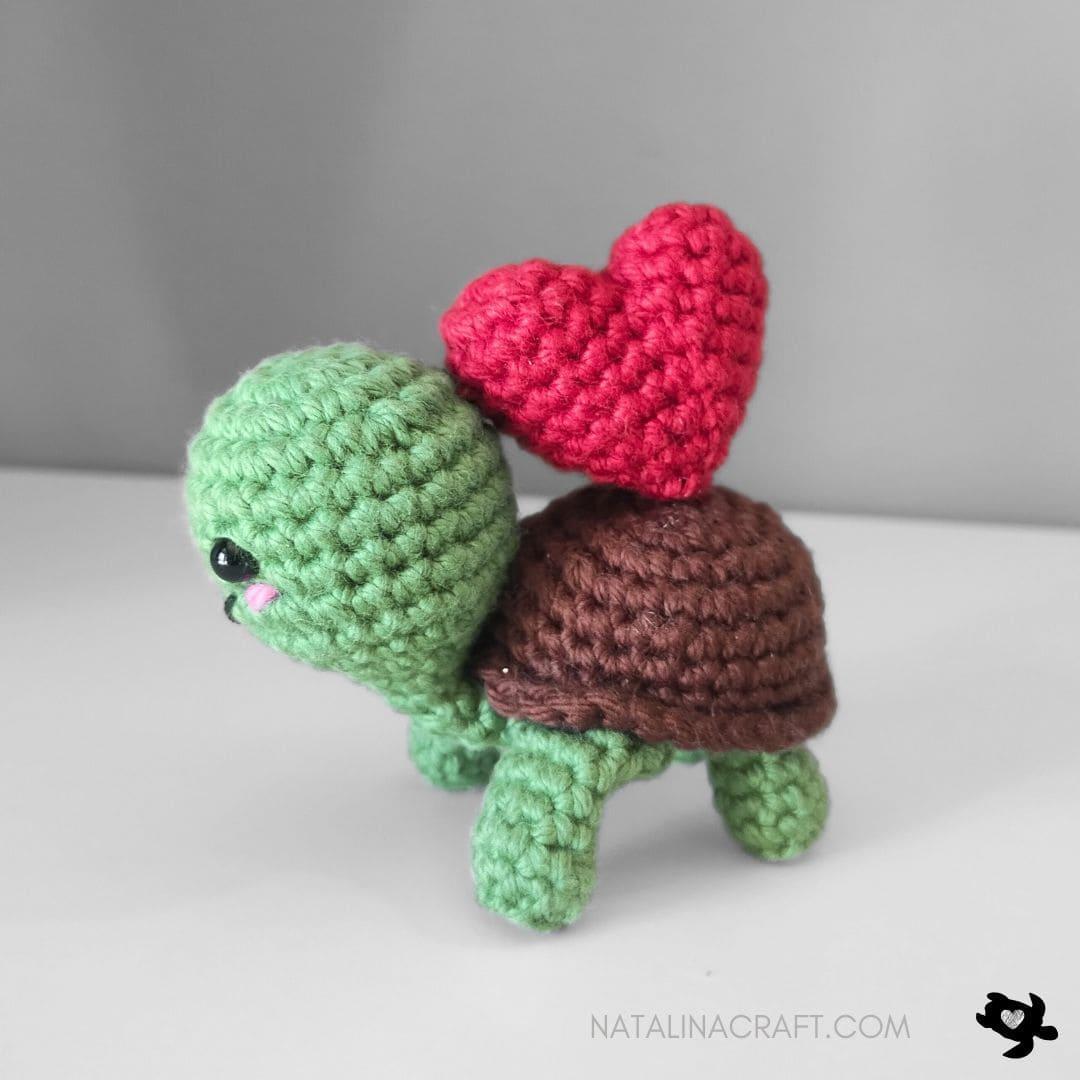
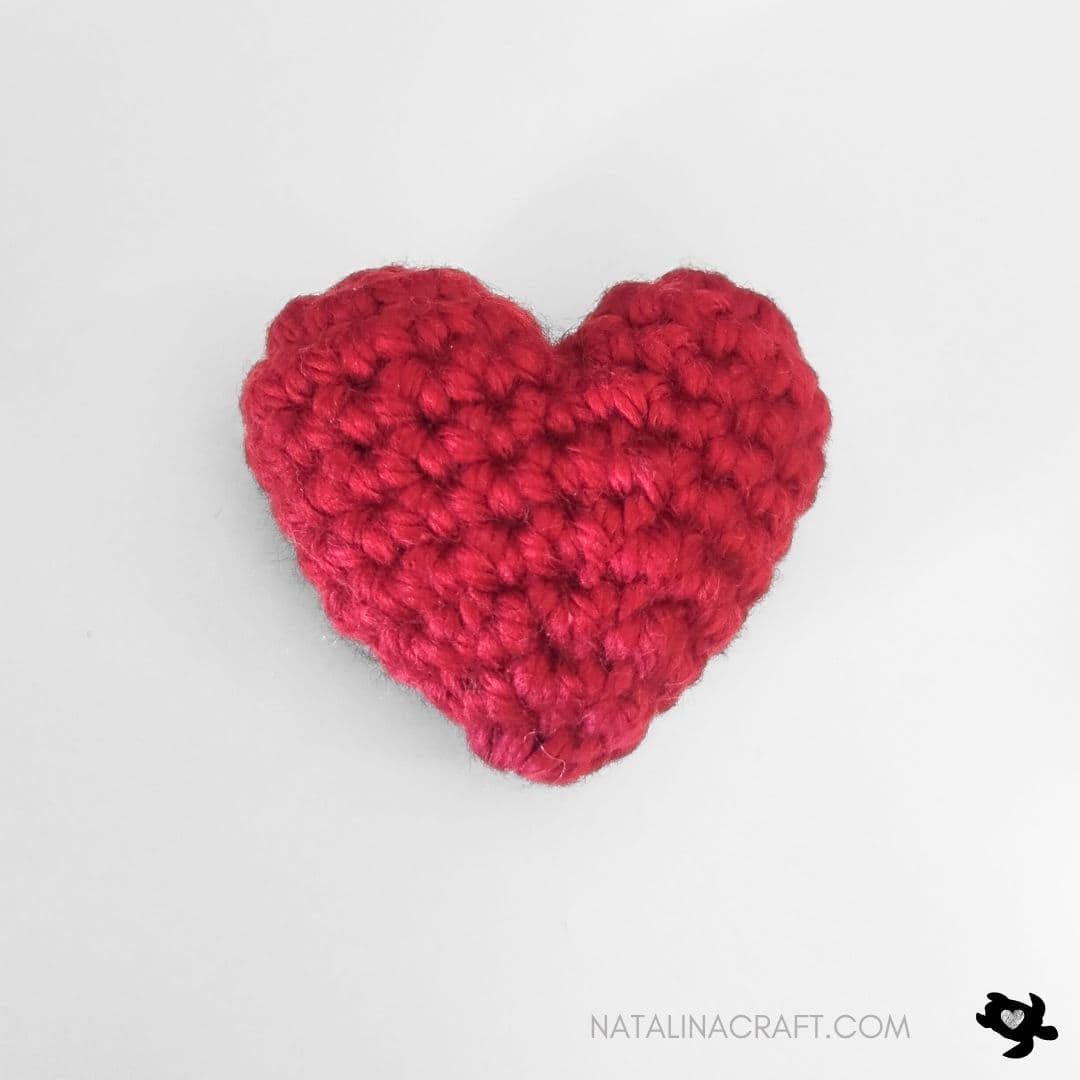
Optional: Heart
- Worked in continuous rounds (as a spiral). Use a stitch marker if needed.
With a 2.75 mm hook and the color of choice.
Part A:
- Round 1: 6 sc in a magic ring. (6)
- Round 2: [6 inc]. (12)
- Round 3: [1 sc in all st]. (12)
Fasten off and set aside.
Part B:
- Round 1: 6 sc in a magic ring. (6)
- Round 2: [6 inc]. (12)
- Round 3: [1 sc in all st]. (12)
Joining both parts:
- Round 4: 1 sc in next 12 sts of Part A, and 1 sc in all 12 sts of Part B. (24)
- Round 5: [1 dec, 10 sc] x2. (22)
- Round 6: [1 dec, 9 sc] x2. (20)
- Round 7: [1 dec, 8 sc] x2. (18)
- Round 8: [1 dec, 1 sc] x6. (12)
- Round 9: [1 dec, 1 sc] x4. (8)
Stuff, close the opening, and fasten off. Sew the heart between the tortoise’s shell. I sewed the bottom of the heart to the shell and one side of the heart to the head.

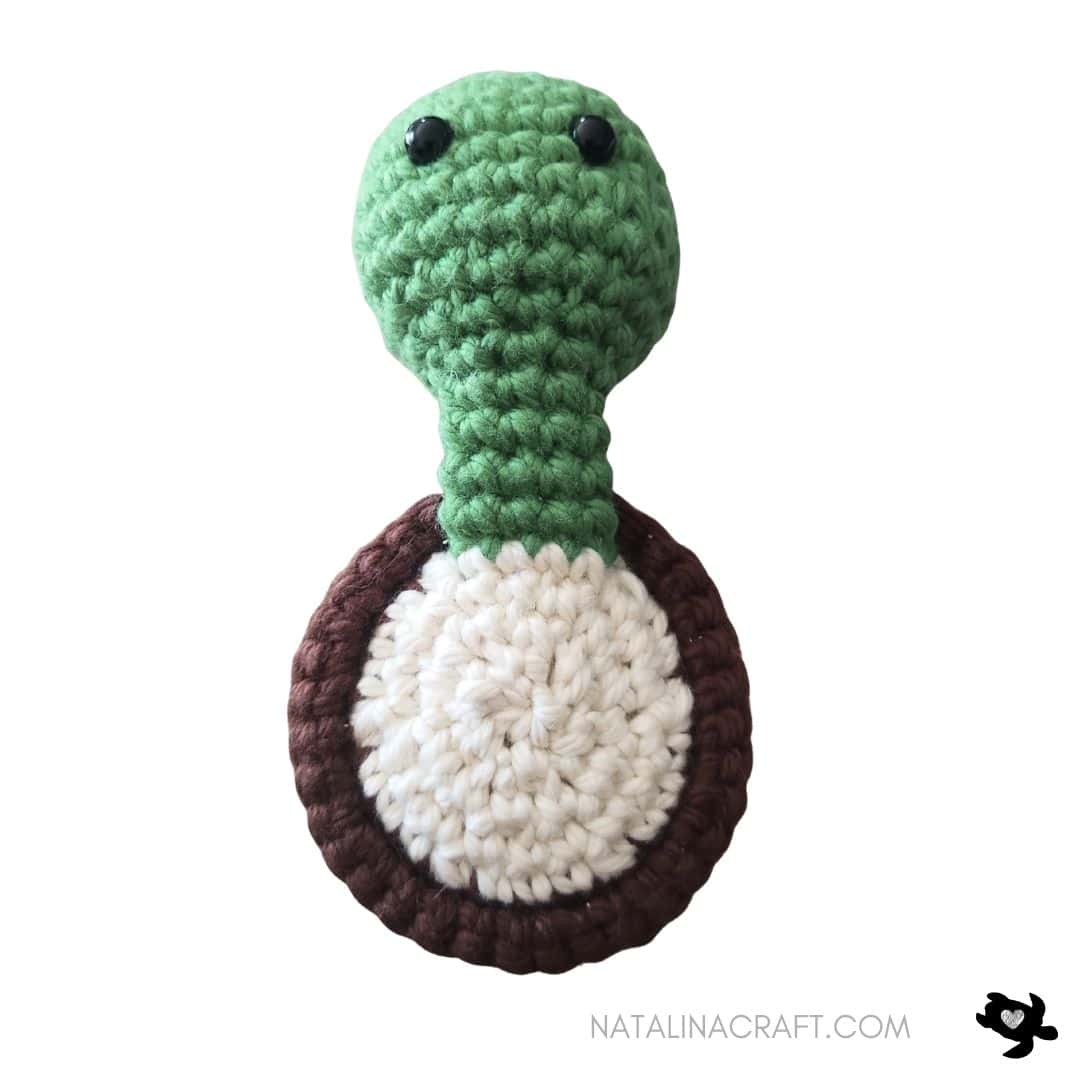
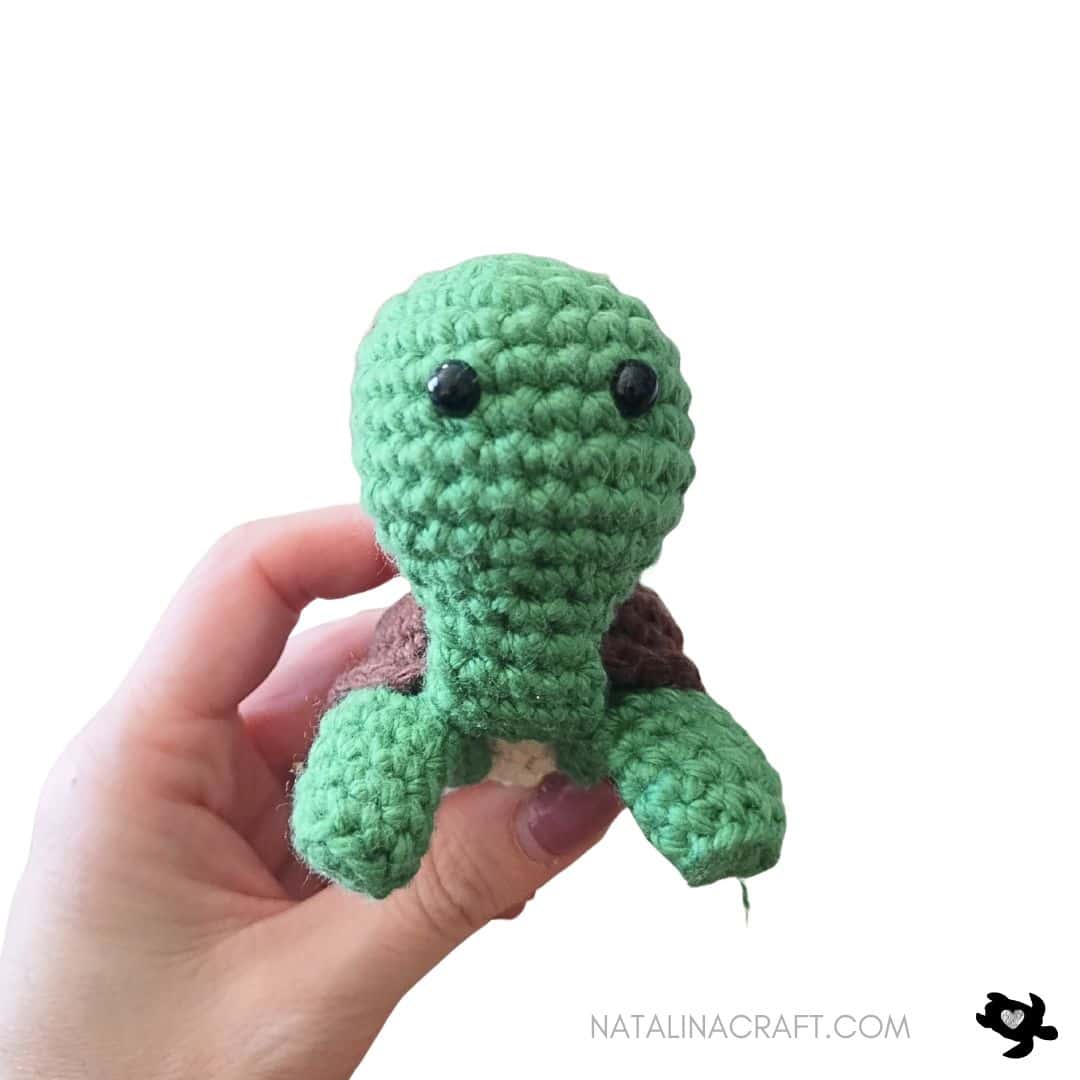
🎉 Congratulations!
Your crochet tortoise is complete! 🐢💛
This sweet little amigurumi is perfect as a handmade toy, woodland decoration, or thoughtful gift. I love how the optional heart adds extra charm and personality to your tortoise.
If you make one, I would love to see it! Don’t forget to tag #natalinacraft when sharing your creations.
Happy crocheting!


All rights reserved.
The pattern and photographs contained in this document are the property of Natalina Craft. This pattern is available for personal use only. No unauthorized reproduction, in whole or in part, or distribution of this pattern or content is allowed.
You may sell finished items in limited amounts. If you sell your finished products online, I would be grateful if you can add a statement saying « Pattern by Natalina Craft » and link back to my post.
Crochet Pattern Tortoise
Free Crochet Pattern Tortoise
Instructions
Crochet Pattern Tortoise
Start Here
- Please read the entire pattern before starting.
- Pattern is written in US terms
- Work in continuous rounds (spiral) unless stated otherwise
Parts:
- Head
- 2 back legs
- 2 front legs
- Shell
- Optional heart
Finished Size:
Approx. 3 inches high and 3.5 inches long
Material:
- Worsted yarn in green, brown, and cream.
- Small amount of light pink yarn (cheeks)
- Optional color for the heart
- 2.75 mm crochet hook
- 2 black safety eyes (6 mm)
- black cotton thread (for the mouth)
- Stitch markers (if needed)
- Tapestry needle
- Polyfill stuffing
Abbreviations:
- chain (ch)
- magic ring (mr)
- single crochet (sc)
- increase (inc)
- invisible decrease (dec)
- slip stitch (sl st)
How to crochet a Tortoise?
Head
- Worked in continuous rounds.
- Stuff lightly as you go.
With a 2.75 mm crochet and green yarn.
- Round 1: 6 sc in a magic ring. (6)
- Round 2: [6 inc]. (12)
- Round 3: [1 sc, 1 inc] x6. (18)
- Round 4: [2 sc, 1 inc] x6. (24)
- Rounds 5 to 9: [1 sc in all]. (24)
Place the eyes between Rounds 6 and 7, spaced by 3 stitches.
- Round 10: [2 sc, 1 dec] x6. (18)
Stuff the head.
- Round 11: [1 sc, 1 dec] x6. (12)
- Round 12: [2 sc, 1 dec] x3. (9)
- Rounds 13 to 16: [1 sc in all]. (9)
Do not stuff the neck section.
Fasten off. Set aside for later.
Shell
- Worked in continuous rounds.
Top Part
With a 2.75 mm crochet and brown yarn.
- Round 1: 6 sc in a magic ring. (6)
- Round 2: [6 inc]. (12)
- Round 3: [1 sc, 1 inc] x6. (18)
- Round 4: [2 sc, 1 inc] x6. (24)
- Round 5: [3 sc, 1 inc] x6. (30)
- Rounds 6-8: [1 sc in all st]. (30)
- Round 9: Working in the front loops only: [4 sc, 1 inc] x6. (36)
Fasten off, leaving a long tail.
Bottom Part
Join the cream yarn in any back loops from Round 8. Starting in the same loop where you joined:
- Round 1:(4 sc, 1 dec) × 2Leave 5 stitches unworked at the front opening.Attach the head by working 4 sc evenly through the stitches of Round 16 of the neck (front of the neck).Continue around shell: (4 sc, 1 dec) × 3. (24)
Sew the back of the neck securely to the shell opening (you can do it now or later when the shell is done).
- Round 2: [2 sc, 1 dec] x6. (18)
- Round 3: [1 sc, 1 dec] x6. (12)
Stuff the shell.
- Round 4: [6 dec]. (6)
Fasten off and close the opening.
If the head tilts downward, secure the back of the head to the shell with a few stitches.
Front Legs (make 2)
- Worked in continuous rounds.
- Only stuff the bottom of the legs.
Note About the Front Legs
After giving this tortoise to my son, I noticed that the front legs tend to lay flat. He actually loves it because he can make his tortoise “sleep” 😊
However, if you prefer your tortoise to stand more upright, you can make all four legs the same as the back legs instead. This will give the tortoise a more stable shape and prevent the front legs from flattening.
With green yarn and a 2.75 mm hook:
- Round 1: 8 sc in a magic ring. (8)
- Rounds 2-8: [1 sc in all st]. (8)
The top part of the legs will be sewn to the body (legs will have a L-shape).
Sew the top part of the legs onto the cream underside of the shell.
Back Legs
- Worked in continuous rounds.
- Stuff as you go.
With green yarn and a 2.75 mm hook:
- Round 1: 8 sc in a magic ring. (8)
- Rounds 2-5: [1 sc in all st]. (8)
Stuff and sew onto the back of the shell underside.
Face Details
- With black cotton thread, embroider a small mouth over Round 8
- With pink yarn, embroider 2 small cheek stitches between Rounds 7-8
Optional: Heart
- Worked in continuous rounds (as a spiral). Use a stitch marker if needed.
With a 2.75 mm hook and the color of choice.
Part A:
- Round 1: 6 sc in a magic ring. (6)
- Round 2: [6 inc]. (12)
- Round 3: [1 sc in all st]. (12)
Fasten off and set aside.
Part B:
- Round 1: 6 sc in a magic ring. (6)
- Round 2: [6 inc]. (12)
- Round 3: [1 sc in all st]. (12)
Joining both parts:
- Round 4: 1 sc in next 12 sts of Part A, and 1 sc in all 12 sts of Part B. (24)
- Round 5: [1 dec, 10 sc] x2. (22)
- Round 6: [1 dec, 9 sc] x2. (20)
- Round 7: [1 dec, 8 sc] x2. (18)
- Round 8: [1 dec, 1 sc] x6. (12)
- Round 9: [1 dec, 1 sc] x4. (8)
Stuff, close the opening, and fasten off. Sew the heart between the tortoise’s shell. I sewed the bottom of the heart to the shell and one side of the heart to the head.
🎉 Congratulations!
Your crochet tortoise is complete! 🐢💛
This sweet little amigurumi is perfect as a handmade toy, woodland decoration, or thoughtful gift. I love how the optional heart adds extra charm and personality to your tortoise.
If you make one, I would love to see it! Don’t forget to tag #natalinacraft when sharing your creations.
Happy crocheting!
All rights reserved. The pattern and photographs contained in this document are the property of Natalina Craft. This pattern is available for personal use only. No unauthorized reproduction, in whole or in part, or distribution of this pattern or content is allowed. You may sell finished items in limited amounts. If you sell your finished products online, I would be grateful if you can add a statement saying « Pattern by Natalina Craft » and link back to my post.