
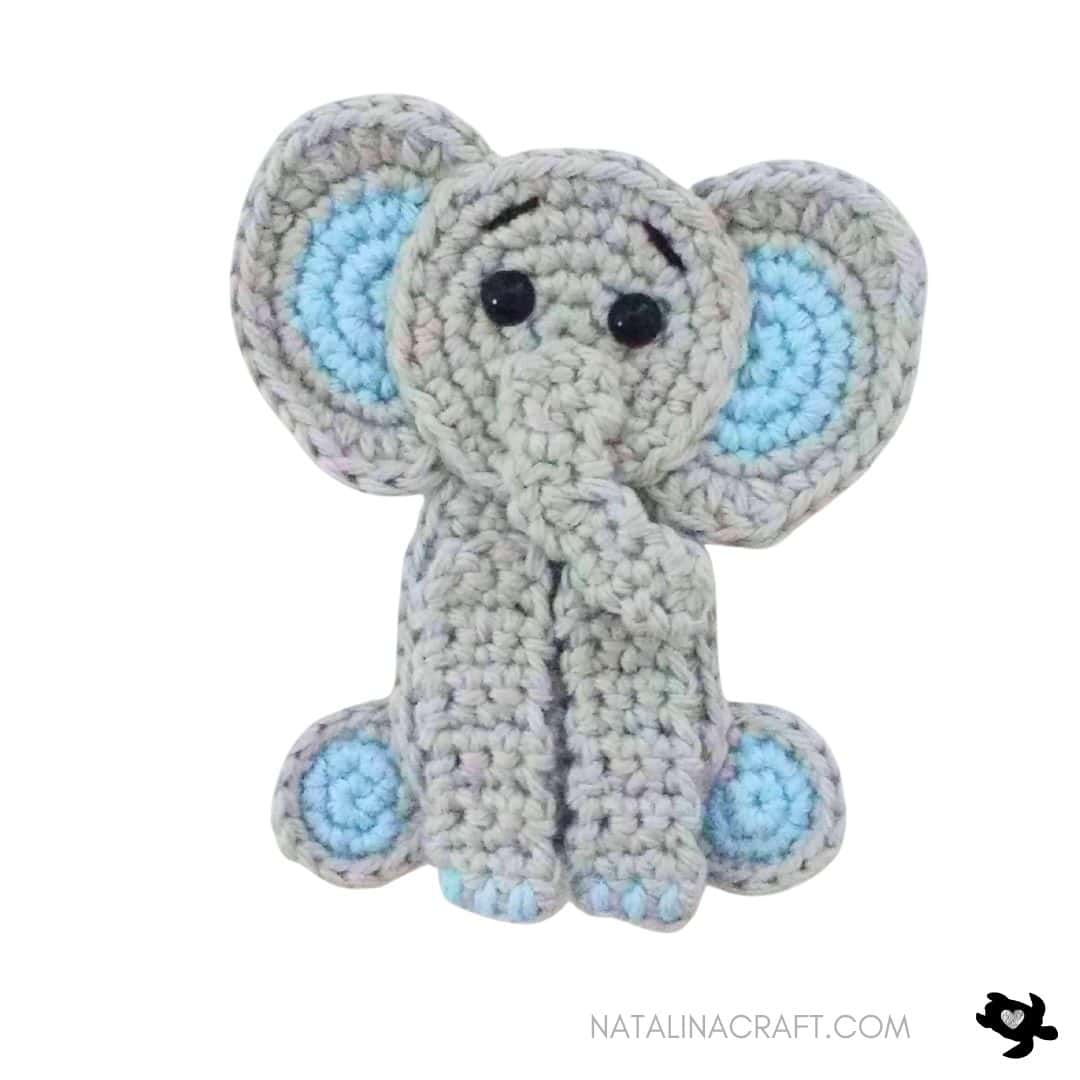
If you’re looking for a cute and versatile elephant applique crochet pattern, you’re in the right place! This free crochet elephant applique is quick to make, beginner-friendly, and perfect for adding a sweet handmade touch to your projects. Whether you’re decorating a baby blanket, crochet bag, hat, or creating a fun children’s crochet project, this little elephant is sure to be a favorite.
Designed to use small amounts of yarn, this easy crochet applique is a great scrap yarn project and works up fast. Its simple shape makes it ideal for both beginner crocheters and more experienced makers looking for a quick, satisfying project. This crochet elephant applique pattern is perfect for nursery decor, baby gifts, and animal-themed crochet collections.
With this free crochet animal applique pattern, you can play with colors, sizes, and details to create your own adorable elephant design that fits perfectly into any handmade project.
Don’t forget to join my Facebook group HERE, you can ask your questions, and share your finished projects. I will regularly ask you what pattern you would like to see next (or you can even suggest something even if I am not asking!).
I hope you enjoy this pattern and find it easy to follow. If you have any questions, feel free to reach out—I’ll do my best to help. And I would love to see your work! Please share your finished projects using #natalinacraft 💛


⭐ Important Update – Plush Yarn Option
This pattern can also be made using fluffy / plush yarn.
I used Premier Parfait Chunky (super bulky yarn, usually paired with an 8 mm / US L-11 hook), but I worked with a 4.5 mm (US 7) hook.
If you use plush yarn, I recommend replacing Round 1 of all circles:
Instead of: Round 1: 6 sc in a magic ring, use: Round 1: ch 2, starting in the 2nd ch from the hook, make 6 sc. (6). Then continue with Round 2 as written.


Crochet Elephant Applique
Materials
- Yarn calling for a 5.5 mm hook in grey and blue
- Small amount of black pearl cotton (eyebrows)
- 3.5 mm crochet hook
- 2 black safety eyes (7.5 mm)
- Stitch markers (optional)
- Tapestry needle
What did I use?
Light worsted yarn.
I used “I Love This Cotton” in grey from Hobby Lobby and Rico Creative Cotton in light blue.
Abbreviations
- ch = chain
- mr = magic ring
- sc = single crochet
- inc = increase
- dec = invisible decrease
- sl st = slip stitch
- hdc = half double crochet
- dc = double crochet
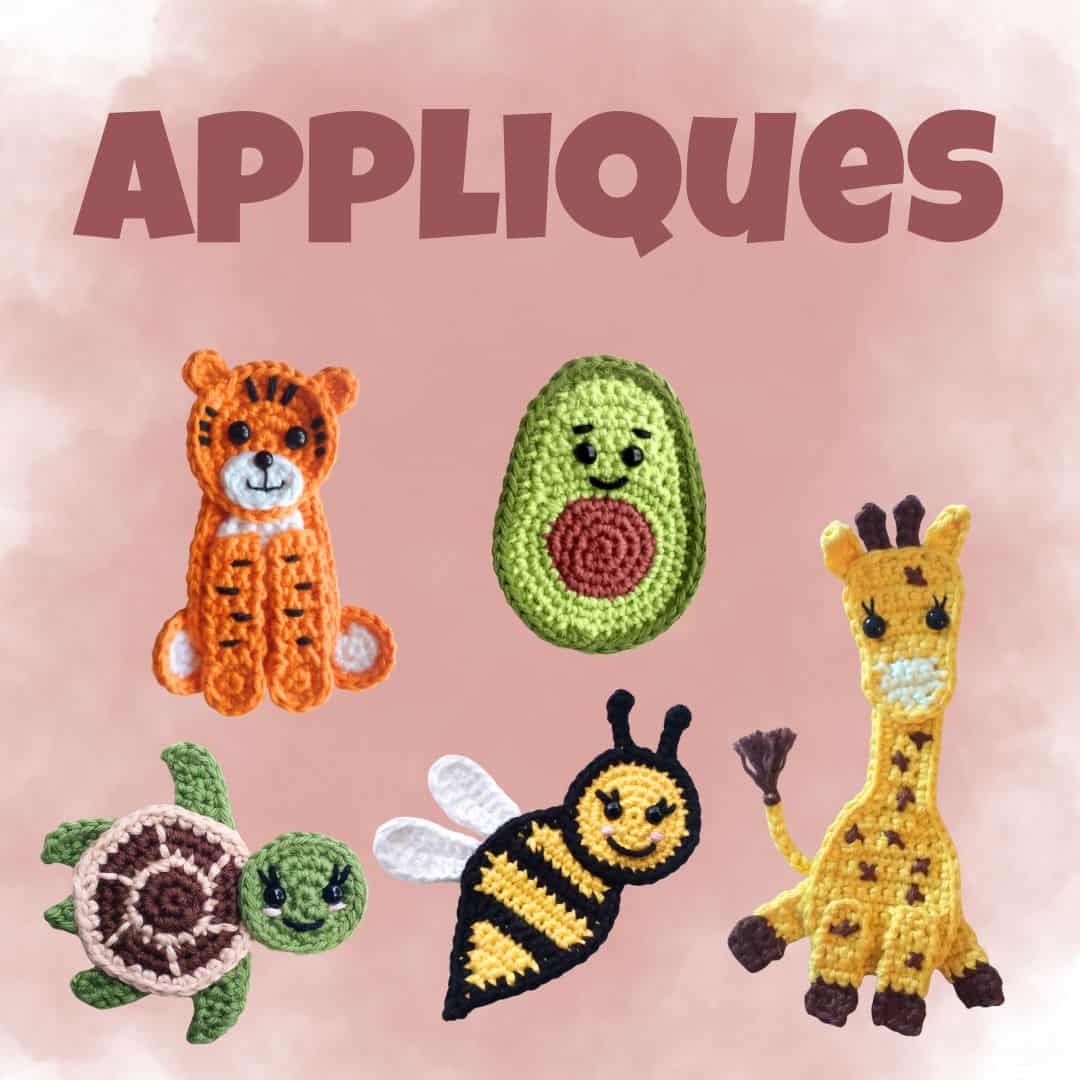
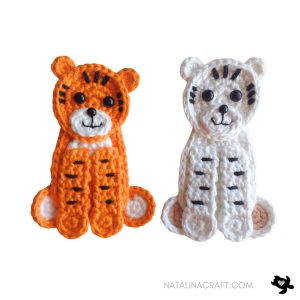
Looking for more appliques?
How to Crochet an Elephant Applique
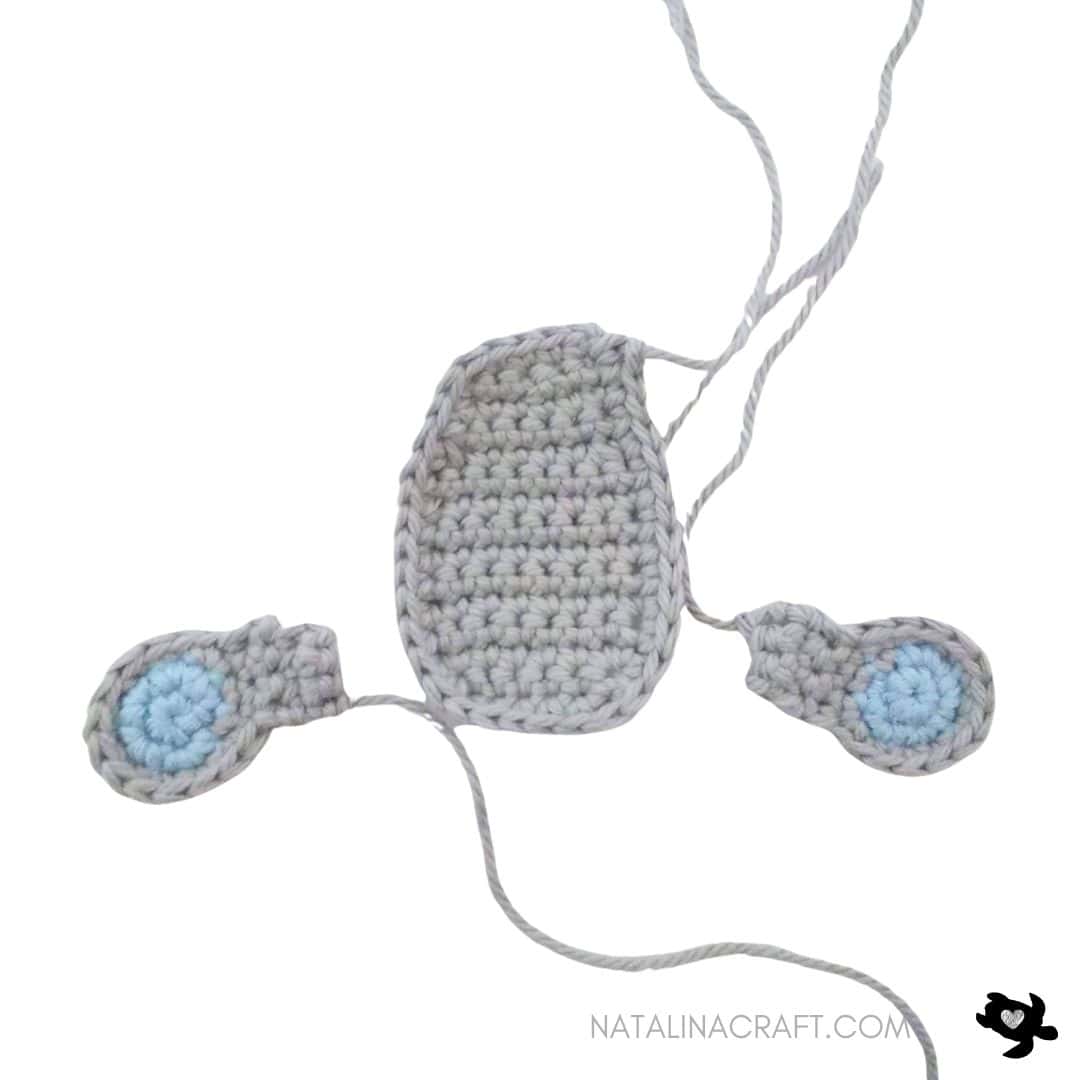
The Head
Work in continuous rounds. Do not turn.
Use a stitch marker if needed.
With grey yarn and a 3.5 mm hook:
- Round 6 sc in a magic ring. (6)
- Round 2: inc 6 times. (12)
- Round 3: [1 sc in next st, 1 inc in next st] x6. (18)
- Round 4: [1 sc in next 2 st, 1 inc in next st] x6. (24)
- Round 5: [1 sc in next 3 st, 1 inc in next st] x6. (30)
Fasten off.
Eyes placement: between Rounds 2 and 3, spaced by 3 stitches.
Tip: You may want to wait until the ears are sewn on before attaching the safety eyes.
With black pearl cotton, embroider the eyebrows between Rounds 4 and 5, over 2 stitches.
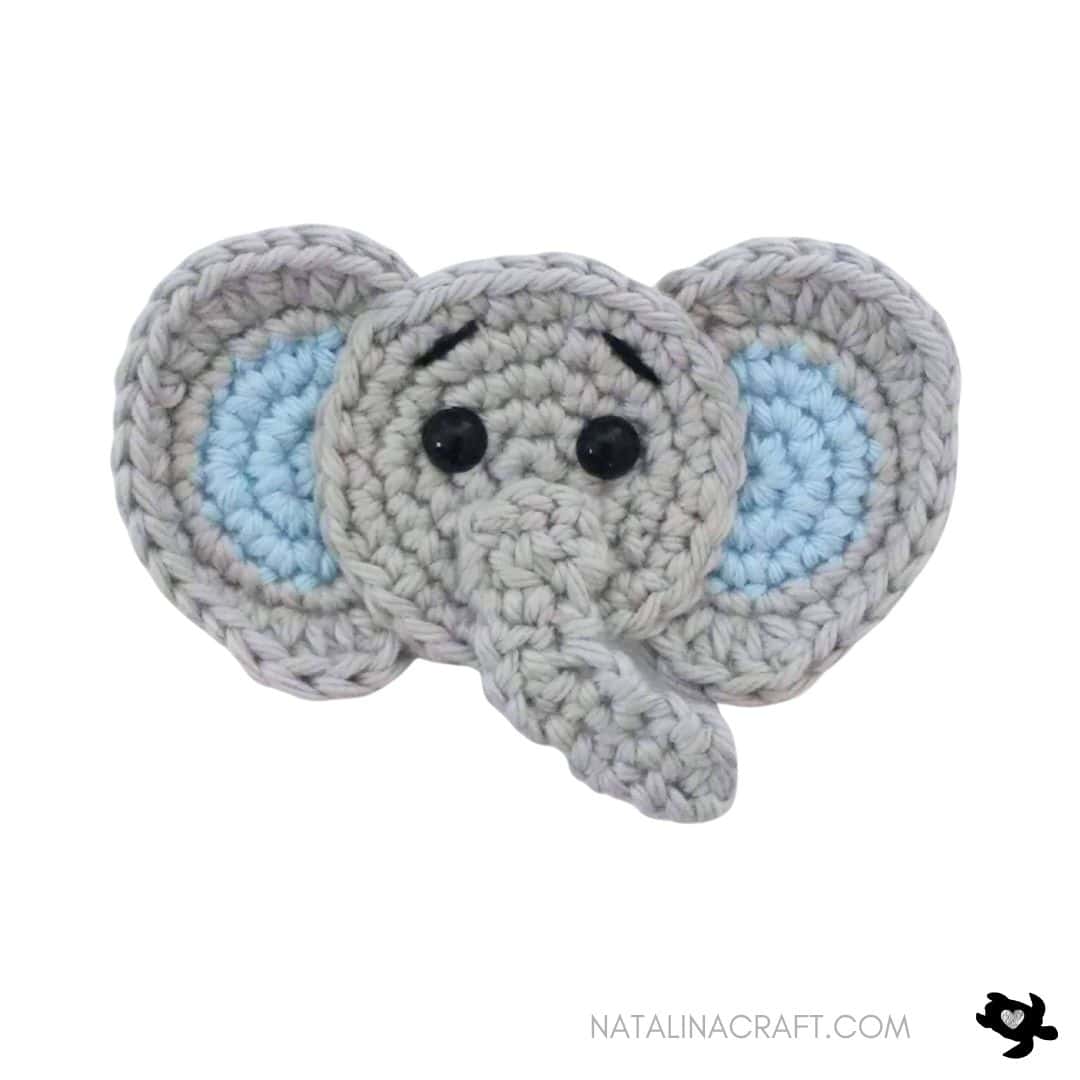
The Ears (make 2)

Left Ear
With blue yarn and a 3.5 mm hook:
- Round 1: 6 sc in a magic ring. (6)
- Round 2: [1 inc in all st]. (12)
- Round 3: [1 sc in the next st, 1 inc in the next st] x6. (18)
Change to grey yarn:
- Round 4: (2 sc, 1 inc) × 6. (24)
- Round 5:
1 sc in next 4 sts,
2 dc in next 2 sts,
1 sc in next 8 sts,
2 hdc in next 4 sts,
1 sc in next 6 sts. (30)
Fasten off.
The dc stitches form the bottom of the ear, and the hdc stitches form the top.
Right Ear
With blue yarn and a 3.5 mm hook:
- Round 1: 6 sc in a magic ring. (6)
- Round 2: inc in all sts. (12)
- Round 3: (1 sc, 1 inc) × 6. (18)
Change to grey yarn:
- Round 4: (2 sc, 1 inc) × 6. (24)
- Round 5:
1 sc in next 6 sts,
2 hdc in next 4 sts,
1 sc in next 8 sts,
2 dc in next 2 sts,
1 sc in next 4 sts. (30)
Fasten off.
Sew the ears behind the head, aligning the sides of the head with the center of each ear.
Now you can attach the safety eyes.
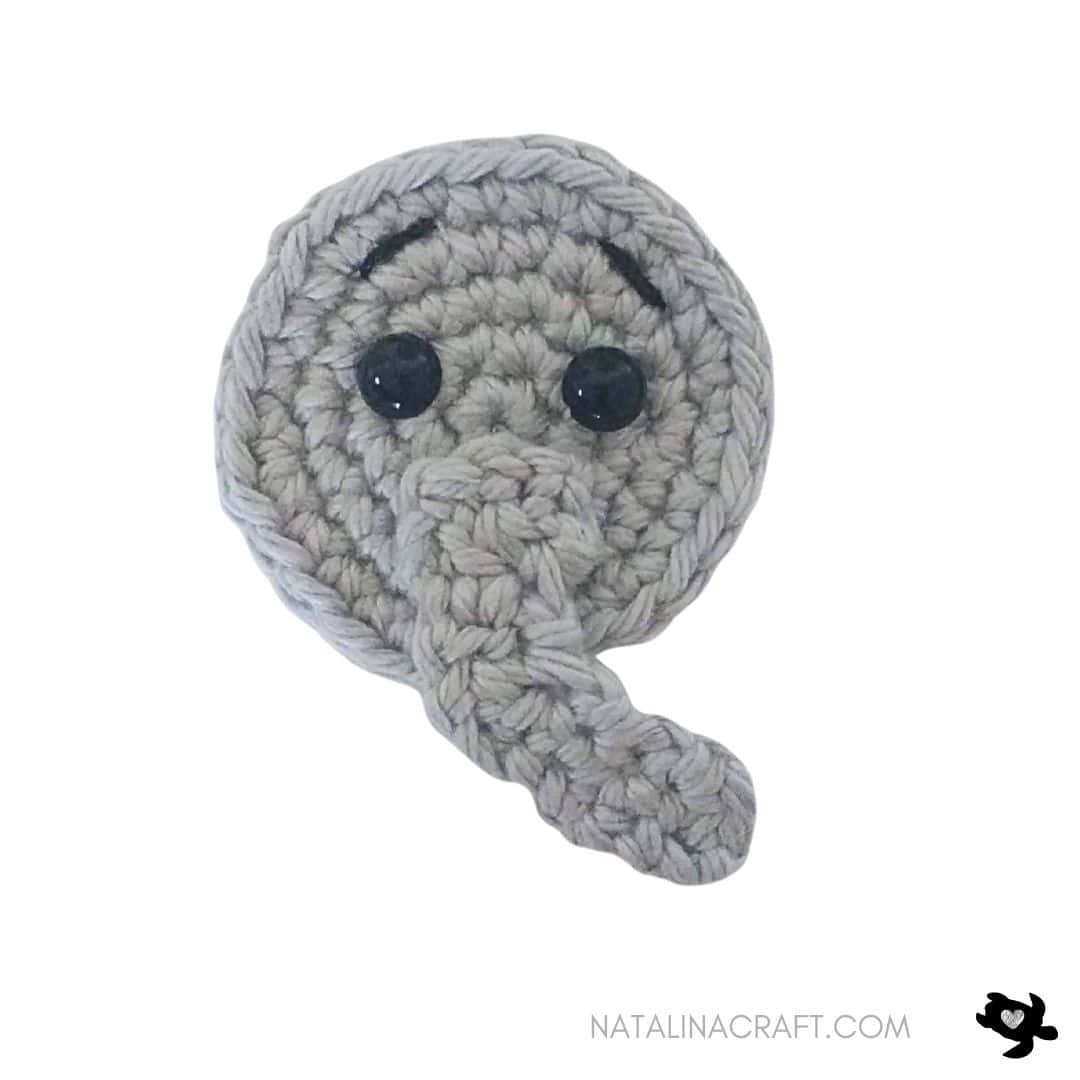
The Trunk
With grey yarn and a 3.5 mm hook:
- ch 3. (3)
- Row 1: starting from the 2nd ch from the hook: 1 sc in the next ch, 1 dc in the next ch. (2)
- Row 2: ch1, turn; 1 dc in the next st, 1 sc in the next st. (2)
- Row 3: ch1, turn; 1 sc in the st, 1 dc in the next st. (2)
- Row 4: ch1, turn; 1 dc in the next st, 1 sc in the next st. (2)
- Row 5: ch1, turn; 1 sc in the next 2 st. (2)
- Row 6: ch1, turn; 1 sc in the next 2 st. (2)
- Row 7: ch1, turn; 1 sc in the st, 1 dc in the next st. (2)
- Row 8: ch1, turn; 1 sc in the next 2 st. (2)
Fasten off and sew the trunk below the eyes.
The Body
With grey yarn and a 3.5 mm hook:
- ch 7. (7)
- Row 1: starting from the 2nd ch from the hook: 1 sc in the next 6 ch. (6)
- Row 2: ch1, turn; 1 inc, 1 sc in the next 4 st, 1 inc. (8)
- Rows 3 to 9: ch1, turn; 1 sc in all st. (8)
- Row 10: ch1, turn; 1 dec, 1 sc in the next 4 st, 1 dec. (6)
- Rows 11 to 12: ch1, turn; 1 sc in all st. (6)
- Row 13: ch1, turn; 1 sc in the next 2 st, 1 dec, 1 sc in the next 2 st. (5)
- Row 14: ch1, turn; 1 sc in all st. (5)
Do not turn. Crochet 1 sc evenly all around (about 32 sts).
Tip: Don’t crochet too tightly—use a larger hook if needed.
Fasten off, leaving a long tail for sewing.

Back Legs (make 2)
With blue yarn and a 3.5 mm hook:
- Round 1: 5 sc in a magic ring. (5)
- Round 2: [1 inc in all st]. (10)
Change to grey yarn:
- Round 3: [1 sc in the next st, 1 inc in the next st] x5. (15)
Now work in rows:
- Row 4: 1 sc in the next 3 st. (3)
- Rows 5-6: ch1, turn; 1 sc in all st. (3)
Fasten off.
Sew the back legs behind the body so that only the feet are visible from the front.

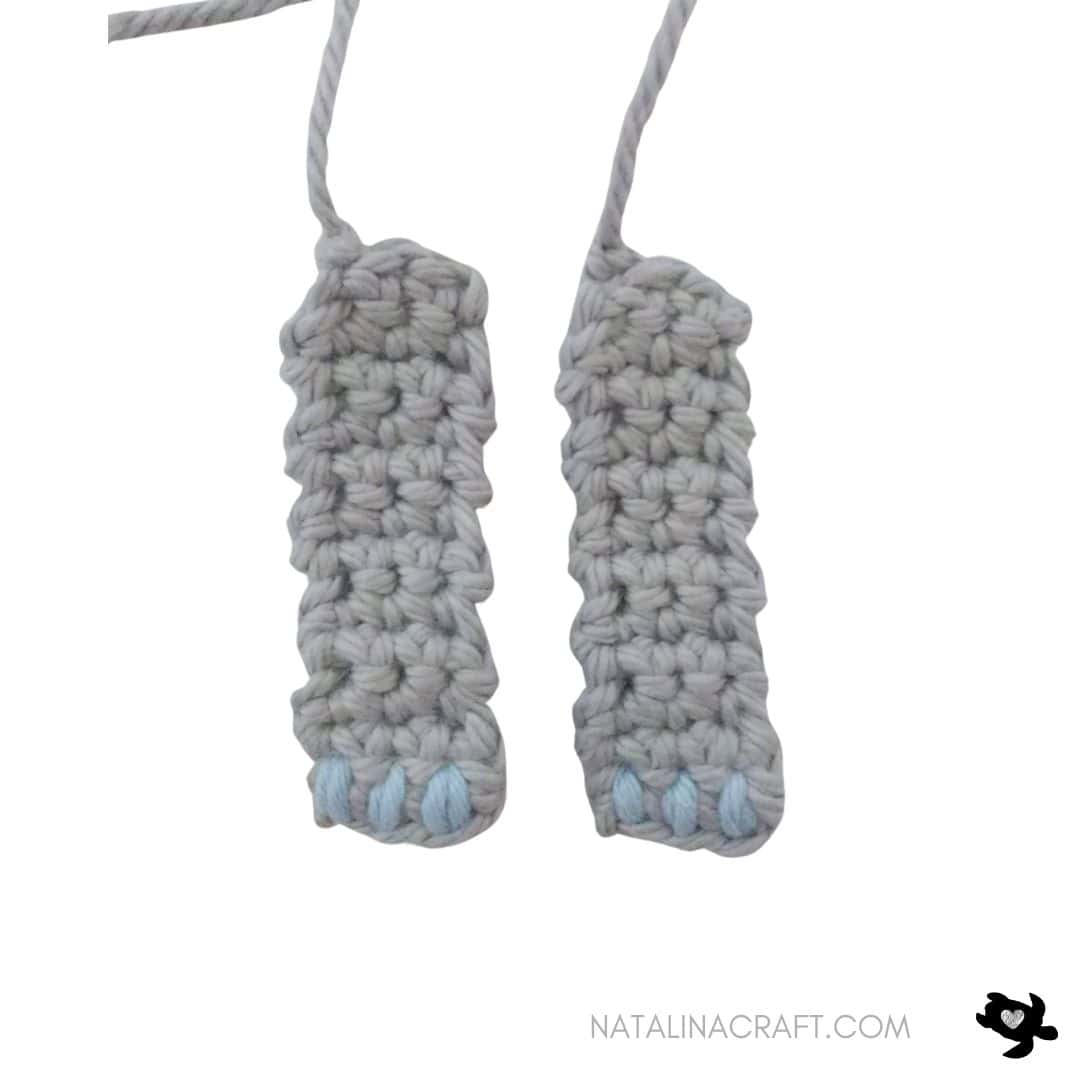
Front Legs (make 2)
With grey yarn and a 3.5 mm hook:
- Row 1: ch 4. (4)
- Row 2: starting in the 2nd ch from the hook: 1 sc in all st. (3)
- Rows 3 to 11: ch1, turn; 1 sc in all st. (3)
Fasten off.
With blue yarn, embroider 3 toenails at the bottom of each leg.
Sew the front legs to the body.


Final Assembly
Sew the head onto the body.
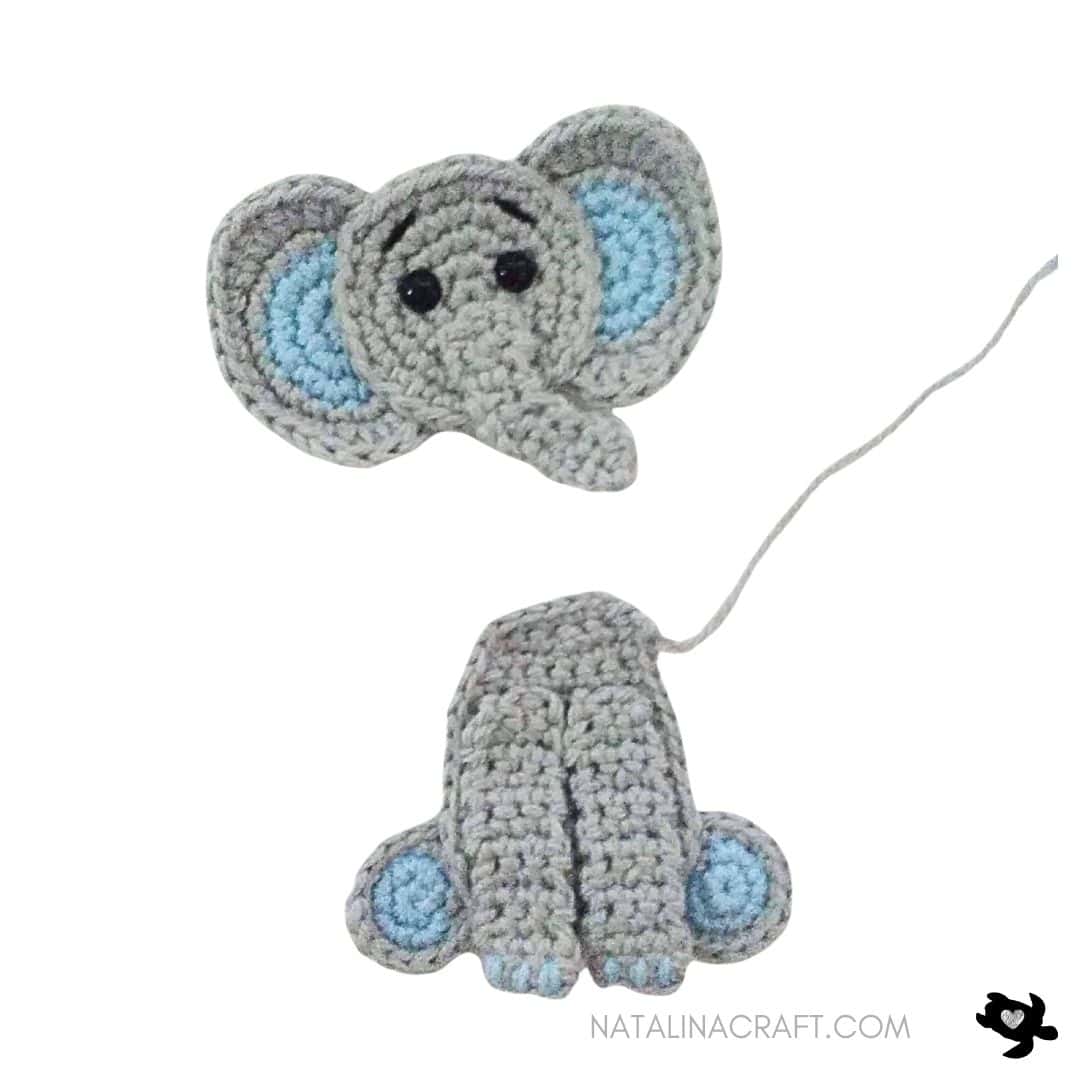
🎉 All done!
I hope you enjoyed making this crochet elephant appliqué. Don’t forget to share your work—it truly encourages me to create more free patterns 💛


Copyright Notice
All rights reserved. This pattern and all accompanying photographs are the property of Natalina Craft and are protected by copyright law. This pattern is for personal use only. Any unauthorized reproduction, redistribution, or publication of this pattern, in whole or in part, is strictly prohibited.
You are welcome to sell finished items made from this pattern in small quantities. While crediting Natalina Craft as the designer is not required, it is always greatly appreciated—especially when selling online—so others can find the original pattern.
Thank you for respecting these guidelines.
Crochet Elephant Applique
Looking for more Animal ideas?
Crochet Applique - Elephant
Instructions
Crochet Elephant Applique
Materials
- Yarn calling for a 5.5 mm hook in grey and blue
- Small amount of black pearl cotton (eyebrows)
- 3.5 mm crochet hook
- 2 black safety eyes (7.5 mm)
- Stitch markers (optional)
- Tapestry needle
What did I use?
Light worsted yarn.I used “I Love This Cotton” in grey from Hobby Lobby and Rico Creative Cotton in light blue.
Abbreviations
- ch = chain
- mr = magic ring
- sc = single crochet
- inc = increase
- dec = invisible decrease
- sl st = slip stitch
- hdc = half double crochet
- dc = double crochet
How to Crochet an Elephant Applique
The Head
Work in continuous rounds. Do not turn.Use a stitch marker if needed.
With grey yarn and a 3.5 mm hook:
- Round 6 sc in a magic ring. (6)
- Round 2: inc 6 times. (12)
- Round 3: [1 sc in next st, 1 inc in next st] x6. (18)
- Round 4: [1 sc in next 2 st, 1 inc in next st] x6. (24)
- Round 5: [1 sc in next 3 st, 1 inc in next st] x6. (30)
Fasten off.
Eyes placement: between Rounds 2 and 3, spaced by 3 stitches.Tip: You may want to wait until the ears are sewn on before attaching the safety eyes.
With black pearl cotton, embroider the eyebrows between Rounds 4 and 5, over 2 stitches.
The Ears (make 2)
Left Ear
With blue yarn and a 3.5 mm hook:
- Round 1: 6 sc in a magic ring. (6)
- Round 2: [1 inc in all st]. (12)
- Round 3: [1 sc in the next st, 1 inc in the next st] x6. (18)
Change to grey yarn:
- Round 4: (2 sc, 1 inc) × 6. (24)
- Round 5:1 sc in next 4 sts,2 dc in next 2 sts,1 sc in next 8 sts,2 hdc in next 4 sts,1 sc in next 6 sts. (30)
Fasten off.
The dc stitches form the bottom of the ear, and the hdc stitches form the top.
Right Ear
With blue yarn and a 3.5 mm hook:
- Round 1: 6 sc in a magic ring. (6)
- Round 2: inc in all sts. (12)
- Round 3: (1 sc, 1 inc) × 6. (18)
Change to grey yarn:
- Round 4: (2 sc, 1 inc) × 6. (24)
- Round 5:1 sc in next 6 sts,2 hdc in next 4 sts,1 sc in next 8 sts,2 dc in next 2 sts,1 sc in next 4 sts. (30)
Fasten off.
Sew the ears behind the head, aligning the sides of the head with the center of each ear.
Now you can attach the safety eyes.
Check out my other applique crochet patterns!
The Trunk
With grey yarn and a 3.5 mm hook:
- ch 3. (3)
- Row 1: starting from the 2nd ch from the hook: 1 sc in the next ch, 1 dc in the next ch. (2)
- Row 2: ch1, turn; 1 dc in the next st, 1 sc in the next st. (2)
- Row 3: ch1, turn; 1 sc in the st, 1 dc in the next st. (2)
- Row 4: ch1, turn; 1 dc in the next st, 1 sc in the next st. (2)
- Row 5: ch1, turn; 1 sc in the next 2 st. (2)
- Row 6: ch1, turn; 1 sc in the next 2 st. (2)
- Row 7: ch1, turn; 1 sc in the st, 1 dc in the next st. (2)
- Row 8: ch1, turn; 1 sc in the next 2 st. (2)
Fasten off and sew the trunk below the eyes.
The Body
With grey yarn and a 3.5 mm hook:
- ch 7. (7)
- Row 1: starting from the 2nd ch from the hook: 1 sc in the next 6 ch. (6)
- Row 2: ch1, turn; 1 inc, 1 sc in the next 4 st, 1 inc. (8)
- Rows 3 to 9: ch1, turn; 1 sc in all st. (8)
- Row 10: ch1, turn; 1 dec, 1 sc in the next 4 st, 1 dec. (6)
- Rows 11 to 12: ch1, turn; 1 sc in all st. (6)
- Row 13: ch1, turn; 1 sc in the next 2 st, 1 dec, 1 sc in the next 2 st. (5)
- Row 14: ch1, turn; 1 sc in all st. (5)
Do not turn. Crochet 1 sc evenly all around (about 32 sts).Tip: Don’t crochet too tightly—use a larger hook if needed.
Fasten off, leaving a long tail for sewing.
Back Legs (make 2)
With blue yarn and a 3.5 mm hook:
- Round 1: 5 sc in a magic ring. (5)
- Round 2: [1 inc in all st]. (10)
Change to grey yarn:
- Round 3: [1 sc in the next st, 1 inc in the next st] x5. (15)
Now work in rows:
- Row 4: 1 sc in the next 3 st. (3)
- Rows 5-6: ch1, turn; 1 sc in all st. (3)
Fasten off.
Sew the back legs behind the body so that only the feet are visible from the front.
Front Legs (make 2)
With grey yarn and a 3.5 mm hook:
- Row 1: ch 4. (4)
- Row 2: starting in the 2nd ch from the hook: 1 sc in all st. (3)
- Rows 3 to 11: ch1, turn; 1 sc in all st. (3)
Fasten off.
With blue yarn, embroider 3 toenails at the bottom of each leg.Sew the front legs to the body.
Final Assembly
Sew the head onto the body.
🎉 All done!I hope you enjoyed making this crochet elephant appliqué. Don’t forget to share your work—it truly encourages me to create more free patterns 💛
Copyright Notice
All rights reserved. This pattern and all accompanying photographs are the property of Natalina Craft and are protected by copyright law. This pattern is for personal use only. Any unauthorized reproduction, redistribution, or publication of this pattern, in whole or in part, is strictly prohibited.
You are welcome to sell finished items made from this pattern in small quantities. While crediting Natalina Craft as the designer is not required, it is always greatly appreciated—especially when selling online—so others can find the original pattern.Thank you for respecting these guidelines.
Adorable. Thank you for sharing
Thank you!
Wow! Thank you for sharing your hard work with us.
You’re welcome!
Thank you for sharing your elephant applique pattern. Love it.
You’re very welcome. Thank you!
Thanks a lot for brilliant help. I really appreciate the pattern. Will send you the results.
Thank you very much. I would love to see the results!
Gracias sus tejidos son muy hermosos y tienen variantes creativas y espectaculares, mucho saludos.
Muchas gracias Carmen.
thank you so much for the pattern!!!! so nice of you
You’re very welcome!
Thank you so much for this lovely pattern. I will be stitching it to a crochet blanket I’ve made for our new Grandson xx
You’re are very welcome! And congratulations on your new grandson!
I used the elephant pattern to make a cushion for my granson’s nursery. It turned out super cute. Thank you for the adorable pattern.
You are very welcome. Thank you very much for your nice words.
Thank you so much for your talent and sharing it us.
I would like to make a much bigger elephant for the middle of the room.
Does a pattern exist?
Thank you very much. Are you looking for an elephant rug? I do not have one but I have seen one by another designer (you should find it if you look for “Josefina elephant rug pattern”) – it is a paid pattern though.
Thank you for sharing your cute creation. I can’t wait to try and make it for the corner of a baby blanket as a gift for grandkids.
Thank you very much for your kind words.
Can you tell me what the size of the head then the body and all?
I am so sorry, I somehow missed your message. I have not the appliqué with me right now but it is about 4-5 inches tall.
I am making the elephant applique to attach to a baby blanket I’m making for a dear friend. I have been browsing your other animal appliques, and I have to say, these are the cutest and easiest to crochet of all the patterns I’ve looked up. Thank you so much for sharing your talent!
Thank you very much for your kind words!
very easy pattern and fast to whip up i love your appliques
Thank you very much!
I have been searching for an animal free pattern all over and I finally found you. Now I’m hunting for a monkey. I wanted to thank you so much for sharing. Really appreciate the act of kindness.
Thank you very much. I will try to make a monkey!
Thank you for sharing this elephant appliqué, I absolutely love it!
It’s so easy to follow your instructions and looks adorable on my grandsons who’s due any day blanket.
😁🥰 x
Thank you very much for your nice words!
Hi. I fell in love with this little elephant 😍 thanks a lot for sharing the FREE pattern 🙏🏻 love from Iran💜
Thank you very much for your nice words!
Thank you so much! What a sweet way of animals for enhancing children’s clothes or hats!
Thank you very much!
I love this pattern!! The directions are very clear and easy to follow!! The elephant comes out as pictured!! Thank you!!
Thank you very much!
Thank you for your beautiful crochet Elephant. I crocheted it and will be seeing it onto the baby blanket I made for my great nephew.
Thank you very much for your nice words. Congratulation on your great nephew!
Thank you for sharing this pattern. I’m going to attach it to a baby blanket.
So easy to follow.
Thank you!
Your appliques are so adorable, do you perhaps have zebra pattern to share. I would appreciate it.
Thank you! I don’t have one yet but I can try to make one!
PERFECT! Thank you!
Because of your great design and how well you describe everything …
I COUNTED LEGS ON OTHER DESIGNS AND OTHER SHOULD ALSO~
Many have too many legs BUT thank YOU for actually understanding animals have 4 legs and when sitting they do not grow one!
Just double check people before you place them on your projects so we have he correct number of parts~
Thank you very much for your nice words!
This is adorable. Can’t wait to do it!!
Thank you very much!
Paylaşım için teşekkürler
You are very welcome!
I just made this and tyvm Natalina for your easy to follow pattern. I will be applying it to a blanket that i am currently crocheting. In case someone wants to know I used a 3-3/4 mm/F/5 crochet hook and the elephant is just under 6″/14cm 🙂
Thank you so much!